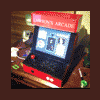
kfchow Posted May 2, 2013 Posted May 2, 2013 Hi guys, Its been a few years since i've built a cabinet. This time though i decided to build a small bartop cabinet for my nephew's 2nd birthday present as he just loves to play on my cabinet when he comes around. I wanted to do this on a budget so most of it was built on parts i had lying around. Decided to build this one though with a raspberry pi so no hyperspin on this cabinet. All in all the project ran over a week including 3d modeling, cutting wood, painting, wiring, programming. Parts List 15" Samsung LCD (had lying around) Raspberry Pi model b (had lying around) 32gb SD card (had lying around) Old PC speakers (had lying around) Buttons and joystick (had lying around) Ultimarc i-pac (had lying around) 10mm MDF ($16 obtained from bunnings) 8mm Perspex ($30 obtained from bunnings) Red paint ($8 obtained from bunnings) Black paint ($8 obtained from bunnings) Clear paint ($8 obtained from bunnings) Primer ($20 obtained from bunnings) fluroscent lamp ($25 obtained from bunnings) 6 Port Power Board (had lying around) Misc gritt sandpaper (obtained from bunnings) Misc sized wood screws (had lying around) Design As i had to build a cabinet to meet the minimum size requirements of all the bits i had lying around i decided to draw up the bits in sketchup first and design the cabinet around those bits. Sketchup already had a pretty nice bartop cabinet in their online warehouse repository so i decided to use that as a template and scale to fit my components. Build I'm a programmer by trade and am terrible with tools but thought hey how hard can it be i shouldn't be able to screw it up. How wrong i was. First of all having the right tool for the job helps incredibly. Trying to cut straight cuts with a jigsaw is absolutely impossible. Reminder to self buy a circular saw. here are some photos of the frame as it was getting cut. I decided to put hinges on the rear panel and control panel so that i could maintain it. The raspberry pi, ipac and pc speaker amplifier will be mounted on the rear panel so when i open it up it would be easy to maintain. Painting Decided to go cherry red with black control panel for the paint job. Did lots of sanding to make sure that they surface was even (though my cuts were bad) and wet sanded every coat. Marquee Whipped something simple up in photoshop (could have done it in ms paint even) and printed out onto A3. stuck it on with tape on the back and sides of the perspex (advantage of having 8mm perspex). Wiring Screwed in the buttons and joystick (8 button's plus coin, start and exit) and soldered on the wiring. Had to use a terminal block to split the ground cable. 3.5 stereo from raspberry pi to the PC speaker amplifier usb from ipac to raspberry pi hdmi to vga converter from raspberry pi to pc monitor (had some issues with getting this to work) Software So this is the interesting part. I've used quite a few raspberry pi's but usually for XBMC, web servers, siri proxy, etc. Luckily some smart cookie made this easy to set up with all emulators with a setup script (retropie). There were a few things i needed to sort out myself though. Caching EDID information. Because the monitor powers on after a few seconds the raspberry pi misses the EDID information from the monitor and as such shows no image what so ever. Upon softwar reboot of the raspberry pi i could get an image. Ended up hard encoding the EDID information into the raspberry pi to resolve this issue. IPAC congifuration needs to be reloaded everytime. Some smart cookie developed some software for linux to program the ipac (http://zumbrovalley.net/readpost.php?artid=6). Just downloaded, compiled and added the command to my rc.local file to ensure it executes at bootup. Retropie like hyperspin uses XML for its gamelists. These gamelists can be auto generated with internal software however it utilises the existing filename. This is ok for the most part apart from mame. So had to output the gamelist from mame and do some quick bash scripting to generate a xml medialist. Retropie also hard encodes the path to the image file within the gamelist xml. So had to create a bash script that grabbed the filename of the game and matched it to the cover art. Luckily emumovies coverart uses the same naming convention as the game name. Wanted to add a splash screen with a custom image so had to write up a script to run at startup. Final Product Anyway here are some final pics of the finished results. The lessons i learnt are that I am terrible with a jigsaw and MDF splits easily. Boot time though is extremely quick. 20 seconds. Great thing about the raspberry pi is that it is extremely energy efficient as well. Hopefully my nephew will treasure this for many years to come.
kfchow Posted May 4, 2013 Author Posted May 4, 2013 It has fullromsets and plays at 100% speed for.. snes, nes, 2600, gb, gbc, gba, sms, gg, genesis, mame 0.37b11, pce not bad for a $40 pc
kfchow Posted May 7, 2013 Author Posted May 7, 2013 Interesting enough I managed to get psx working at about 90% speed. Great thing is that now that I have almost finished I can just dd the SD card so that future builds would be nice and quick
SparkyShizz Posted May 26, 2013 Posted May 26, 2013 Ha! I too realised jigsaws dont cut straight, when i put my cab together and had to use lots of filler! Good job man

Recommended Posts
Archived
This topic is now archived and is closed to further replies.