
Adaptateur Manette Gamecube pour Wii U
Replacement OEM AC Adapter For Nintendo Gamecube
Compilation de shader asynchrone (éviter le temps de compilation du shader)
Encodeur/décodeur de texture DX11 de Galop (améliore le décodage de texture spécialement EFB vers RAM)
Chargeur de sommets pré-compilé et décodage de sommets optimisé à l'aide de SSSE3 et SSE4
Prise en charge de Dolpby Pro Logic II pour xaudio et openal
Résolutions internes plus grandes (IRx6) pour permettre les jeux 4K
Améliorations des textures personnalisées pour permettre le chargement direct de textures compressées, y compris les mipmaps
DSP - Option Time Streching (Améliore la sortie sonore pour éviter les sauts de son sur les machines lentes)
Prise en charge de DX9 pour les anciennes machines
Interface de post-traitement modifiée pour prendre en charge :
-Plusieurs étapes permettant des effets plus complexes.
-Profondeur et gamma natif en entrées.
-DX11/DX12.
-Version personnalisée de DolphinFX qui fonctionne sous dx11 et ogl
-SSAO et DOF.
-Prise en charge de la mise à l'échelle des textures
-Bump Mapping avec des propriétés de matériaux avancées
-Phong Réflexion spéculaire pour améliorer la qualité de l'éclairage
-Cartographie de tessellation et de déplacement
-Éclairage de jante
-Génération automatique de bosses pour améliorer l'éclairage avec la prise en charge des cartes cubiques env
-Cache de l'UID du shader :
* Les uids de shader identifient les différents shaders dont les jeux ont besoin pour restituer les graphiques, comme on le sait, la génération de shader est lente
et provoque un bégaiement la première fois que vous jouez à un jeu ou lorsque la version de Dolphin change.
L'utilisation des caches UID permet à un utilisateur ayant déjà joué au jeu de partager les informations du shader,
permettant ainsi aux autres utilisateurs de profiter du jeu sans bégayer.
* Pour les utiliser, demandez simplement les fichiers à un ami ayant déjà joué au jeu.
* Ensuite, placez simplement le dossier des fichiers [UserFolder]\Cache\ShadersUIDS et activez l'option "Compile Shaders On Startup" dans l'onglet graphique avancé.
Autres fonctionnalités
Compilation de shaders multithread
Mise en œuvre précoce de tests approfondis pour corriger les problèmes associés et augmenter les performances
L'option Fast-Depth contrôle désormais l'utilisation ou non de l'émulation z précoce précise, donc l'activation de la profondeur rapide donnera un boost de vitesse dans certains systèmes.
Accès EFB rapide. Implémentez le cache d'accès EFB global pour réduire les blocages du GPU causés par l'accès du CPU à l'efb (cette option est l'onglet Hack dans les options Gfx)
Réorganisation du chemin de génération de shader pour améliorer les performances
Implémentation du support 3D pour le rendu 3D côte à côte/TopBottom
De nombreuses corrections de bugs anciens de DX9 (ZComploc, émulation Tev, etc.)
Autres correctifs et petites améliorations.
1117(f0dd960b5) :
Fusionnez la prise en charge de plusieurs dossiers de textures à partir du maître.
Configuration
[ *] Full Async Shader = Aucun ralentissement causé par la compilation des shaders. -> Conditions requises : CPU faible (problèmes possibles)
Options DSP - Time streching
Activer l'étirement du son pour éviter les crépitements dus à la lenteur du VPS dans l'émulation.
Cela introduira une certaine latence.
Batterie Rechargeable USB Haute Capacité 3800 mAh pour Wii Fit Balance Board
Dolphin Ishiiruka WIP 10-09-2020.zip
10.35 Mo
TATSUNOKO VS. CAPCOM ULTIMATE ALL-STARS.iso
4.38 Go
TATSUNOKO VS. CAPCOM ULTIMATE ALL-STARS.jpg
143.49 Ko
TATSUNOKO VS. CAPCOM ULTIMATE ALL-STARS
MEmu := "Dolphin Ishiiruka "
MEmuV := ""
MURL := ["https://dolphin-emu.org/"]
MAuthor := ["djvj","bleasby"]
MVersion := ""
MCRC := ""
iCRC := ""
MID := ""
MSystem := ["Nintendo Gamecube","Nintendo Wii","Nintendo WiiWare"]
;----------------------------------------------------------------------------
; Notes:
; Bew sure you are running at least Dolphin v4.0 or greater.
; If you get an error that you are missing a vcomp100.dll, install Visual C++ 2010: http://www.microsoft.com/download/en/details.aspx?id=14632
; Also make sure you are running latest directx: http://www.microsoft.com/downloads/details.aspx?FamilyID=2da43d38-db71-4c1b-bc6a-9b6652cd92a3
; Dolphin will sometimes crash when connnecting a Wiimote, then going back to the game. After all Wiimotes are connected that you want to use, it shouldn't have anymore issues.
; Convert all your games to ciso using Wii Backup Manager to save alot of space by stripping everything but the game partition. http://www.wiibackupmanager.tk/
; If you want to keep your Dolphin.ini in the emu folder, create a "portable.txt" file in MyDocuments\Dolphin Emulator\
;
; Bezels:
; If the game does not fit the window, you can try setting stretch to window manually in dolphin.
;
; Setting up custom Wiimote or GCPad profiles:
; First set UseCustomWiimoteProfiles or UseCustomGCpadProfiles to true in RocketLauncherUI for this module
; Launch Dolphin manually and goto Options->(Wiimote or Gamecube Pad) Settings and configure all your controls how you want your default setup to look like. This will be used for all games that you don't set a custom profile for. No need to save any profiles.
; All your controls are stored in WiimoteNew.ini or GCPadNew.ini and get copied to a _Default_(WiimoteNew or GCPadNew).ini on first launch. This ini contains all the controls for all 4 controllers.
; Do not confuse this with Dolphin's built-in profiles as those only contain info for only one controller. The (WiimoteNew or GCPadNew).ini and all the profiles RocketLauncher uses contain info for all controllers in one file.
; This new profile now called _Default_(WiimoteNew or GCPadNew).ini will be found in Dolphins settings folder: \Config\Profiles\(Wiimote or GCPad) (RL)\Default.ini
; For each game or custom control sets you want to use, edit the controls for all the controllers to work for that game and exit Dolphin. Now copy the (WiimoteNew or GCPadNew).ini to the "(Wiimote or GCPad) (RL)" folder and name it whatever you like.
; In RocketLauncherUI's module settings for Dolphin, Click the Rom Settings tab and add each game from your xml you want to use a this custom profile for.
; Now for all those games you added, make sure the Profile setting it set to the custom profile you want to load when that game is launched.
; Any game not added will use the "_Default_(WiimoteNew or GCPadNew).ini" profile RocketLauncher makes on first launch.
;
; To Pair a Wiimote:
; Highly suggest getting a Mayflash DolphinBar as it makes pairing and using wiimotes as easy as with a real Wii: http://www.amazon.com/TOTALCONSOLE-W010-Wireless-Sensor-DolphinBar/dp/B00HZWEB74
; If using the DolphinBar, just make sure Dolphin is set to continuously scan for wiimotes and set controls to use real wiimotes for as many wiimotes you have.
; You do not need to pair the wiimote with the PC first as you would with a standard blueooth and wiimote.
; DolphinBar should be on Mode 4. Wiimotes don't get paired until after Dolphin is running, not before!!
; After Dolphin is running, press 1+2 on each wiimote and after a few moments, the wiimote will pair and vibrate and one led will lock solid. Do this for each wiimote. That's it!
;
; If using a standard LED Bar:
; Make sure all your wiimotes have already been paired with your PC's bluetooth adapter
; All 4 leds on the wiimote should be flashing
; Press your Refresh key (set in RocketLauncherUI for this module) or enable continuous scanning in Dolphin
; Press 1 + 2 on the wiimote and one led should go solid designating the player number
;
; MultiGame:
; Currently unable to get disc swapping to work. See MultiGame section below for additional details.
;
; Netplay:
; If you're using a GameCube game with saves, synchronize your memory cards, Wii NAND needs to be synchronized, and some settings (such as CPU Clock Override) must be either synchronized or disabled.
; Because netplay may require different settings than you would normally use with local play, the module will look for any inis in your Dolphin user config folder ending with "_netplay" and use those configs instead of your normal ones.
; So for example, after you tweak all your dolphin settings for netplay, copy your dolphin.ini to dolphin_netplay.ini in the same folder.
; When the module launches and you choose multiplayer from RocketLauncher on screen menu, the module will backup dolphin.ini and copy dolphin_network.ini to dolphin.IniDelete
; On exit, the module will restore your backed up dolphin.ini and any other ini files in this folder (and all subfolders) that had the "_netplay" in the name.
; Guide on tweaking performance for netplay: https://dolphin-emu.org/docs/guides/netplay-guide/
; Another guide: https://docs.google.com/document/d/1CIkBAGcf_-kBUa4urn4KUj2U4UA6y_2a7stXJz85yiE/
;
; Linking a GameCube game with VBA-M
; Game tested: Legend of Zelda, The - Four Swords Adventures (USA)
; VBA-M emulator tested: visualboyadvance-m2.0.0Beta1
; dolphin emulator tested: dolphin-master-4.0-6725-x64
; On RocketLaunchUI, dolphin, GameCube Module settings set your VBA-M executable and VBA Bios file path on the VBALink tab.
; On RocketLaunchUI, dolphin, GameCube, Game name Module Settings enable VBA Link
; If your Game Boy Advanced Windows appear frozen after the RocketLauncher fade screen loads, increase the value of the VBADelay on GameCube, VBALink settings. Default value is 500 milliseconds.
; A game with one VBA window will use a two screens bezel file, Bezel [2S].png, the first screen for the GameCube game and the second one for the VBA screen. Two VBAs = Bezel [3S].png, again first screen for the GameCube game and second and third for the VBA screens, and so on.
;----------------------------------------------------------------------------
StartModule()
BezelGui()
FadeInStart()
primaryExe := new Emulator(emuPath . "\" . executable) ; instantiate emulator executable object
Fullscreen := moduleIni.Read("Settings", "Fullscreen","true",,1)
UseCustomWiimoteProfiles := moduleIni.Read("Settings", "UseCustomWiimoteProfiles","false",,1) ; set to true if you want to setup custom Wiimote profiles for games
UseCustomGCPadProfiles := moduleIni.Read("Settings", "UseCustomGCPadProfiles","false",,1) ; set to true if you want to setup custom GCPad profiles for games
HideMouse := moduleIni.Read("Settings", "HideMouse","true",,1) ; hides mouse cursor in the emu options
RefreshKey := moduleIni.Read("Settings", "RefreshKey",,,1) ; hotkey to "Refresh" Wiimotes, delete the key to disable it
Timeout := moduleIni.Read("Settings", "Timeout","5",,1) ; amount in seconds we should wait for the above hotkeys to timeout
renderToMain := moduleIni.Read("Settings", "Render_To_Main","false",,1)
enableNetworkPlay := moduleIni.Read("Network", "Enable_Network_Play","false",,1)
controlTypePort1 := moduleIni.Read(romName . "|Controls", "Control_Type_Port_1",,,1)
controlTypePort2 := moduleIni.Read(romName . "|Controls", "Control_Type_Port_2",,,1)
controlTypePort3 := moduleIni.Read(romName . "|Controls", "Control_Type_Port_3",,,1)
controlTypePort4 := moduleIni.Read(romName . "|Controls", "Control_Type_Port_4",,,1)
;options to Gamecube and VBA Link
enableVBALink := moduleIni.Read(romName, "enableVBALink", "false",,1)
VBAExePath := moduleIni.Read("VBA Link", "VBAExePath",,,1)
VBABiosPath := moduleIni.Read("VBA Link", "VBABiosPath",,,1)
VBADelay := moduleIni.Read("VBA Link", "VBADelay", 500,,1)
If (renderToMain = "true") {
emuPrimaryWindow := new Window(new WindowTitle("Dolphin","wxWindowNR")) ; instantiate primary emulator window object
emuGameWindow := emuPrimaryWindow
} Else {
emuPrimaryWindow := new Window(new WindowTitle("Dolphin","wxWindowNR")) ; instantiate primary emulator window object
emuPrimaryWindow.ExcludeTitle := "FPS" ; when main window doesn't have the game, FPS will not be on the title bar
emuGameWindow := new Window(new WindowTitle("FPS","wxWindowNR"))
}
emuPrimaryWindow := new Window(new WindowTitle("Dolphin","wxWindowNR")) ; instantiate primary emulator window object
emuGameWindow := If renderToMain = "true" ? emuPrimaryWindow : new Window(new WindowTitle("FPS","wxWindowNR")) ; Older dolphins used "FPS ahk_class wxWindowClassNR"
emuScanningWindow := new Window(new WindowTitle("Scanning for ISOs","#32770"))
emuNetPlaySetupWindow := new Window(new WindowTitle("Dolphin NetPlay Setup","wxWindowNR"))
emuNetPlayWindow := new Window(new WindowTitle("Dolphin NetPlay","wxWindowNR"))
emuWiimoteWindow := new Window(new WindowTitle("Dolphin Controller Configuration","#32770"))
emuOpenROMWindow := new Window(new WindowTitle("Select","#32770"))
emuErrorWindow1 := new Window(new WindowTitle("Warning","#32770"))
emuErrorWindow2 := new Window(new WindowTitle("Error","#32770"))
emuWiimoteWindow.CreateControl("OK")
; Determine where Dolphin is storing its ini, this will act as the base folder for settings and profiles related to this emu
dolphinININewPath := new File(A_MyDocuments . "\Dolphin Emulator\Config\Dolphin.ini") ; location of Dolphin.ini for v4.0+
dolphinINIOldPath := new File(emuPath . "\User\Config\Dolphin.ini") ; location of Dolphin.ini prior to v4.0
portableTxtFile := new File(emuPath . "\portable.txt")
If (!portableTxtFile.Exist() && dolphinININewPath.Exist())
{ dolphinBasePath := A_MyDocuments . "\Dolphin Emulator"
RLLog.Info("Module - Dolphin's base settings folder is not portable and found in: " . dolphinBasePath)
} Else If (portableTxtFile.Exist() || dolphinINIOldPath.Exist())
{ dolphinBasePath := emuPath . "\User"
RLLog.Info("Module - Dolphin's base settings folder is portable and found in: " . dolphinBasePath)
} Else
ScriptError("Could not find your Dolphin.ini in either of these folders. Please run Dolphin manually first to create it.`n" . dolphinINIOldPath.FileFullPath . "`n" . dolphinININewPath.FileFullPath)
dolphinINI := new IniFile(dolphinBasePath . "\Config\Dolphin.ini")
If (enableVBALink = "true"){
VBAExePath := AbsoluteFromRelative(EmuPath, VBAExePath)
VBABiosPath := AbsoluteFromRelative(EmuPath, VBABiosPath)
StringUtils.SplitPath(VBAExePath, VBAFile, VBAPath)
SelectedNumberofPlayers := NumberOfPlayersSelectionMenu(4)
If (SelectedNumberofPlayers = 1) {
enableVBALink := "false"
} Else {
; backup original ini
dolphinINIBackup := new File(dolphinBasePath . "\Config\Dolphin_Backup.ini")
dolphinINI.Copy(dolphinINIBackup.FileFullPath)
Loop, % SelectedNumberofPlayers
{ tempCount := A_Index-1
dolphinINI.Write(5, "Controls", PadType%tempCount%)
}
}
}
If (enableVBALink = "true")
BezelStart(SelectedNumberofPlayers+1)
Else
BezelStart()
If (enableVBALink = "true" and !bezelPath) ; disabling fullscreen if VBA Link mode
Fullscreen := "false"
If (renderToMain = "true" && (enableVBALink = "true" || bezelEnabled = "true")) { ; disabling toolbar and statusbar if bezels or vba link is used as it will show when rendering to the main window
dolphinINI.Write("False", "Interface", "ShowToolbar")
dolphinINI.Write("False", "Interface", "ShowStatusbar")
}
If (renderToMain = "true")
hideEmuObj := Object(emuScanningWindow,0,emuNetPlayWindow,0,emuNetPlaySetupWindow,0,emuErrorWindow1,0,emuErrorWindow2,0,emuGameWindow,1)
Else
hideEmuObj := Object(emuScanningWindow,0,emuNetPlayWindow,0,emuNetPlaySetupWindow,0,emuErrorWindow1,0,emuErrorWindow2,0,emuPrimaryWindow,0,emuGameWindow,1)
; Set control types in each port
dolphinDevice := 0
Loop 4 {
If controlTypePort%A_Index%
dolphinINI.Write(controlTypePort%A_Index%, "Core", "SIDevice" . dolphinDevice)
dolphinDevice++
}
7z(romPath, romName, romExtension, sevenZExtractPath)
If StringUtils.Contains(romExtension,"\.zip|\.7z|\.rar")
ScriptError(MEmu . " does not support compressed roms. Please enable 7z support in RocketLauncherUI to use this module/emu.")
If RefreshKey {
RefreshKey := xHotKeyVarEdit(RefreshKey,"RefreshKey","~","Add")
xHotKeywrapper(RefreshKey,"RefreshWiimote")
}
Fullscreen := If Fullscreen = "true" ? "True" : "False"
HideMouse := If HideMouse = "true" ? "True" : "False"
networkSession := ""
If (enableNetworkPlay = "true") {
RLLog.Info("Module - Network Multi-Player is an available option for " . dbName)
dolphinNickname := dolphinINI.Read("NetPlay", "Nickname")
dolphinAddress := dolphinINI.Read("NetPlay", "Address")
dolphinCPort := dolphinINI.Read("NetPlay", "ConnectPort")
dolphinHPort := dolphinINI.Read("NetPlay", "HostPort")
netplayNickname := moduleIni.Read("Network", "NetPlay_Nickname","Player",,1)
getWANIP := moduleIni.Read("Network", "Get_WAN_IP","false",,1)
networkPlayers := 4 ; Max amount of networkable players
If (getWANIP = "true")
myPublicIP := GetPublicIP()
defaultServerIP := moduleIni.Read("Network", "Default_Server_IP", myPublicIP,,1)
defaultServerPort := moduleIni.Read("Network", "Default_Server_Port",,,1)
lastIP := moduleIni.Read("Network", "Last_IP", defaultServerIP,,1) ; does not need to be on the ISD
lastPort := moduleIni.Read("Network", "Last_Port", defaultServerPort,,1) ; does not need to be on the ISD
If (netplayNickname != dolphinNickname)
dolphinINI.Write(netplayNickname, "NetPlay", "Nickname")
MultiplayerMenu(lastIP,lastPort,networkType,networkPlayers,0)
If networkSession {
RLLog.Info("Module - Using a Network for " . dbName)
restoreIniObject := Object() ; initialize object
currentObj := ""
dolphinConfigPath := dolphinBasePath . "\Config"
Loop, % dolphinConfigPath . "\*.ini"
{
If StringUtils.InStr(A_LoopFileName, "_netplay.ini",,,,0) {
RLLog.Info("Module - Found a network specific ini: " . A_LoopFileFullPath)
networkIni%A_Index%File := new File(A_LoopFileFullPath)
originalIni%A_Index%File := new File(StringUtils.RegExReplace(A_LoopFileFullPath, "_netplay",,,-1,15))
backupIni%A_Index%File := new File(originalIni%A_Index%File.FileFullPath . ".backup")
originalIni%A_Index%File.Move(backupIni%A_Index%File,1) ; backup original ini
networkIni%A_Index%File.Copy(originalIni%A_Index%File) ; copy network ini to original name
}
}
moduleIni.Write(lastPort, "GlobalModuleIni", "Network", "Last_Port")
If (networkType = "client") {
moduleIni.Write(lastIP, "GlobalModuleIni", "Network", "Last_IP") ; Save last used IP and Port for quicker launching next time
dolphinINI.Write(lastIP, "Network", "Address")
dolphinINI.Write(lastPort, "Network", "ConnectPort")
} Else ; server
dolphinINI.Write(lastPort, "Network", "HostPort")
dolphinINI.Write(romPath, "Network", "ISOPath0") ; makes browser only show the one game we want to play
dolphinINI.Write(1, "General", "ISOPaths") ; makes browser only show the first path set
dolphinINI.Write(romPath . "\" . romName . romExtension, "General", "LastFilename")
RLLog.Info("Module - Starting a network session using the IP """ . networkIP . """ and PORT """ . networkPort . """")
} Else
RLLog.Info("Module - User chose Single Player mode for this session")
}
gcSerialPort := 5 ; this puts the BBA network adapter into the serial port. If previous launch was Triforce, AM-Baseboard would be set here and would result in Unknown DVD command errors
; Compare existing settings and if different than desired, write them to the emulator's ini
dolphinINI.Write(Fullscreen, "Display", "Fullscreen", 1)
dolphinINI.Write(renderToMain, "Display", "RenderToMain", 1)
dolphinINI.Write(HideMouse, "Interface", "HideCursor", 1)
dolphinINI.Write("False", "Interface", "ConfirmStop", 1)
dolphinINI.Write("False", "Interface", "UsePanicHandlers", 1)
dolphinINI.Write(gcSerialPort, "Core", "SerialPort1", 1)
; Load default or user specified Wiimote or GCPad profiles for launching
If (StringUtils.InStr(systemName, "wii") && UseCustomWiimoteProfiles = "true")
ChangeDolphinProfile("Wiimote")
If (UseCustomGCPadProfiles = "true")
ChangeDolphinProfile("GCPad")
HideAppStart(hideEmuObj,hideEmu)
If networkSession
primaryExe.Run() ; must be launched w/o /b for browser list to work
Else
primaryExe.Run(" -b -e """ . romPath . "\" . romName . romExtension . """") ; -b = batch (exit dolphin with emu), -e = load file
emuGameWindow.Wait()
emuGameWindow.Get("ID")
emuGameWindow.WaitActive()
If networkSession {
RLLog.Info("Module - Opening NetPlay window")
; Get the 6-letter ID of the game
If (romExtension = ".wbfs")
gameID := RLObject.readFileData(romPath . "\" . romName . romExtension,512,6,"UTF8")
Else If (romExtension = ".iso")
gameID := RLObject.readFileData(romPath . "\" . romName . romExtension,0,6,"UTF8")
Else If (romExtension = ".ciso")
gameID := RLObject.readFileData(romPath . "\" . romName . romExtension,32768,6,"UTF8")
; Must wait for Dolphin to finish scanning isos before netplay window can be opened so the game list is populated. Opening too early and the game list will be blank or partially filled.
If emuScanningWindow.Exist()
emuScanningWindow.WaitClose(60) ; wait 60 seconds max. hopefully doesn't take longer than that to scan your isos...
Else {
errlvl := emuScanningWindow.Wait(5) ; wait 5 seconds max to appear
If errlvl
RLLog.Info("Module - Timed out waiting for ""Scanning for ISOs"" window to appear. It may have finished before it could be detected, moving on.")
Else
RLLog.Info("Module - ""Scanning for ISOs"" window found.")
}
emuPrimaryWindow.MenuSelectItem("Tools", "Start NetPlay")
matchMode := A_TitleMatchMode ; store for restoration later
MiscUtils.SetTitleMatchMode(3) ; changes match mode so title must match exactly
emuNetPlaySetupWindow.Wait()
emuNetPlaySetupWindow.WaitActive()
emuNetPlayWindow.ExcludeTitle := emuNetPlaySetupWindow.WinTitle.GetWIndowTitle() ; set emuNetPlayWindow exclude title for the below command
If (networkType = "client") {
RLLog.Info("Module - Clicking Connect button")
emuNetPlaySetupWindow.CreateControl("Button1") ; instantiate new control for button1
emuErrorWindow1.CreateControl("Button1")
emuErrorWindow2.CreateControl("Button1")
While !breakLoops {
emuNetPlaySetupWindow.GetControl("button1").Click() ; click connect button
RLLog.Info("Module - Waiting for Host to start game")
errlvl := emuNetPlayWindow.Wait(2) ; waits 2 seconds
If errlvl { ; 1 if timed out, now check for any error windows and close them
Loop, 2 ; loop through both error windows
If emuErrorWindow%A_Index%.Exist() ; error windows that can appear when host is not running yet
emuErrorWindow%A_Index%.GetControl("button1").Click() ; click ok to clear the error
RLLog.Info("Module - Host not running yet, trying again")
Continue
} Else { ; window exists
RLLog.Info("Module - Connected to host, waiting for host to start game")
Break
}
}
} Else { ; server
emuNetPlayWindow.CreateControl("ListBox1") ; create a control called ListBox1
emuNetPlayWindow.CreateControl("Button8") ; create a control called Button8 (the Host's Start button)
emuNetPlaySetupWindow.CreateControl("ListBox1") ; create a control called ListBox1
emuNetPlaySetupWindow.CreateControl("Button3") ; create a control called Button3 (the Host button)
emuNetPlaySetupWindow.GetControl("ListBox1").Get("List") ; Get the text from the ListBox
loopList := emuNetPlaySetupWindow.GetControl("ListBox1").List ; can't use this object directly on the Parse Loop below
Loop, Parse, loopList, `n
{
If StringUtils.InStr(A_Loopfield, gameID,,,,0) {
idLocation := A_Index ; record the location in the ListBox of our game
RLLog.Info("Module - Game list shows """ . A_LoopField . """ as item " . A_Index) ; logging each items in ListBox
}
}
If !idLocation { ; game was not found in list
ScriptError("Could not find your """ . romName . """ in the game selection window for netplay. Possibly the gameID could not be found in your game. Please check your the RocketLauncher log and report this error.",,,,,1)
Gosub, CloseProcess
FadeInExit()
Goto, CloseDolphin
}
emuNetPlaySetupWindow.GetControl("ListBox1").Control("Choose",idLocation) ; selects our game in the ListBox
RLLog.Info("Module - Clicking Host button")
emuNetPlaySetupWindow.GetControl("Button3").Click() ; click host button
emuNetPlayWindow.Wait() ; this window should now appear when hosted correctly
RLLog.Info("Module - Waiting for " . networkPlayers . " players until the game is started")
While !breakLoops {
emuNetPlayWindow.GetControl("ListBox1").Get("List") ; Get the text from the ListBox
If StringUtils.InStr(emuNetPlayWindow.GetControl("ListBox1").List,"[" . networkPlayers . "]",,,,0) {
RLLog.Info("Module - All players have joined, starting game")
Break
}
TimerUtils.Sleep(100,0)
}
emuNetPlayWindow.GetControl("Button8").Click() ; click Start button
}
MiscUtils.SetTitleMatchMode(matchMode) ; restore old match mode
}
If (enableVBALink = "true") {
vbaINI := new IniFile(VBAPath . "\vbam.ini")
vbaINI.CheckFile()
vbaINIBackup := new File(VBAPath . "\vbam_Backup.ini")
vbaINI.Copy(vbaINIBackup.FileFullPath)
;removing fullscreen from VBA-M
vbaINI.Write(0, "preferences", "fullScreen")
;setting other VBA-M ini options
VBABiosPathDoubleSlash := StringUtils.Replace(VBABiosPath,"\","\\","all")
vbaINI.Write(0, "preferences", "pauseWhenInactive")
vbaINI.Write(VBABiosPathDoubleSlash, "GBA", "BiosFile")
vbaINI.Write(1, "GBA", "LinkAuto")
vbaINI.Write("127.0.0.1", "GBA", "LinkHost")
vbaINI.Write(3, "GBA", "LinkType")
vbaINI.Write(SelectedNumberofPlayers, "preferences", "LinkNumPlayers")
vbaINI.Write(1, "preferences", "useBiosGBA")
vbaINI.Write(1, "Display", "Stretch")
vbaINI.Write(1, "Display", "Scale")
;running VBA-M
Loop % SelectedNumberofPlayers {
currentScreen := A_Index + 1
VBA%currentScreen%Exe := new Process(VBAExePath) ; instantiate a new process for each instance of VBA we need to run
VBA%currentScreen%Exe.Run(" """ . VBABiosPath . """")
; msgbox % "PID: " . VBA%A_Index%Exe.PID . "`nVBABiosPath: " . VBABiosPath
VBA%currentScreen%Window := new Window(new WindowTitle(,,,,VBA%currentScreen%Exe.PID))
VBA%currentScreen%Window.Wait()
TimerUtils.Sleep(VBADelay,0)
bezelBottomOffsetScreen%currentScreen% := 24 ; to hide emu bottom bar
}
;waiting for VBA-M windows bios loading
timeout := A_TickCount
VBAGBABiosWindow := new Window(new WindowTitle("gba_bios - VisualBoyAdvance-M"))
Loop {
VBAGBABiosWindow.Get("List") ; Get a list of all vba-m hwnd IDs
If (VBAGBABiosWindow.List[0] = SelectedNumberofPlayers){
Loop % VBAGBABiosWindow.List[0] { ; loop through each vba-m window
currentScreen := A_Index + 1
Screen%currentScreen%ID := VBAGBABiosWindow.List[A_Index] ; record each vba-m window's hwnd ID
}
RLLog.Info("Module - gba_bios Loaded")
Break
}
If (timeout < A_TickCount - 10000) {
RLLog.Warning("Module - Timed out waiting gba_bios to load")
Break
}
TimerUtils.Sleep(100,0)
}
;Resizing Windows to fill screen if no bezel file is found
If !(bezelPath) {
Loop % (SelectedNumberofPlayers + 1) {
If (A_Index = 1) { ; the main Dolphin window
X1 := 0
Y1 := 0
W1 := A_ScreenWidth//2
H1 := A_ScreenHeight
emuGameWindow.WinTitle.PID := "" ; remove PID from object's WinTitle so only the window hwnd ID is acted upon
emuGameWindow.RemoveBorder()
emuGameWindow.RemoveTitlebar()
emuGameWindow.ToggleMenu()
emuGameWindow.Move(X1,Y1,W1,H1)
} Else { ; the vba-m windows
X%A_Index% := A_ScreenWidth//2
Y%A_Index% := (A_Index-2)*(A_ScreenHeight//SelectedNumberofPlayers)
W%A_Index% := A_ScreenWidth//2
H%A_Index% := (A_ScreenHeight//SelectedNumberofPlayers)+bezelBottomOffsetScreen%A_Index%
VBA%A_Index%Window.WinTitle.ID := Screen%A_Index%ID ; set ID of window into object
VBA%A_Index%Window.WinTitle.PID := "" ; remove PID from object's WinTitle so only the window hwnd ID is acted upon
VBA%A_Index%Window.RemoveBorder()
VBA%A_Index%Window.RemoveTitlebar()
VBA%A_Index%Window.ToggleMenu()
VBA%A_Index%Window.Move(X%A_Index%,Y%A_Index%,W%A_Index%,H%A_Index%)
}
}
TimerUtils.Sleep(50)
Loop % SelectedNumberofPlayers {
currentScreen := A_Index + 1
VBA%currentScreen%Window.Activate() ; put focus on all the VBA windows
}
VBA1Window.Activate() ; put focus on the first VBA window
}
}
BezelDraw()
emuGameWindow.Activate()
HideAppEnd(hideEmuObj,hideEmu)
FadeInExit()
primaryExe.Process("WaitClose")
CloseDolphin:
If networkSession {
Loop {
If !IsObject(backupIni%A_Index%File)
Break
RLLog.Info("Module - Restoring the original ini: " . backupIni%A_Index%File.FileFullPath . " to " . originalIni%A_Index%File.FileFullPath)
backupIni%A_Index%File.Move(originalIni%A_Index%File.FileFullPath,1) ; restore all backed up inis
}
}
7zCleanUp()
BezelExit()
FadeOutExit()
ExitModule()
ChangeDolphinProfile(profileType) {
Global settingsFile,romName,dolphinBasePath,RLLog,moduleIni
profile := moduleIni.Read(romName, "profile", "Default",,1)
RLProfilePath := new Folder(dolphinBasePath . "\Config\Profiles\" . profileType . " (RL)")
currentProfileFile := new File(dolphinBasePath . "\Config\" . profileType . "New.ini")
defaultProfileFile := new File(RLProfilePath.FilePath . "\_Default_" . profileType . "New.ini")
customProfileFile := new File(RLProfilePath.FilePath . "\" . profile . ".ini")
If !currentProfileFile.Exist() {
RLLog.Warning("Module - You have custom " . profileType . " profiles enabled, but could not locate " . currentProfileFile.FileFullPath . ". This file stores all your current controls in Dolphin. Please setup your controls in Dolphin first.")
Return
}
If !defaultProfileFile.Exist() {
RLLog.Warning("Module - Creating initial Default " . profileType . " profile by copying " . profileType . ".ini to " . defaultProfileFile.FileFullPath)
RLProfilePath.CreateDir()
currentProfileFile.Copy(defaultProfileFile.FileFullPath) ; create the initial default profile on first launch
}
If (profile != "Default" && !customProfileFile.Exist())
RLLog.Warning("Module - " . romName . " is set to load a custom " . profileType . " profile`, but it could not be found: " . customProfileFile.FileFullPath)
currentProfileFile.Read() ; read current profile into memory
customProfileFile.Read() ; read custom profile into memory
If (currentProfileFile.Text != customProfileFile.Text) { ; if both profiles do not match exactly
RLLog.Info("Module - Current " . profileType . " profile does not match the one this game should use.")
If (profile != "Default") { ; if user set to use a custom profile
RLLog.Info("Module - Copying this defined " . profileType . " profile to replace the current one: " . customProfileFile.FileFullPath)
customProfileFile.Copy(currentProfileFile.FileFullPath,1)
} Else { ; load default profile
RLLog.Info("Module - Copying the default " . profileType . " profile to replace the current one: " . defaultProfileFile.FileFullPath)
defaultProfileFile.Copy(currentProfileFile.FileFullPath,1)
}
} Else
RLLog.Info("Module - Current " . profileType . " profile is already the correct one for this game, not touching it.")
}
ConnectWiimote(key) {
Global Timeout,emuPrimaryWindow,emuGameWindow,emuWiimoteWindow
If !emuWiimoteWindow.Exist()
{
MiscUtils.DetectHiddenWindows("OFF") ; this needs to be off otherwise WinMenuSelectItem doesn't work for some odd reason
emuPrimaryWindow.Activate()
emuPrimaryWindow.MenuSelectItem("Options","Controller Settings")
emuWiimoteWindow.Wait()
emuWiimoteWindow.WaitActive()
}
;emuWiimoteWindow.Activate() ; test if window needs to be active
If !emuWiimoteWindow.GetControl(key)
emuWiimoteWindow.CreateControl(key)
emuWiimoteWindow.GetControl(key).Click()
emuWiimoteWindow.GetControl("OK").Click()
emuGameWindow.Activate()
}
PairWiimote:
ConnectWiimote("Pair Up")
Return
RefreshWiimote:
ConnectWiimote("Refresh")
Return
HaltEmu:
If RefreshKey
XHotKeywrapper(RefreshKey,"RefreshWiimote","OFF")
Return
MultiGame:
; MultiGame doesn't work with Dolphin currently because Dolphin hides itself from Winspector Spy and cannot send any commands to the emulator through scripts.
If (fullscreen = "True")
{ KeyUtils.SetKeyDelay(50)
KeyUtils.Send("{Alt Down}{Enter Down}{Enter Up}{Alt Up}") ; go windowed to get the menubar
}
If bezelEnabled
emuGameWindow.ToggleMenu() ; put the menubar back
; emuPrimaryWindow.MenuSelectItem("File","Change Disc...")
emuPrimaryWindow.MessageUtils.PostMessage("0x111", "00288") ; Change Disc
OpenROM(emuOpenROMWindow.WinTitle.GetWindowTitle(), selectedRom)
emuPrimaryWindow.WaitActive()
If bezelEnabled
emuGameWindow.ToggleMenu() ; remove the menubar again
If (fullscreen = "True")
KeyUtils.Send("{Alt Down}{Enter Down}{Enter Up}{Alt Up}") ; restore fullscreen
Return
RestoreEmu:
If RefreshKey
XHotKeywrapper(RefreshKey,"RefreshWiimote","ON")
Return
CloseProcess:
breakLoops := 1
FadeOutStart()
If (enableVBALink = "true") {
Loop % SelectedNumberofPlayers
{ currentScreen := A_Index + 1
;VBA%currentScreen%Window.Activate()
VBA%currentScreen%Window.Close()
TimerUtils.Sleep(100,0)
}
dolphinINIBackup.Move(dolphinINI.FileFullPath)
vbaINIBackup.Move(vbaINI,1)
}
If networkSession {
If emuNetPlaySetupWindow.Exist()
emuNetPlaySetupWindow.Close()
If emuNetPlayWindow.Exist()
emuNetPlayWindow.Close()
If !emuGameWindow.Exist() ; if game never launched, close the main emu window
emuPrimaryWindow.Close()
}
If emuGameWindow.Exist()
emuGameWindow.Close() ; this needs to close the window the game is running in otherwise dolphin crashes on exit
Return
; Unused messages for reference from Dolphin v4.0 build 6980 x64:
; emuPrimaryWindow.PostMessage("0x111", "0261") ; Toggle Fullscreen
; emuPrimaryWindow.PostMessage("0x111", "0258") ; Toggle Play/Pause
; emuPrimaryWindow.PostMessage("0x111", "0259") ; Stop
; emuPrimaryWindow.PostMessage("0x111", "0260") ; Reset
; emuPrimaryWindow.PostMessage("0x111", "00539") ; Show Toolbar
; emuPrimaryWindow.PostMessage("0x111", "00540") ; Show Statusbar
; emuPrimaryWindow.PostMessage("0x111", "05123") ; Refresh List
; emuPrimaryWindow.PostMessage("0x111", "0305") ; Change Disc
; emuPrimaryWindow.PostMessage("0x111", "00218") ; Load State Slot 1
; emuPrimaryWindow.PostMessage("0x111", "00227") ; Load State Slot 10
; emuPrimaryWindow.PostMessage("0x111", "00208") ; Save State Slot 1
; emuPrimaryWindow.PostMessage("0x111", "00217") ; Save State Slot 10
; emuPrimaryWindow.PostMessage("0x111", "00303") ; Start Netplay
; emuPrimaryWindow.PostMessage("0x111", "05000") ; Open
; Unused messages for reference from Dolphin v4.0.2 x86:
; emuPrimaryWindow.PostMessage("0x111", "00248") ; Toggle Fullscreen
; emuPrimaryWindow.PostMessage("0x111", "00245") ; Toggle Play/Pause
; emuPrimaryWindow.PostMessage("0x111", "00246") ; Stop
; emuPrimaryWindow.PostMessage("0x111", "00247") ; Reset
; emuPrimaryWindow.PostMessage("0x111", "00501") ; Show Toolbar
; emuPrimaryWindow.PostMessage("0x111", "00502") ; Show Statusbar
; emuPrimaryWindow.PostMessage("0x111", "00217") ; Load State Slot 1
; emuPrimaryWindow.PostMessage("0x111", "00226") ; Load State Slot 10
; emuPrimaryWindow.PostMessage("0x111", "00207") ; Save State Slot 1
; emuPrimaryWindow.PostMessage("0x111", "00216") ; Save State Slot 10
; emuPrimaryWindow.PostMessage("0x111", "00286") ; Start Netplay
; emuPrimaryWindow.PostMessage("0x111", "05000") ; Open
; emuPrimaryWindow.PostMessage("0x111", "05006") ; Exit
Compilation de shader asynchrone (éviter le temps de compilation du shader)
Encodeur/décodeur de texture DX11 de Galop (améliore le décodage de texture spécialement EFB vers RAM)
Chargeur de sommets pré-compilé et décodage de sommets optimisé à l'aide de SSSE3 et SSE4
Prise en charge de Dolpby Pro Logic II pour xaudio et openal
Résolutions internes plus grandes (IRx6) pour permettre les jeux 4K
Améliorations des textures personnalisées pour permettre le chargement direct de textures compressées, y compris les mipmaps
DSP - Option Time Streching (Améliore la sortie sonore pour éviter les sauts de son sur les machines lentes)
Prise en charge de DX9 pour les anciennes machines
Interface de post-traitement modifiée pour prendre en charge :
-Plusieurs étapes permettant des effets plus complexes.
-Profondeur et gamma natif en entrées.
-DX11/DX12.
-Version personnalisée de DolphinFX qui fonctionne sous dx11 et ogl
-SSAO et DOF.
-Prise en charge de la mise à l'échelle des textures
-Bump Mapping avec des propriétés de matériaux avancées
-Phong Réflexion spéculaire pour améliorer la qualité de l'éclairage
-Cartographie de tessellation et de déplacement
-Éclairage de jante
-Génération automatique de bosses pour améliorer l'éclairage avec la prise en charge des cartes cubiques env
-Cache de l'UID du shader :
Les uids de shader identifient les différents shaders dont les jeux ont besoin pour restituer les graphiques, comme on le sait, la génération de shader est lente
et provoque un bégaiement la première fois que vous jouez à un jeu ou lorsque la version de Dolphin change.
L'utilisation des caches UID permet à un utilisateur ayant déjà joué au jeu de partager les informations du shader,
permettant ainsi aux autres utilisateurs de profiter du jeu sans bégayer.
Pour les utiliser, demandez simplement les fichiers à un ami ayant déjà joué au jeu.
Ensuite, placez simplement le dossier des fichiers [UserFolder]\Cache\ShadersUIDS et activez l'option "Compile Shaders On Startup" dans l'onglet graphique avancé.
Autres fonctionnalités
Compilation de shaders multithread
Mise en œuvre précoce de tests approfondis pour corriger les problèmes associés et augmenter les performances
L'option Fast-Depth contrôle désormais l'utilisation ou non de l'émulation z précoce précise, donc l'activation de la profondeur rapide donnera un boost de vitesse dans certains systèmes.
Accès EFB rapide. Implémentez le cache d'accès EFB global pour réduire les blocages du GPU causés par l'accès du CPU à l'efb (cette option est l'onglet Hack dans les options Gfx)
Réorganisation du chemin de génération de shader pour améliorer les performances
Implémentation du support 3D pour le rendu 3D côte à côte/TopBottom
De nombreuses corrections de bugs anciens de DX9 (ZComploc, émulation Tev, etc.)
Autres correctifs et petites améliorations.
1117(f0dd960b5) :
Fusionnez la prise en charge de plusieurs dossiers de textures à partir du maître.
Configuration
[ *] Full Async Shader = Aucun ralentissement causé par la compilation des shaders. -> Conditions requises : CPU faible (problèmes possibles)
Options DSP - Time streching
Activer l'étirement du son pour éviter les crépitements dus à la lenteur du VPS dans l'émulation.
Cela introduira une certaine latence.
This Version complements Official Dolphin-Master giving support for legacy devices, and reducing cpu usage on the graphic thread.
The focus is the gaming experience and speed.
Please test the new versions will be appreciated, and not forget comment if Ishiiruka was usefull for you.
Thank you. Have Happy Gamming and Enjoy!.
[color=#1D2654]Tino[/color]
[color=#FF0000]LAST UPDATE 2020-08-23[/color]
http://i.imgur.com/xzQoR66.png?1 [color=#1D2654]Important Features[/color]
Async shader compilation (Avoiding shader compilation time)
Galop's DX11 Texture Encoder/Decoder (Improve Texture decoding specially EFB TO RAM)
Pre compiled Vertex loader & Optimized vertex decoding using SSSE3 and SSE4
Dolpby Pro Logic II support for xaudio and openal
Larger internal resolutions (IRx6) to allow 4k gaming
Custom Texture improvements to allow direct compressed texture loading including mipmaps
DSP - Time Streching Option (Improve sound output to avoid sound skipping on slow machines)
DX9 support for old machines
Modified Post Procesing interface to support:
-Multiple Stages allowing more complex effects.
-Depth and native gamma as inputs.
-DX11/DX12.
-Custom version of DolphinFX that work under dx11 and ogl
-SSAO and DOF.
-Texure Scaling Support
-Bump Mapping with advanced material properties (1)
-Phong Specular reflection to improve ligthing quality(1)
-Tessellation and Displacement Mapping(1)
-Rim Lighting(1)
-Bump auto generation to improve ligthingwith support for env cubemaps
-Shader uid cache:
* Shader uids identify the diferent shaders that games need to render graphics, as is known shader generation is slow
and causes stutering the first time you play a game or when dolphin version changes.
Using the uid caches allow an user that already played the game to share the shader information,
allowing other users to enjoy gaming without stutering.
* To use them just ask for the files from a friend that already played the game.
* Then just put the files [UserFolder]\Cache\ShadersUIDS folder and Enable The "Compile Shaders On Startup" option in the Advanced Graphic Tab
((1)For more info see post #3)
[color=#1D2654]Other Features[/color]
Multithreaded Shader Compilation
Early depth test implementation to correct related issues and increase performance
Fast-Depth option now control the use or not of the accurate early z emulation so enabling fast depth will give a speed boos in some systems
Fast EFB Access. Implement global EFB Access Cache to reduce GPU stalls caused by CPU access to the efb (This option is Hack Tab in Gfx Options)
Shader generation Path reorganization to improve performance
Implemented 3d support for Side by side/TopBottom 3d rendering
Many DX9 old bugs fixes (ZComploc, Tev emulation, etc)
Others fixes and little improves.
[color=#30543D]DOWNLOAD[/color]
Downloads
https://bit.ly/3qcNiA7
https://bit.ly/3smg1Fw
https://bit.ly/3pdpigZ

Manuel d'utilisation de nullDC v1.0.3
-------------------------
Sommaire :
1. Qu'est-ce que c'est ?
2. Configuration système requise
3. Préparation/Autres prérequis
4. Utilisation
5.1. Menus
5.2. Menus spécifiques aux plugins
6. Jeu en réseau
7. Conseils, problèmes connus et solutions possibles
8. À propos
Informations pour les utilisateurs pressés :
Si vous rencontrez des problèmes pour lancer l'émulateur, consultez les sections 2 et 7.
Pour en savoir plus sur les options de l'émulateur, consultez les sections 4 et 5.
L'émulateur est préconfiguré avec des options qui conviennent à la plupart des utilisateurs, mais
elles ne sont ni les plus précises, ni les plus rapides.
Si vous rencontrez des erreurs sur certains jeux, modifiez les options ou
les plugins.
1. Qu'est-ce que c'est ?
--------------
nullDC est un émulateur Dreamcast basé sur des plugins pour les ordinateurs x86 fonctionnant sous Windows.
-- 2. Configuration système requise
-------------------
Configuration minimale :
- Processeur : Tout processeur compatible SSE1 (AMD Athlon XP et versions ultérieures, Intel Pentium 3 et versions ultérieures)
- Carte graphique : Carte graphique compatible DirectX 9 avec prise en charge des textures projetées.
(GeForce MX, ATI Radeon)
- Mémoire vive : 256 Mo
- Système d’exploitation : Windows 2000/XP/2003
- Redistributable de décembre de DirectX 9c La dernière version disponible à ce jour est
ici :
Programme d’installation en ligne :
http://www.microsoft.com/downloads/details.aspx?FamilyID=2da43d38-db71-4c1b
-bc6a-9b6652cd92a3&DisplayLang=en
Programme d’installation hors ligne :
http://www.microsoft.com/downloads/details.aspx?FamilyID=c1367bc3-4676-481a
-bfaa-5c15d1d7199d&DisplayLang=en
- Environnements d’exécution Visual C++ 2005 Service Pack 1. Ils sont disponibles ici :
http://www.microsoft.com/downloads/details.aspx?familyid=200B2FD9-AE1A-4A14
-984D-389C36F85647&displaylang=en
- WinPcap. Il est nécessaire pour l'émulation de modem et n'est pas requis autrement.
Il est disponible ici :
http://www.winpcap.org/install/default.htm
Les exigences ci-dessus sont considérées comme le strict minimum pour exécuter
l'émulateur avec un minimum d'erreurs,
à condition que les plugins/options sélectionnés soient compatibles avec le matériel. L'émulateur risque de mal fonctionner
ou de ne pas fonctionner du tout sur les systèmes ne répondant pas à ces exigences.
Configuration recommandée :
- Processeur : AMD 3000+ ou Intel Pentium 4 à 2,6 GHz ou équivalent.
- Carte graphique : Carte graphique compatible DirectX 9 avec prise en charge du Shader Model 2. (Ge
force FX, ATi Radeon 9600)
- RAM : 512 Mo DDR333 double canal
Les systèmes répondant aux exigences recommandées devraient offrir des performances acceptables pour la plupart des jeux, avec un minimum d'erreurs.
Configuration idéale :
- Processeur : Intel Core 2 Duo rapide ou AMD 4000+ ou équivalent.
- Carte graphique : Carte graphique compatible DirectX 9 avec prise en charge du Shader Model 4 (Ge
force série 8, Radeon série HD).
- RAM : 1 Go DDR400 double canal
Les systèmes répondant aux exigences idéales devraient offrir des performances optimales pour la plupart des jeux, même avec les options les plus exigeantes.
Remarques :
- Certains jeux ont des exigences plus élevées et peuvent rencontrer des problèmes de performances, même sur les systèmes répondant aux exigences recommandées. Dans ce cas, une configuration proche des exigences idéales est nécessaire pour atteindre les performances optimales.
- Les processeurs Pentium 4 exécutent certaines tâches plus lentement que les autres processeurs ; une fréquence d'horloge de 2,6 GHz est donc nécessaire. En revanche, les processeurs Pentium M exécutent les mêmes tâches beaucoup plus rapidement.
(Un Pentium M 750 à 1,86 GHz devrait suffire pour atteindre la pleine vitesse).
Les processeurs Intel Celeron et AMD Duron sont lents et leurs performances devraient être inférieures.
à celles des autres.
- nullDC fonctionnera sous Windows Vista. Cependant, la configuration matérielle requise sera légèrement supérieure à celle mentionnée ci-dessus et des problèmes de son sont probables (comme pour de nombreuses autres applications fonctionnant sous Vista).
3. Préparation/Autres exigences
----------------------------------
Avant d'exécuter l'émulateur, assurez-vous de disposer des fichiers nécessaires du BIOS Dreamcast, du système d'exploitation et de la mémoire Flash, extraits de votre Dreamcast.
Le BIOS doit être nommé « dc_boot.bin » et la mémoire Flash « dc_flash.bin ».
Ces deux fichiers doivent être placés dans le répertoire « Data », situé à l'emplacement d'installation de l'émulateur.
L'émulateur ne pourra pas se charger si ces fichiers sont absents. Veuillez noter que les disques Dreamcast originaux (GD-ROM) sont des disques spéciaux qui ne sont pas compatibles avec les lecteurs DVD/CD PC classiques.
De ce fait, il est impossible de les exécuter directement sur un émulateur.
La seule solution est d'en faire une copie de sauvegarde (un dump) à l'aide de méthodes spécifiques, soit avec une Dreamcast, soit avec un lecteur DVD/CD PC modifié.
4. Utilisation
--------
Lancer l'émulateur et sélectionner « Options → Sélectionner les plugins » ouvrira le menu de sélection des plugins.
Voici la liste des plugins fournis avec l'émulateur :
- Plugins PowerVR (Graphiques) :
« nullPVR » est le plugin graphique créé par l'équipe nullDC. C'est le plugin graphique recommandé.
« Chankast's video » est un portage du noyau PowerVR (graphiques) utilisé sur Chankast (un autre excellent émulateur Dreamcast).
MEmu := "NullDC"
MEmuV := "r150"
MURL := [""]
MAuthor := ["Ibn"]
MVersion := ""
MCRC := ""
iCRC := ""
MID := ""
MSystem := ["Sega Naomi","Sammy Atomiswave"]
;----------------------------------------------------------------------------
;
;----------------------------------------------------------------------------
StartModule()
BezelGUI()
FadeInStart()
BezelStart()
Run, %emuPath%.\nullDC_Win32_Release-NoTrace.exe
settingsFile := modulePath . "\" . moduleName . ".ini"
nullDCcfg := checkFile(emuPath . "\nullDC.cfg")
rom= %romPath%\%romName%%romExtension%
Sleep, 2000
Send, !{f}
Send, {enter}
Sleep, 2000
Send, %rom% ; sends rompath romfile from exe syntax
Send, {enter}
#NoEnv ; Recommended for performance and compatibility with future AutoHotkey releases.
; #Warn ; Enable warnings to assist with detecting common errors.
SendMode Input ; Recommended for new scripts due to its superior speed and reliability.
SetWorkingDir %A_ScriptDir% ; Ensures a consistent starting directory.
MyPath = C:\Program Files (x86)\iRotate\iRotate.exe
#+!Up::
Run %MyPath% /2:rotate=0
Return
#+!Down::
Run %MyPath% /2:rotate=180
Return
#+!Left::
Run %MyPath% /2:rotate=270
Return
#+!Right::
Run %MyPath% /2:rotate=90
Return
BezelDraw()
FadeInExit()
BezelExit()
Process("WaitClose", executable)
FadeOutExit()
ExitModule()
CloseProcess:
Process, Close, %executable%
FadeOutStart()
Sleep, 300
if winc_presses = 2 ; The key was pressed twice
SendInput {Esc}{Esc}
Return
Reste également la possibilité
à condition de posséder les fichiers lst nécessaires au démarrage des
ROMs bin ou dat
nullDC_Naomi-r150.zip
https://1fichier.com/?ixal3h4udiem24kt2e6r
null_DC.png
https://1fichier.com/?a4mgr9rhxthgd3dwtkfj
exemple LST:
Nom du jeu
"bin-file-name", 0x0000000, <longueur du bin-file-name>
- Regardez la taille du fichier
(Propriétés du clic droit)
copiez le nombre en octets
puis dans la calculatrice windows
dans la vue menu sélectionnez scientifique
collez le nombre
et cliquez dans HEX
puis changez 0x0000000 en l'
exemple de valeur HEX souhaité :
Game123456 "Game123456", 0x0000000, 0x0 "0000000" (Insérez la valeur HEX souhaitée dans le devis)
exemple:
Game123456
"Game123456.bin or dat", 0x0000000, 0x01234567
ROMs.sp|tap|tzx
Sinclair ZX Spectrum|LibRetro_SPECZX|fuse_libretro|spectrum
Edition: D1
Découvrez The Spectrum, un magnifique chef-d’œuvre digne d’une galerie d’art, orné des couleurs de l’arc-en-ciel qui le caractérisent. Cette machine à l’apparence excentrique et amusante redonne vie aux joies des jeux accessibles à tous, proposant ainsi une expérience dont les jeux modernes ne disposent plus.
Avec une esthétique intemporelle et une personnalité flamboyante, The Spectrum n’est pas qu’une simple réplique de sa version iconique des années 80, c’est une œuvre d’art qui offre à chacun un sentiment nostalgique et une aventure ludique
Revivez la magie.
Manette de jeu haute précision USB à 8 boutons
Compatible avec THEC64, THEC64 Mini, THEA500 Mini, THE400 Mini, The Spectrum, PC, Mac & Linux"
Run PSVITA on PC
/PROCESS/
Download the emulator, then install the "firmware" in Vita3K. For the games in Vita3k install the VPK or ZIP games (MaiDump), if that does not work well, the other method consists in placing the games (MaiDump) decompress under Local Disk C, users, ***, AppData ( Hidden folder), Roaming, Vita3K, Vita3K, ux0, app
Screenshots
Un camion blindé rempli d'argent est abandonné dans un garage, et vous n'avez que quelques secondes pour remplir votre sac à dos avant que la police n'arrive. Quelques billets s'envolent derrière vous alors que vous courrez vers l'ascenseur. Lorsque vous arrivez sur le toit, un acolyte s’échappe par la tyrolienne, mais vous choisissez une route plus directe et faites le saut de l’ange depuis le bord de la toiture.
Votre parachute s’ouvre. Les balles sillent alors qu’elles vous frôlent de beaucoup trop près. Dès que vos pieds touchent le sol, c’est un sprint endiablé vers la fourgonnette de fuite. Les sirènes hurlent. Les flics sont à vos trousses. C’est à ce moment que vous remarquez l’immense grue en chute libre vers le sol. Tout cela fait partie du quotidien d’un joueur de Battlefield Hardline.

CONSOLE DE JEUX
Type de produit : PRELOADED_ELECTRONIC_GAME
Marque: SNK
Console Retro Neo Geo Mini - Edition Limitée de Noël
Neo·Geo. Ce nom mythique résonne encore pour tout passionné comme synonyme de plaisir, de bonheur, de qualité, mais aussi de frustration (de ne pas avoir pu se l'offrir). Plus de 30 ans après sa première apparition, « La Rolls-Royce des consoles » comme la surnommait la presse spécialisée française, a suscité plus de convoitise qu'aucune autre et hante encore bon nombre d'esprits. Cette dénomination traduisait une réalité et cristallisait un rêve qui à l'époque semblait illusoire, celui d'amener sans compromis l'arcade à la maison.
SNK Neo Geo Arcade Stick Pro, 20 jeux rétro NEOGEO sous licence officielle préchargés, Prise en charge de la console Neo Geo Pocket sortie HDMI
Neo Geo Patent
NEO GEO Anthologie Version Luxe - Pro-Gear Edition
Ecran TFT 3,5 pouces (env.8,9cm), 4:3
Alimentation via câble USB type C (Adaptateur secteur non fourni)
Sortie Vidéo HDMI "Mini" (Non fourni) Sortie Audio "jack" 1,5mm
Pads 6 boutons Neo Geo Mini USB Type C (vendus séparéments)
Livré dans le pack Neo Geo Mini International : La console Neo Geo Mini et ses 40 jeux, Un câble d'alimentation USB (1,5m), x2 Stickers Personnages SNK, x1 Sticker Logo NEO·GEO
SNK Console Neo Geo Mini Edition Internationale 40 Jeux Inclus
MVS Mini Borne Arcade - SNK, Une Mini au design de la célèbre machine d'arcade SNK NEO GEO MVS
45 jeux rétro Arcade Neo Geo parmi les plus populaires sont inclus
La baston sera à l'honneur avec les fameuses séries King Of Fighters, Samurai Shodown ou Fatal Fury, Mais aussi les incontournables Metal Slug
Un design rétro et compact avec un stick et 4 boutons plus Select et Start, sortie HDMI et 2 ports manettes intégrés en USB type C
Alimentation via port USB C (cable inclus), Hauts parleurs intégrés à la borne ainsi qu'une prise casque 3.5mm Stereo type Jack
Manette pour MVS Mini compatible Neo Geo Mini - SNK
NEOGEO: A VISUAL HISTORY ネオジオ~目で楽しむ軌跡~For a brief few years in the early 1990s, the NEOGEO was the pinnacle of video gaming. An elite, exclusive console that didn't just emulate the arcade experience, as so many 8 and 16-bit consoles tried to do. It was the arcade experience, pixel for pixel, on your TV at home. Born in the days before polygons, the NEOGEO was a staunchly 2D system that gave birth to some of gaming's most iconic franchises such as Fatal Fury, The King of Fighters, Samurai Shodown and, of course, Metal Slug.
NEOGEO: A Visual History is the first officially licensed NEOGEO art book of its kind to be released in the English language. A pictorial celebration of all things NEOGEO, it's crammed full of beautiful images split into dedicated chapters, including Hardware, Box Art, Character and Concept Art, and Pixel Art. This imagery has been collated and photographed from all over the world, then handpicked to appear in this unique and exclusive volume.
NEOGEO: A Visual History also features official interviews with key staff integral to the NEOGEO's history, including producer Yasuyuki Oda, artist Tatsuhiko Kanaoka (Falcoon) and composer Hideki Asanaka (sha-v).
The book weighs in at a healthy 400 pages in length, A4 in size, and is available in hardback only. Metallic gold ink is used throughout and the binding employs thread rather than glue, so it will be much more durable and can open flat, minimising imagery lost in the binding. Produced using the very best in print techniques, it will happily grace any gamer's coffee table.
NEOGEO: A Visual History promises to be a real collector's item for all fans of the NEOGEO system and of classic gaming in general. It provides a fascinating insight into the world of the mystical NEOGEO console – something that was so unobtainable for many of us back in the '90s.
About the publisher:
Bitmap Books work with the world's most experienced writers, designers and gaming experts to create meticulously researched, visually ambitious retro gaming books. As a design-led publisher, visual quality matters to us. We don’t just obsessively pursue the best printing quality currently available. We want to constantly push the envelope when it comes to expectations about printing techniques.
NEOGEO Mini Arcade édition Internationale
40 Jeux SNK Classiques Préinstallés: The King of The Fighters / Metal Slug, etc., Écran LCD 3,5” Clair Intégré/HDMI/2 Ports Gamepad/Cadeaux [SNK Authorised]
🎮【40 Jeux SNK Neogeo Préinstallés】: Neogeo Mini International intègre 40 chefs - d'œuvre de jeu Neogeo tels que [King Of Fighters], [Samurai Shodown], [Fatal Fury] and [Metal Slug].
🎮【Léger et Portable】: le Neogeo Mini est assez petit pour tenir dans la paume de votre main (taille: W135mm x D108mm x H162mm). Avec un poids total de 390 grammes et une alimentation USB (Type-C), vous pouvez utiliser une alimentation portable où que vous soyez.
🎮 【Plug and Play】: Aucune installation compliquée ou connexion Internet n'est requise, et aucune carte et bande ne doivent être insérées. Facile à installer et à utiliser.
🎮【Prise en charge de la sortie HDMI et de la connexion au Contrôleur externe】: Le neo GEO Mini international dispose d'un port HDMI, de 2 connexions au Contrôleur externe et d'une prise casque. Le Neo Nego Mini peut être connecté à un téléviseur via une entrée HDMI. La manette de Jeu Neo GEO et le câble HDMI sont vendus séparément et ne sont pas inclus dans l'emballage du NEO GEO Mini international.
🎮 【Fonction de chargement / sauvegarde instantanée intégrée】: Neo GEO Mini international dispose d'une fonction de chargement / sauvegarde instantanée intégrée. Vous pouvez enregistrer votre progression de jeu actuelle ou charger un profil précédent dans le menu. Sur [Neogeo] Mini international, vous pouvez jouer n'importe où, facilement et avec plaisir.
VISCO Mini Arcade Bartop
Le Mini Bartop Arcade VISCO contient 12 jeux préinstallés, une collection de grands classiques du célèbre studio Japonais ayant fait les beaux jours de la Neo Geo SNK et des salles d’Arcade pendant une des plus glorieuse époque de l’histoire des jeux vidéo !
Découvrez ou rejouez au shoot’em Up mythique Andro Dunos, L’éternel Ganryu, l’inimitable Breaker’s Revenge ou encore Neo Drift Out et Captain Tomaday il y en a pour tous les goûts et pour de longues heures de jeu « vintage » !
Il est équipé d’un écran HD LCD de 8 pouces (20cm), d’un panel Stick + 4 boutons aux normes standards de l’Arcade, d’un port USB, d’une sortie HDMI et d’une sortie audio stéréo.
Il supporte le jeu à 2 joueurs grâce à son port USB pour connecter une manette en plus. C’est plus amusant de partager votre expérience de jeu avec votre famille ou vos amis.
Un design soigné et fidèle à l’esprit rétro qui rend hommage aux licences Visco des années 90. Conçu et fabriqué par les créateurs du déjà célèbre Bartop MVSX de SNK
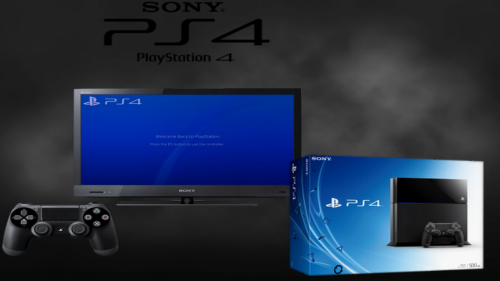
Console PS4 500
Go - édition limitée + Metal Gear Solid V: The Phantom Pain - édition day one
An open-source PS4 compatibility layer (emulator) written with Free Pascal
Ce projet est actuellement à ses débuts et a été lancé pour le plaisir.
Bâtiment
Compilateur Free Pascal : 3.3.1 (utiliser fpcupdeluxe avec trunk), x86_64 uniquement.
Lazarus : version 2.0.0 et supérieure, x86_64 uniquement.
Configuration minimale requise
Système d'exploitation : Windows 7 SP1 x64 et versions ultérieures
Processeur : x64, prise en charge AVX2
GPU : prise en charge de l’API Vulkan
Suivi de la compatibilité des jeux
https://github.com/red-prig/fpps4-game-compatibility/issues
Agencement des commandes
Pour passer en mode plein écran sans bordure, appuyez sur Alt+Entrée.
fpPS4 prend en charge nativement les manettes compatibles XInput. Vous pouvez reconfigurer les boutons en appuyant sur Échap pendant l'émulation. Vous pouvez également utiliser un clavier comme périphérique d'entrée. Le pavé tactile d'une DualShock 4 est émulé par la souris.
Disposition du clavier :
Bouton de la manette PS4
Bouton du clavier
Bâton gauche levé
W
Joystick gauche gauche
UN
Joystick gauche vers le bas
S
Joystick gauche droit
D
Bâton droit levé
je
Joystick droit gauche
J
Joystick droit vers le bas
K
Joystick droit
L
OPTIONS
Entrer
Haut de la croix directionnelle
Flèche vers le haut
Croix directionnelle gauche
Flèche gauche
Bas sur la croix directionnelle
Flèche vers le bas
Croix directionnelle droite
Flèche droite
Triangle
Pavé numérique 8
Carré
Pavé numérique 4
Croix
Pavé numérique 2
Cercle
Pavé numérique 6
L1
Q
L2
1
L3
Z
R1
E
R2
4
R3
C
shadPS4 est un émulateur PlayStation 4 primitif pour Windows, Linux et macOS, écrit en C++.
1. Exigences
1.1 Configuration système minimale requise
processeur
Un processeur doté d'au moins 4 cœurs et 6 threads
Fréquence supérieure à 2,5 GHz
Un processeur prenant en charge la configuration de base x86-64-v3.
Intel : Génération Haswell ou plus récente
AMD : Génération Excavator ou plus récente
Apple : Rosetta 2 sur macOS 15.4 ou version ultérieure
GPU
Une carte graphique avec au moins 2 Go de VRAM
Vulkan 1.3 avec VK_KHR_swapchainles VK_KHR_push_descriptorextensions
BÉLIER
8 Go de RAM ou plus
Système d'exploitation
Au minimum Windows 10, Ubuntu 22.04 ou macOS 15.4
1.2 Conducteurs requis
Avant de poursuivre, assurez-vous que vos pilotes sont à jour :
Découvrez la marque de votre carte graphique.
Téléchargez le fichier approprié à votre système d'exploitation :
Nvidia : https://www.nvidia.com/en-us/drivers
AMD : https://www.amd.com/en/support/download/drivers.html
Intel : https://www.intel.com/content/www/us/en/download-center/home.html
2. Installation
2.1 Télécharger shadPS4QtLauncher
CONSEIL
Ce guide est conçu pour shadPS4 QtLauncher, qui offre une interface graphique pour utiliser shadPS4 et peut être téléchargé ici. Les versions disponibles au téléchargement fonctionnent comme un outil en ligne de commande, ce que les utilisateurs plus expérimentés préféreront peut-être. Vous pouvez également télécharger la dernière version directement depuis GitHub .
Suivez ce lien
Vous y trouverez les options de téléchargement (lanceur Qt de shadPS4, version de shadPS4 avec Qt, version de shadPS4 avec interface en ligne de commande). Il est recommandé de télécharger le lanceur Qt de shadPS4 adapté à votre système d'exploitation.
Extrayez l'archive téléchargée à l'emplacement de votre choix.
AVERTISSEMENT
N'extrayez pas shadPS4 et ne placez aucun de ses répertoires personnalisés dans un dossier nécessitant des privilèges supplémentaires ! Cela pourrait entraîner divers problèmes d'émulation étranges, voire empêcher complètement le fonctionnement de shadPS4.
Pour Windows :
Tout d'abord, vous aurez besoin de Microsoft Visual C++ 2022 pour l'exécuter.
Téléchargez-le ici : https://aka.ms/vs/17/release/vc_redist.x64.exe et installez-le avant de passer à l’étape suivante.
Ouvrez le dossier extrait et exécutez shadPS4QtLauncher.exe.
Pour Linux :
Ouvrez le dossier extrait.
Commencer shadPS4QtLauncher-qt.AppImage.
Pour macOS :
Ouvrez le dossier extrait.
Une fenêtre devrait apparaître avec le texte shadPS4QtLauncher Not Opened, appuyez dessus Done.
Accédez à l'icône Apple en haut à gauche de votre écran et appuyez dessus. Dans le menu qui apparaît, sélectionnez l'option «System Settings Créer un menu ».
Une fois l' System Settingsapplication ouverte, accédez à l' Privacy & Securityonglet et faites défiler vers le bas jusqu'à ce que vous voyiez le message.shadPS4QtLauncher was blocked to protect your Mac
À droite du message, il y a un bouton appelé Open Anyway, appuyez dessus.
Une nouvelle fenêtre devrait apparaître, indiquantOpen shadPS4QtLauncher? : appuyez sur le Open Anywaybouton et saisissez votre mot de passe ou utilisez votre empreinte digitale pour confirmer.
3. Installez les jeux et le contenu associé
PRUDENCE
Les jeux, les mises à jour et les contenus téléchargeables sont protégés par le droit d'auteur et doivent être extraits de votre propre copie du jeu.
L'émulateur est maintenant lancé. Vous pouvez maintenant installer votre ou vos premiers jeux.
Utilisez un outil d'extraction de fichiers (application/payload) sur votre PS4 jailbreakée pour récupérer les fichiers de vos jeux. La plupart de ces outils sont fournis avec un mode d'emploi.
Itemzflow est une application homebrew facile à utiliser que vous pouvez installer sur votre PS4 jailbreakée pour cela, bien que de nombreuses autres solutions existent.
Préparez votre fichier de sauvegarde de jeu en vous assurant que le dossier a le bon format de nom : CUSAxxxxx(où xxxxxse trouve le numéro de série du jeu).
Si vous utilisez Itemzflow, votre dossier de jeu aura déjà le nom correct.
Trouvez le répertoire d'installation du jeu indiqué au premier démarrage. Vous le trouverez dans les paramètres.
Récupérez le fichier de sauvegarde de votre jeu et copiez-le dans le répertoire d'installation du jeu.
Une fois terminé, le jeu devrait apparaître dans l'interface utilisateur.
La procédure d'installation des mises à jour reste la même :
Préparez votre fichier de sauvegarde de la mise à jour du jeu en vous assurant que le dossier a le bon format de nom : CUSAxxxxx-patch/CUSAxxxxx-UPDATE
Si vous utilisez Itemzflow, votre dossier de mise à jour aura déjà le nom correct.
Copiez la mise à jour du jeu dans le répertoire d'installation de votre jeu.
Une fois l'installation terminée, le jeu devrait afficher la version de la mise à jour installée dans l'interface utilisateur.
L'installation des DLC est légèrement différente :
Accédez à votre répertoire de contenu supplémentaire défini ; vous l'avez configuré lors du premier démarrage de shadPS4.
Pour les utilisateurs de SDL, vous devrez ajouter manuellement un chemin de contenu supplémentaire au paramètre « addonInstallDir » de votre config.tomlfichier.
Créez un dossier dans votre répertoire de contenu additionnel et donnez-lui le même nom que votre dossier de jeu précédent.
Copiez vos fichiers DLC extraits dans le dossier que vous avez créé.
Une fois l'installation terminée, votre contenu téléchargeable installé devrait apparaître dans le jeu.
4. Extraction des modules de firmware
shadPS4 peut charger certains modules dans :
LLE modeÉmulation de bas niveau : utilisation directe des fichiers firmware de la console ;
HLE modeÉmulation de haut niveau : Fourniture d’une réimplémentation du module original dans le code source de l’émulateur.
Bien que plusieurs modules aient été réimplémentés, certains restent à implémenter. Pour contourner ce problème, nous pouvons charger directement les fichiers du firmware afin d'améliorer la compatibilité avec les jeux.
Vous trouverez ci-dessous la liste des modules de firmware actuellement utilisés :
Modules
libSceCesCs.sprx
libSceFont.sprx
libSceFontFt.sprx
libSceFreeTypeOt.sprx
libSceJson.sprx
libSceJson2.sprx
libSceLibcInternal.sprx
libSceNgs2.sprx
libSceUlt.sprx
Pour extraire vos modules de firmware :
Activez un serveur FTP sur votre PS4
Ouvrez un client FTP sur votre ordinateur (comme FileZilla).
Saisissez l'adresse IP et le port du serveur FTP dans votre client FTP.
Une fois connecté, accédez à l'emplacement indiqué /system/common/lib/sur votre PS4 et copiez tous les fichiers que vous voyez dans un dossier de votre appareil.
Une fois extraits, vous pouvez les placer dans le sys_modulesdossier shadPS4.
Vous pouvez trouver ce dossier en faisant un clic droit sur un jeu, en choisissant l'option correspondante Open Folder -> Open Log Folder, puis en revenant au dossier précédent. Le sys_modulesdossier devrait alors s'y trouver.
5. Déposer la clé du trophée
En utilisant la configuration FTP de l'étape précédente, accédez à l'emplacement indiqué /system/vshsur votre PS4 et copiez le fichier nommé SceShellCore.elfsur votre appareil.
Téléchargez tropy_key_export.zip et extrayez-le où vous le souhaitez.
Crédits à https://github.com/red-prig pour la création de cet outil.
Cet outil est conçu pour Windows. Les utilisateurs Linux peuvent utiliser Wine pour ouvrir ce programme, mais il n'existe pas encore d'option native pour les utilisateurs Mac.
Faites glisser votre fichier déposé SceShellCore.elfsur tropy_key_export.exe, une fenêtre d'invite de commandes apparaîtra affichant la clé du trophée.
Entrez la clé du trophée dans les paramètres de votre shadPS4, ou directement dans votre shadPS4 config.toml.
Une fois ces étapes terminées, shadPS4 débloquera des trophées au fur et à mesure que vous jouerez.
6. Configurer l'émulateur
Félicitations, votre émulateur possède tous les fichiers nécessaires pour exécuter vos jeux !
Vous pouvez maintenant configurer les paramètres de l’émulateur ici .

MEmu := "Final Burn Alpha"
MEmuV := "v0.2.97.42"
MURL := ["http://www.barryharris.me.uk/"]
MAuthor := ["djvj"]
MVersion := "2.0.4"
MCRC := ""
iCRC := ""
MID := ""
MSystem := ["Capcom Play System","Capcom Play System II","Capcom Play System III","Cave","Data East","Psikyo","Technos Arcade","Toaplan","Irem M62","Kaneko","NMK16","Konami","PolyGame Master IGS","SNK Neo Geo MVS"]
;----------------------------------------------------------------------------
StartModule()
FadeInStart()
primaryExe := new Process(emuPath . "\" . executable) ; instantiate emulator executable object
emuPrimaryWindow := new Window(new WindowTitle(,"FB Alpha")) ; instantiate primary emulator window object
emuLoadingWindow := new Window(new WindowTitle(,"32770"))
If StringUtils.Contains(systemname,"NEC TurboGrafx-16|NEC PC Engine|NEC SuperGrafx|Sega Mega Drive")
{ ; The object controls how the module reacts to different systems. FBA can play a lot of systems, but the romName changes slightly so this module has to adapt
mType := Object("NEC TurboGrafx-16","tg_","NEC PC Engine","pce_","NEC SuperGrafx","sgx_","Sega Mega Drive","md_")
ident := mType[systemName] ; search 1st array for the systemName identifier mednafen uses
If !ident
ScriptError("Your systemName is: " . systemName . "`nIt is not one of the known supported systems for this FBA module: " . moduleName)
}
fbaRomName := (If ident ? ident : "") . romName ; FBA requires an identifier prefix attached to the romName which tells FBA what system to run
hideEmuObj := Object(emuLoadingWindow,0,emuPrimaryWindow,1)
HideAppStart(hideEmuObj,hideEmu)
primaryExe.Run(" """ . fbaRomName . """")
emuPrimaryWindow.Wait()
emuPrimaryWindow.WaitActive()
; This loops detects the rom loading window and breaks when it's done. Only here to avoid using too many WinWait commands from all the odd flashing the emu does.
Loop {
If emuLoadingWindow.Active()
Break
TimerUtils.Sleep(50,0)
}
; This loop detects when the emu window is done flashing back and forth between your FE and the emu window and is actually in the game.
Loop {
If (x = 10)
Break
If emuPrimaryWindow.Active()
x++
emuPrimaryWindow.Activate()
TimerUtils.Sleep(50,0)
}
HideAppEnd(hideEmuObj,hideEmu)
FadeInExit()
emuPrimaryWindow.Activate()
CloseProcess:
FadeOutStart()
emuPrimaryWindow.Close()
TimerUtils.Sleep(50,0)
Run, wmic process where name='RocketLauncher.exe' delete
ExitModule()
~Escape::
Process, Close, fba64.exe
ExitAPP
return
Final Burn Alpha "config keys"
1) Pour définir une configuration par défaut, nous allons prendre un jeu « modèle ». Nous allons définir les touches pour ce jeu et les recopier pour tout notre set. Dans mon cas, j'ai choisi Street Fighter 2, car ce jeu utilise 6 boutons, soit le grand maximum dans 99 % des jeux d'arcades. Mais si vous prévoyez de ne jouer qu'à des jeux utilisant trois boutons, vous pouvez choisir un jeu n'utilisant que trois boutons.
Ouvrez la rom de Street Fighter 2, allez dans game>map game input et définissez les contrôles comme suit :
P1 up: Joystick haut
P1 down: Joystick bas
P1 left: Joystick gauche
P1 droite: Joystick droit
P1 weak punch : bouton 1
P1 medium punch : bouton 2
P1 strong punch : bouton 3
P1 weak kick : bouton 4
P1 medium kick : bouton 5
P1 strong kick : bouton 6
Coin1 bouton 7
P1 start bouton 8
Notez bien que les �bouton 1�, �bouton 2�, etc.� seront les futurs paramètres par défaut de votre émulateur !
Ne TOUCHEZ SURTOUT PAS aux trois menus du bas (laissez les en « blanc ») et cliquez sur ok
Testez le jeu pour voir si votre configuration a bien été prise en compte et fermez la rom et l'émulateur.
2) Rendez vous dans le dossier config>games et trouvez le fichier correspondant à Street Fighter 2 (normalement c'est sf2). Copiez ce fichier dans le dossier preset et renommez le en « défaut » par exemple.
Ouvrez ensuite ce fichier et modifiez le comme suit :
Remplacez tous les noms propres au jeu comme bouton 1 pour « weak punch », bouton 4 pour « medium kick » par « fire 1 », « fire 4 » etc� « fire » étant une dénomination générique reconnue par tous les jeux et tous les systèmes. Ne touchez SURTOUT PAS aux valeurs hexadécimales (les « switch »), sinon c'est comme si vous n'aviez rien fait� Vous devriez avoir à la fin un fichier qui se présente comme ceci :
input "P1 Coin" switch 0x4085
input "P1 Start" switch 0x4084
input "P1 Up" switch 0x4012
input "P1 Down" switch 0x4013
input "P1 Left" switch 0x4010
input "P1 Right" switch 0x4011
input "P1 fire 1" switch 0x4080
input "P1 fire 2" switch 0x4083
input "P1 fire 3" switch 0x4089
input "P1 fire 4" switch 0x4081
input "P1 fire 5" switch 0x4082
input "P1 fire 6" switch 0x4088
Sauvegardez votre fichier et retournez dans l'émulateur, chargez un jeu au hasard.
3) Dans « map game inputs », dans les boites du bas choisissez « player 1 » dans la seconde boite il devrait apparaître dans le menu déroulant le fichier « défaut » que vous avez crée juste avant dans les presets. Sélectionnez le. Dans la fenêtre de droite, si on vous le propose, choisissez une option. Perso, je prends toujours « auto-center » ça marche très bien.. Cliquez sur « make default » et les valeurs que vous avez définies sont attribuées. Vérifiez si les contrôles sont conformes à vos souhaits en testant le jeu ; si vous avez bien tout suivis jusque la et que vous étiez sûr de votre config ça devrait être bon. Sinon le cas échéant rééditez « map game input » avec un jeu qui vous convient mieux que Street Fighter 2 et recommencez la procédure depuis l'étape 1�
4) Ensuite rechargez un autre jeu et vérifiez dans « map game input ». Théoriquement, les contrôles devraient être ceux que vous avez définis par défaut et vous ne devriez rien avoir à toucher : les contrôles par défaut sont configurés !
Même si ces réglages conviennent à la plupart des jeux se jouant au joystick, certains jeux particuliers n'en tiendront pas compte. Les jeux neo-geo par exemple. Mais il suffit simplement pour ceux-ci de répeter l'étape 3 une seule fois. Pour les jeux de course et utilisant « volant » et/ou « pédales » c'est un peu plus compliqué ; et je ne peux que vous conseiller dans ces cas la d'utiliser les « preset » proposés par défaut par l'émulateur ou d'éditer les jeux un par un�Mais les plus courageux peuvent faire un nouvel ini spécial « jeux de courses» en suivant la procédure.
Capcom CPS1 (1988–1995): https://youtu.be/3Dhev0IFop8 Capcom CPS2 (1993–2003): https://youtu.be/1cpznsRrkz4 Capcom CPS3 (1996–1999): https://youtu.be/uUDSLZfYoM4 Cave (First generation: 1994–2001): https://youtu.be/QZYq0GfT5IA Data East DEC-0 (1980–1985), DEC-8 (1986-1988) and DECO IC16 (1987-1990): https://youtu.be/Rk4_GJ0VXr4 Galaxian based hardware (1979-1982) Irem M62 (1984-1986), M63 (1984-1985), M72 (1987-1990), M90 (1991), M92 (1991-1994) and M107 hardware (1993-1995) Kaneko 16 (Kaneko AX System. 1991-1995.)
Neo Geo (MVS hardware: 1990–2004): https://youtu.be/Tii7q0XIxrw
NMK16 (Nihon Maicom Kaihatsu. 1989-2001): https://youtu.be/byi-48cFb24 Pacman based hardware (1980-1983) PGM (PolyGame Master. 1997–2005): https://youtu.be/22scpU-20wg Psikyo 68EC020 (1st Generation: https://youtu.be/etUWGa48oa0 1993–1996) and SH-2 (1997–2002) based hardware Sega System 1 (1983–1987), System 16 (And similar. 1985–1994), System 18 (1989–1992), X-Board (1987–1990), Y-Board (1988–1991) Super Kaneko Nova System (1996–2002): https://youtu.be/Xm90a1R5xaY Toaplan (Company: 1984-1994. V1 hardware: 1988-1991; V2: 1991-1999.): https://youtu.be/GJamPY-DPR8
MEmu := "Final Burn Alpha"
MEmuV := "v0.2.97.42"
MURL := ["http://www.barryharris.me.uk/"]
MAuthor := ["djvj"]
MVersion := "2.0.4"
MCRC := ""
iCRC := ""
MID := ""
MSystem := ["Capcom Play System","Capcom Play System II","Capcom Play System III","Cave","Data East","Psikyo Arcade","Technos","Toaplan","Irem","Kaneko","Konami","PolyGame Master IGS","SNK Neo Geo AES","The King of Fighters Collection"]
;----------------------------------------------------------------------------
StartModule()
FadeInStart()
primaryExe := new Process(emuPath . "\" . executable) ; instantiate emulator executable object
emuPrimaryWindow := new Window(new WindowTitle(,"FB Alpha")) ; instantiate primary emulator window object
emuLoadingWindow := new Window(new WindowTitle(,"32770"))
If StringUtils.Contains(systemname,"NEC TurboGrafx-16|NEC PC Engine|NEC SuperGrafx|Sega Mega Drive")
{ ; The object controls how the module reacts to different systems. FBA can play a lot of systems, but the romName changes slightly so this module has to adapt
mType := Object("NEC TurboGrafx-16","tg_","NEC PC Engine","pce_","NEC SuperGrafx","sgx_","Sega Mega Drive","md_")
ident := mType[systemName] ; search 1st array for the systemName identifier mednafen uses
If !ident
ScriptError("Your systemName is: " . systemName . "`nIt is not one of the known supported systems for this FBA module: " . moduleName)
}
fbaRomName := (If ident ? ident : "") . romName ; FBA requires an identifier prefix attached to the romName which tells FBA what system to run
hideEmuObj := Object(emuLoadingWindow,0,emuPrimaryWindow,1)
HideAppStart(hideEmuObj,hideEmu)
primaryExe.Run(" """ . fbaRomName . """")
emuPrimaryWindow.Wait()
emuPrimaryWindow.WaitActive()
; This loops detects the rom loading window and breaks when it's done. Only here to avoid using too many WinWait commands from all the odd flashing the emu does.
Loop {
If emuLoadingWindow.Active()
Break
TimerUtils.Sleep(50,0)
}
; This loop detects when the emu window is done flashing back and forth between your FE and the emu window and is actually in the game.
Loop {
If (x = 10)
Break
If emuPrimaryWindow.Active()
x++
emuPrimaryWindow.Activate()
TimerUtils.Sleep(50,0)
}
HideAppEnd(hideEmuObj,hideEmu)
FadeInExit()
emuPrimaryWindow.Activate()
CloseProcess:
FadeOutStart()
emuPrimaryWindow.Close()
TimerUtils.Sleep(50,0)
Run, wmic process where name='RocketLauncher.exe' delete
ExitModule()
~Escape::
Process, Close, fba64.exe
ExitAPP
return
Final Burn Alpha (x64 NT6) v0.2.97.43 destiné à Windows Vista/7/8/8.1/10/11 ... (NT6.X)est un émulateur de jeu vidéo d'arcade basé sur l'émulateur Final Burn, qui émule différents systèmes tels que l'
Arcades
Atari
Capcom
Capcom Play System, CPS-2 et CPS-3
Cave
Galaxian:
Le Galaxian est un système d'arcade, destiné aux salles d'arcade, créé par la société Namco en 1979 et similaires
Irem
Kaneko 16
Konami
Neo-Geo MVS
Pacman et similaires
PGM
Psikyo 68EC020 et similaires
Sega: System 1, 16, 18 et 32, X-Board et Y-Board
Toaplan 1 et 2
Taito F2, X et Z
support.zip
7.47 Go
https://1fichier.com/?vz5ldaln6jzw4rcg7xuu
et les Consoles
Fairchild Channel F
ColecoVision
Neo-Geo AES (Advanced Entertaiment System)
Neo-Geo CD
Neo-Geo Pocket
Nintendo NES
Nintendo Famicom Disk System
Mega Drive
Sega SG-1000
Sega Game Gear
Sega Master System
Super NES (préliminaire et en mode debug)
PC Engine
TurboGrafx-16
SuperGrafx
Ordinateurs
MSX
Sinclair ZX Spectrum
Il fonctionne également sous les dépendances Linux (distro Ubuntu, Debian, Kali Linux,Pengwin, Fedora Remix, OpenSuse & Alpine WSL) / OSX via QT
Informations
Créateur
Haavard Nord et Eirik Chambe-Eng
Développé par
Trolltech (1991–2008)
Nokia (2008–2011)
Qt Project (2011–présent)
Digia (2012–2014)
The Qt Company (2014–présent)
Première version
20 mai 1995
Dernière version
6.8.1 (2 décembre 2024)
Dépôt
code.qt.io/cgit/qt/qtbase.git
État du projet
Actif
Écrit en
C++
Système d'exploitation
GNU/Linux, Microsoft Windows, macOS, BSD, Android et iOS
Environnement
GNU/Linux, Windows,
Windows CE, Mac OS X, BSD, Unix, Symbian OS, Maemo, Tizen, Genode
Formats lus
Qt Message, Qt User Interface, Qt Translation source file, Qt Assistant Documentation Profile, Qt Assistant Content File, Qt Resource Collection et Qt Jambi User Interface
Formats écrits
Qt Message, Qt User Interface, Qt Translation source file , Qt Assistant Documentation Profile, Qt Assistant Content File, Qt Resource Collection et Qt Jambi User Interface
Type
création d'interfaces graphique
Licence
GNU GPL v2, GNU LGPL 3 à partir de Qt 5.7
Documentation
doc.qt.io
Site web
www.qt.io
ainsi que des portages sur Android et
Dingux - Écran de démarrage
Promoteur
Boubou
Architectures
mips x86
Modèle de développement
Logiciel gratuit
Sorti en
25 juin 2009 (15 ans)
Famille
Rockbox
Cœur
Linux
Licence
GNU GPL / Autres
État de développement
Actuel
Site web
www.dingux.com
Origine commune
Espagne
Une histoire de licences libres… et de gros sous.
Le panel arcade de la discorde…
Capcom n’y est pour pas grand chose dans cette histoire : ils ont cédé les droits de leurs jeux à Koch Media, qui eux, ont décidé de s’appuyer sur le formidable travail de l’équipe de FinalBurn Alpha
Seulement voilà : comme beaucoup de projets dits « Open Source », FinalBurn Alpha est libre et gratuit, oui… mais pas dans le cadre d’une utilisation commerciale. Or, avec le Capcom Home Arcade, Koch Media est en plein dans ce cas de figure…
Sauf que… si Koch Media dispose bien de la licence des jeux Capcom, c’est un peu plus compliqué concernant la licence de FinalBurn Alpha… car c’est ce point qui pose problème. Koch Media, voulant probablement bien faire, a acheté la licence et les droits à Barry Harris, le « chef de projet »/développeur de FinalBurn Alpha. Sauf que :
la licence de FinalBurn Alpha aurait été vendue dans la plus grande discrétion, sous le manteau, au nez et à la barbe des autres développeurs (bénévoles, faut-il le rappeler…) du projet…
… sans aucun accord avec l’équipe même de FinalBurn Alpha, ni même avec les projets MAME (« Multiple Arcade Machine Emulator ») ou Final Burn, dont FBalpha tire une partie du code (et hérite donc de leurs licences d’utilisation…)…
…et en totale violation des licences même du propre projet Final Burn Alpha !
Car oui, ce sont donc bien 3 licences qui ont été ouvertement violées, celle de FinalBurn, celle de FinalBurn Alpha et celle de MAME, toutes trois dites « libres et open source », mais uniquement dans le cadre d’une utilisation personnelle et non commerciale... « FB Alpha est un émulateur distribué sous une licence stipulant spécifiquement que l’on ne peut ni le vendre, ni le louer. »
"Apogee BK-01"
Emulator Mess & MessUI 0.195 nonag 64 bits
Module MESS.ahk :
add these lines
Apogee BK-01|apogee
}Else If messID = apogee ; Apogee BK-01
{ If romExtension != .rka
param1 := " -cass """ . romPath . "\" . romName . romExtension . """"
RUN is work:
Enter I
Press Scroll Lock
Press TAB
Play Tape Control
Press Scroll Lock
Enter G
Sous messui, allez dans Options, onglet Répertoires..., sous Afficher les répertoires ; ROMs, ajoutez-les en cliquant sur Insérer le dossier contenant vos jeux et le BIOS. La détection est effectuée. Placez les fichiers bios.zip, xml et hsi du sous-dossier ROMs intv dans le dossier hash. Exécutif : exec.bin (obligatoire) : intv.zip Graphiques (GROM) : ro-3-9503-003.u21 (requis) : stic.zip Intellivoice : sp0256-012.bin : intvecs.zip Adaptateur d'ordinateur ECS : ecs_rom.20, ecs_rom.70, ecs_rom.e0 : Manquant Exécutif Sears Super Video Arcade : searsexc.bin : intvsrs.zip Intellivision II exécutif : ro-3-9506-010.ic6 : Manquant Lancez MAME et recherchez « intellivision » et démarrez l'un des émulateurs intellivision (il y en a six). Le jeu se lance sur un écran noir. Pour charger une ROM de cartouche, appuyez sur la touche Tab, sélectionnez « Gestionnaire de fichiers », puis naviguez jusqu'à sélectionner un fichier ROM de cartouche Intellivision, qui peut se trouver sur n'importe quel lecteur. MAME utilise des « listes de logiciels » et gère une base de données locale des sommes de contrôle et des mappages mémoire des ROM de cartouches. Ces fichiers ROM se trouvent dans les ensembles de ROM de la liste de logiciels MAME. MAME prend également en charge les fichiers binaires non répertoriés s'ils utilisent le mappage mémoire standard Mattel pour les cartouches. Il ne prend pas en charge les fichiers de mappage mémoire .cfg utilisés par d'autres émulateurs Intellivision. Les fichiers ROM au format .rom d'Intellicart sont également pris en charge, mais pas la variante .rom de CC3. Pour consulter et configurer les mappages de manettes, avec l'émulateur Intellivision en cours d'exécution, appuyez sur Tab et sélectionnez « Entrée (cette machine) ». Notez que MAME enregistre ces paramètres dans un fichier .cfg correspondant, situé dans le dossier CFG. Vous pouvez utiliser de véritables manettes Intellivision avec un adaptateur USB Intellivision. Autres fonctions par défaut de l'émulateur : Tab - menu de configuration ; Échap - quitter l'émulateur ; P - mettre l'émulateur en pause ; Alt+Entrée - basculer en plein écran ; F3 - réinitialiser l'émulateur ; Maj+F3 - réinitialisation matérielle ; F7 - charger une sauvegarde ; Maj+F7 - créer une sauvegarde ; F8 - diminuer le saut d'images (0 image recommandé) ; F9 - augmenter le saut d'images ; F10 - activer/désactiver la limitation de vitesse ; F11 - activer/désactiver l'affichage de la vitesse ; Verr. défil. - activer/désactiver le clavier émulé (permet d'accéder au menu de configuration de la touche Tab).
Envoyer des commentaires
Letters.zip
Neo Kobe Emulator Pack
Neo Kobe emulator pack 2.jpg
Neo Kobe emulator pack 2013-08-17.7z
Neo Kobe emulator pack 2_thumb.jpg
Neo Kobe emulator pack.jpg
Neo Kobe emulator pack_thumb.jpg
__ia_thumb.jpg
neo-kobe-emulator-pack-2013-08-17.7z_meta.sqlite
neo-kobe-emulator-pack-2013-08-17.7z_meta.xml
Neo Kobe - Sharp X1 (2016-02-25).zip
Neo_Kobe_Sharp_X1_2016-02-25_meta.sqlite
Neo_Kobe_Sharp_X1_2016-02-25_meta.xml
Sharp X1.jpg
Sharp X1_thumb.jpg
__ia_thumb.jpg
nkpresents.gif
13cm.zip
ABA.zip
ASCII.zip
Aaru.zip
AbogadoPowers.zip
AcclaimJapan.zip
AcidPlan.zip
Active.zip
AdultInn.zip
Agumix.zip
AiShuppan.zip
AicSpirits.zip
Ail.zip
Aion.zip
Algolab.zip
AliceSoft.zip
Allex.zip
Altacia.zip
Altron.zip
Ambitious.zip
AmtSavan.zip
Ange.zip
Anjin.zip
Answer.zip
ApolloTechnica.zip
ApplePie.zip
Apricot.zip
Apros.zip
ArkhamProducts.zip
ArrowMicro-techs.zip
ArsysSoftware.zip
Artdink.zip
Artec.zip
Aypio.zip
BIOS.zip
BIT2.zip
BPS.zip
Backspin.zip
BananaSoft.zip
Banpresto.zip
Basement.zip
BashoHouse.zip
Bell-Da.zip
BetterVisualSystems.zip
BirdySoft.zip
BitTown.zip
BlackPackage.zip
Blucky.zip
BonbeeBonBon.zip
BondSoft.zip
Bothtec.zip
BrainGrey.zip
BroderbundJapan.zip
C-Lab.zip
C2Bros.zip
C2World.zip
C_Class.zip
Capcom.zip
CarryLab.zip
CatsPro.zip
ChampionSoft.zip
Chaos.zip
ChatNoir.zip
Clest.zip
CocktailSoft.zip
CocktailSoftFmc.zip
Colossus.zip
Compac.zip
Compilation.zip
Compile.zip
ComputerBrain.zip
CoreMagazine.zip
CosmosComputer.zip
CreamSoft.zip
CreoI.zip
Crowd.zip
CsWare.zip
Cuisse.zip
Curott.zip
Custom.zip
Cybelle.zip
DO.zip
Dance.zip
DataWest.zip
DengekiSoft.zip
DennouYamashiro-gumi-ComradeSystem.zip
Desire.zip
DexterSoft.zip
DezClimax.zip
DigitalTricks.zip
Directors.zip
Discovery.zip
DoA.zip
Dollhouse.zip
DottPlan.zip
DynamicPro.zip
EastCube.zip
Effat.zip
ElectronicArts.zip
ElectronicArtsVictor.zip
Enix.zip
Epic.zip
Ext.zip
FairyDust.zip
Fairytale.zip
FairytaleHardcover.zip
FairytaleRed-zone.zip
FairytaleXShitei.zip
Falcom.zip
FamilySoft.zip
Flat.zip
FlipFlop.zip
Foresight.zip
Forest.zip
Foster.zip
FourNine.zip
Frontier.zip
FugaSystem.zip
G.A.M.zip
GMF.zip
Gainax.zip
Gakken.zip
GameArts.zip
GameTechnopolis.zip
GamesExpress.zip
Garuda.zip
GeneralSoftware.zip
GeneralSupport.zip
Giga.zip
GimmickHouse.zip
Glams.zip
Glodia.zip
Gloria.zip
Gray.zip
Great.zip
Grocer.zip
Gust.zip
HappyTime.zip
Hard.zip
HarvestOne.zip
HeartSoft.zip
Hertz.zip
Hervest.zip
HimeyaSoft.zip
HobbyJapan.zip
Hokusho.zip
HomeData.zip
Hot-B.zip
HudsonSoft.zip
Hulinks.zip
HummingBirdSoft.zip
HyoutanProduction.zip
I.S.C.zip
Ice.zip
Ides.zip
Illusion.zip
IllusionCore.zip
Imagineer.zip
Inos.zip
Interheart.zip
Interprog.zip
Irem.zip
JHV.zip
Jam.zip
Janis.zip
JapanClaryBusiness.zip
JapanRoadAssociation.zip
Jast.zip
Juice.zip
KSK.zip
KSS.zip
KameshimaSangyo.zip
Katty.zip
Kawai.zip
Kinpukurin.zip
Koei.zip
Kogado.zip
Kohgakusha.zip
Konami.zip
Leaf.zip
Libido.zip
LipStar.zip
Log.zip
LoveGun.zip
LunarSoft.zip
M.M.S.zip
M.n.m.Software.zip
MaboroshiWare.zip
MacadamiaSoft.zip
MagicalCompany.zip
MainichiCommunications.zip
Masterpiece.zip
Matrix.zip
Maxima.zip
May-beSoft.zip
May-beSoftTruse.zip
MayfarSoft.zip
MebioSoftware.zip
MediaFactory.zip
Mediax.zip
Medic.zip
Medix.zip
Melody.zip
MiamiSoft.zip
MicroCabin.zip
MicroMouse.zip
MicroVision.zip
Micronet.zip
MicroproseJapan.zip
Microsoft.zip
Mink.zip
Miscellaneous.zip
Mischief.zip
Misty.zip
Moonchild.zip
Movic.zip
Mugen.zip
MuppetBox.zip
Musumeya.zip
NCS.zip
NIC.zip
Natsume.zip
NecAvenue.zip
NecHomeElectronics.zip
NecInterchannel.zip
Negative.zip
NewSystemHouseOh.zip
Nexton.zip
NexusInteract.zip
Nichibutsu.zip
NihonCreate.zip
Nikukyuu.zip
OS.zip
OcsHeaven.zip
OrangeHouse.zip
Outlaw.zip
OutouShobouIn-side.zip
PIL.zip
PSD.zip
PSK.zip
Pack-in-Video.zip
PalmTreeSoft.zip
PandoraBox.zip
PantherSoftware.zip
PcmComplete.zip
PeachSoft.zip
PearlSoft.zip
PegasusJapan.zip
PeppermintKids.zip
PersianSoft.zip
Petit.zip
PinkySoft.zip
PioneerLdc.zip
PistonSoft.zip
PixyBell.zip
Plantech.zip
PointGetter.zip
PoisonBreath.zip
PonyCanyon.zip
PonytailSoft.zip
PopcomSoft.zip
Pow.zip
ProIllusion.zip
Pumpie.zip
QueenSoft.zip
Quota.zip
R-Rate.zip
Raccoon.zip
RandomHouse.zip
RightStuff.zip
RingerBell.zip
RiruhisParty.zip
RiverhillSoft.zip
SPS.zip
SantaFe.zip
ScapTrust.zip
Scoop.zip
SeaLion.zip
Shambhala.zip
ShinjitsuPro.zip
ShodaiSangyo.zip
ShogakukanProduction.zip
ShuwaSystemTrading.zip
SierraOn-lineJapan.zip
Silence.zip
Silkys.zip
SoftHouseAladdin.zip
SoftPlan.zip
SoftStudioWing.zip
Softec.zip
Softpal.zip
SoftwareHouseParsley.zip
Sogna.zip
SomethingGood.zip
Sorciere.zip
SpaceProject.zip
SpectrumHolobyteJapan.zip
Square.zip
Starcraft.zip
Striker.zip
StudioAngel.zip
StudioB-room.zip
StudioMilk.zip
StudioMobius.zip
StudioOffside.zip
StudioTwinkle.zip
SubLOGIC.zip
Succubus.zip
Sunsoft.zip
SurDeWave.zip
Swat.zip
Synchronicity.zip
SystemHouseOh.zip
SystemSacom.zip
SystemSoft.zip
T2.zip
TGL.zip
Takeru.zip
TakeruProject.zip
TakiCorporation.zip
TeSoft.zip
Teardrop.zip
TechnoGrard.zip
Teichiku.zip
TelenetJapan.zip
TenguPro.zip
Tenshindo.zip
TensuiSoftware.zip
Tetratech.zip
ThinkingRabbit.zip
Tiare.zip
Tierheit.zip
Tips.zip
TokumaShoten.zip
Tomboy.zip
TonkinHouse.zip
Trush.zip
TsukamotoYoshihikoJimusho.zip
TwinSoft.zip
U-Office.zip
U-meSoft.zip
Ucom.zip
UmitsukiSeisakusho.zip
Utility.zip
ViViAn.zip
VictorEntertainment.zip
VictorMusicalIndustries.zip
Ving.zip
VirginHouse.zip
Warlock.zip
WaveTrain.zip
WendyMagazine.zip
Westside.zip
WildLife.zip
Wishbone.zip
Witchs.zip
WittyWolf.zip
Wiz.zip
WolfTeam.zip
XYZ.zip
XtalSoft.zip
You-en-tai.zip
ZainSoft.zip
Zeit.zip
Zenryutsu.zip
ZigoWatt.zip
ZyX.zip
dB-Soft.zip
doujinHomebrew.zip
elf.zip
megami.zip
.____padding_file/1
.____padding_file/10
.____padding_file/100
.____padding_file/101
.____padding_file/102
.____padding_file/103
.____padding_file/104
.____padding_file/105
.____padding_file/106
.____padding_file/107
.____padding_file/108
.____padding_file/109
.____padding_file/11
.____padding_file/110
.____padding_file/111
.____padding_file/112
.____padding_file/113
.____padding_file/114
.____padding_file/115
.____padding_file/116
.____padding_file/117
.____padding_file/118
.____padding_file/119
.____padding_file/12
.____padding_file/120
.____padding_file/121
.____padding_file/122
.____padding_file/123
.____padding_file/124
.____padding_file/125
.____padding_file/126
.____padding_file/127
.____padding_file/128
.____padding_file/129
.____padding_file/13
.____padding_file/130
.____padding_file/131
.____padding_file/132
.____padding_file/133
.____padding_file/134
.____padding_file/135
.____padding_file/136
.____padding_file/137
.____padding_file/138
.____padding_file/139
.____padding_file/14
.____padding_file/140
.____padding_file/141
.____padding_file/142
.____padding_file/143
.____padding_file/144
.____padding_file/145
.____padding_file/146
.____padding_file/147
.____padding_file/148
.____padding_file/149
.____padding_file/15
.____padding_file/150
.____padding_file/151
.____padding_file/152
.____padding_file/153
.____padding_file/154
.____padding_file/155
.____padding_file/156
.____padding_file/157
.____padding_file/158
.____padding_file/159
.____padding_file/16
.____padding_file/160
.____padding_file/161
.____padding_file/162
.____padding_file/163
.____padding_file/164
.____padding_file/165
.____padding_file/166
.____padding_file/167
.____padding_file/168
.____padding_file/169
.____padding_file/17
.____padding_file/170
.____padding_file/171
.____padding_file/172
.____padding_file/173
.____padding_file/174
.____padding_file/175
.____padding_file/176
.____padding_file/177
.____padding_file/178
.____padding_file/179
.____padding_file/18
.____padding_file/180
.____padding_file/181
.____padding_file/182
.____padding_file/183
.____padding_file/184
.____padding_file/185
.____padding_file/186
.____padding_file/187
.____padding_file/188
.____padding_file/189
.____padding_file/19
.____padding_file/190
.____padding_file/191
.____padding_file/192
.____padding_file/193
.____padding_file/194
.____padding_file/195
.____padding_file/196
.____padding_file/197
.____padding_file/198
.____padding_file/199
.____padding_file/2
.____padding_file/20
.____padding_file/200
.____padding_file/201
.____padding_file/202
.____padding_file/203
.____padding_file/204
.____padding_file/205
.____padding_file/206
.____padding_file/207
.____padding_file/208
.____padding_file/209
.____padding_file/21
.____padding_file/210
.____padding_file/211
.____padding_file/212
.____padding_file/213
.____padding_file/214
.____padding_file/215
.____padding_file/216
.____padding_file/217
.____padding_file/218
.____padding_file/219
.____padding_file/22
.____padding_file/220
.____padding_file/221
.____padding_file/222
.____padding_file/223
.____padding_file/224
.____padding_file/225
.____padding_file/226
.____padding_file/227
.____padding_file/228
.____padding_file/229
.____padding_file/23
.____padding_file/230
.____padding_file/231
.____padding_file/232
.____padding_file/233
.____padding_file/234
.____padding_file/235
.____padding_file/236
.____padding_file/237
.____padding_file/238
.____padding_file/239
.____padding_file/24
.____padding_file/240
.____padding_file/241
.____padding_file/242
.____padding_file/243
.____padding_file/244
.____padding_file/245
.____padding_file/246
.____padding_file/247
.____padding_file/249
.____padding_file/25
.____padding_file/250
.____padding_file/251
.____padding_file/252
.____padding_file/253
.____padding_file/254
.____padding_file/255
.____padding_file/256
.____padding_file/257
.____padding_file/258
.____padding_file/259
.____padding_file/26
.____padding_file/260
.____padding_file/261
.____padding_file/262
.____padding_file/263
.____padding_file/264
.____padding_file/265
.____padding_file/266
.____padding_file/267
.____padding_file/268
.____padding_file/269
.____padding_file/27
.____padding_file/270
.____padding_file/271
.____padding_file/272
.____padding_file/273
.____padding_file/274
.____padding_file/275
.____padding_file/276
.____padding_file/277
.____padding_file/278
.____padding_file/279
.____padding_file/28
.____padding_file/280
.____padding_file/281
.____padding_file/282
.____padding_file/283
.____padding_file/284
.____padding_file/285
.____padding_file/286
.____padding_file/287
.____padding_file/288
.____padding_file/289
.____padding_file/29
.____padding_file/290
.____padding_file/291
.____padding_file/292
.____padding_file/293
.____padding_file/294
.____padding_file/295
.____padding_file/296
.____padding_file/297
.____padding_file/298
.____padding_file/299
.____padding_file/3
.____padding_file/30
.____padding_file/300
.____padding_file/301
.____padding_file/302
.____padding_file/303
.____padding_file/304
.____padding_file/305
.____padding_file/306
.____padding_file/307
.____padding_file/308
.____padding_file/309
.____padding_file/31
.____padding_file/310
.____padding_file/311
.____padding_file/312
.____padding_file/313
.____padding_file/314
.____padding_file/315
.____padding_file/316
.____padding_file/317
.____padding_file/318
.____padding_file/319
.____padding_file/32
.____padding_file/320
.____padding_file/321
.____padding_file/322
.____padding_file/323
.____padding_file/324
.____padding_file/325
.____padding_file/326
.____padding_file/327
.____padding_file/328
.____padding_file/329
.____padding_file/33
.____padding_file/330
.____padding_file/331
.____padding_file/332
.____padding_file/333
.____padding_file/334
.____padding_file/335
.____padding_file/336
.____padding_file/337
.____padding_file/338
.____padding_file/339
.____padding_file/34
.____padding_file/340
.____padding_file/341
.____padding_file/342
.____padding_file/343
.____padding_file/344
.____padding_file/345
.____padding_file/346
.____padding_file/347
.____padding_file/348
.____padding_file/349
.____padding_file/35
.____padding_file/350
.____padding_file/351
.____padding_file/352
.____padding_file/353
.____padding_file/354
.____padding_file/355
.____padding_file/356
.____padding_file/357
.____padding_file/358
.____padding_file/359
.____padding_file/36
.____padding_file/360
.____padding_file/361
.____padding_file/362
.____padding_file/363
.____padding_file/364
.____padding_file/365
.____padding_file/366
.____padding_file/367
.____padding_file/368
.____padding_file/369
.____padding_file/37
.____padding_file/370
.____padding_file/371
.____padding_file/372
.____padding_file/373
.____padding_file/374
.____padding_file/375
.____padding_file/376
.____padding_file/377
.____padding_file/378
.____padding_file/379
.____padding_file/38
.____padding_file/380
.____padding_file/381
.____padding_file/382
.____padding_file/383
.____padding_file/384
.____padding_file/385
.____padding_file/386
.____padding_file/387
.____padding_file/388
.____padding_file/389
.____padding_file/39
.____padding_file/392
.____padding_file/393
.____padding_file/4
.____padding_file/40
.____padding_file/41
.____padding_file/42
.____padding_file/43
.____padding_file/44
.____padding_file/45
.____padding_file/46
.____padding_file/47
.____padding_file/48
.____padding_file/49
.____padding_file/5
.____padding_file/50
.____padding_file/51
.____padding_file/52
.____padding_file/53
.____padding_file/54
.____padding_file/55
.____padding_file/56
.____padding_file/57
.____padding_file/58
.____padding_file/59
.____padding_file/6
.____padding_file/60
.____padding_file/61
.____padding_file/62
.____padding_file/63
.____padding_file/64
.____padding_file/65
.____padding_file/66
.____padding_file/67
.____padding_file/68
.____padding_file/69
.____padding_file/7
.____padding_file/70
.____padding_file/71
.____padding_file/72
.____padding_file/73
.____padding_file/74
.____padding_file/75
.____padding_file/76
.____padding_file/77
.____padding_file/78
.____padding_file/79
.____padding_file/8
.____padding_file/80
.____padding_file/81
.____padding_file/82
.____padding_file/83
.____padding_file/84
.____padding_file/85
.____padding_file/86
.____padding_file/87
.____padding_file/88
.____padding_file/89
.____padding_file/9
.____padding_file/90
.____padding_file/91
.____padding_file/92
.____padding_file/93
.____padding_file/94
.____padding_file/95
.____padding_file/96
.____padding_file/97
.____padding_file/98
.____padding_file/99
Allot.zip
BNN.zip
BitTown-Kao.zip
Dempa.zip
EcsecoSoft.zip
FancySoft.zip
FirstQuarter.zip
JIS.zip
NecPc-9801.jpg
NecPc-9801_thumb.jpg
NeoKobe-NecPc-98012017-11-17_meta.xml
OfficeKoukan.zip
Progress.zip
Taito.zip
TecnoSoft.zip
TectHouse.zip
TwilightExpress.zip
__ia_thumb.jpg
nkpresents.gif
Neo Kobe - NEC PC-8801 (2016-02-25).zip
.____padding_file/0
.____padding_file/1
.____padding_file/2
.____padding_file/4
.____padding_file/5
.____padding_file/8
.____padding_file/9
NEC PC-8801mkIISR.jpg
NEC PC-8801mkIISR_thumb.jpg
Neo_Kobe_NEC_PC-8801_2016-02-25_meta.sqlite
Neo_Kobe_NEC_PC-8801_2016-02-25_meta.xml
__ia_thumb.jpg
nkpresents.gif
NecPc-8001.jpg
NecPc-8001_thumb.jpg
Neo Kobe - NEC PC-8001 (2016-02-25).zip
Neo_Kobe_NEC_PC-8001_2016-02-25_meta.sqlite
Neo_Kobe_NEC_PC-8001_2016-02-25_meta.xml
__ia_thumb.jpg
nkpresents.gif
Fujitsu FM77AV.jpg
Fujitsu FM77AV_thumb.jpg
Neo Kobe - Fujitsu FM-7 (2016-02-25).zip
Neo_Kobe_Fujitsu_FM-7_2016-02-25_meta.sqlite
Neo_Kobe_Fujitsu_FM-7_2016-02-25_meta.xml
__ia_thumb.jpg
nkpresents.gif
NeoKobe-FujitsuFmTowns2016-02-25.zip
.____padding_file/0
.____padding_file/1
.____padding_file/10
.____padding_file/11
.____padding_file/12
.____padding_file/13
.____padding_file/14
.____padding_file/15
.____padding_file/16
.____padding_file/17
.____padding_file/18
.____padding_file/19
.____padding_file/2
.____padding_file/20
.____padding_file/21
.____padding_file/22
.____padding_file/23
.____padding_file/24
.____padding_file/26
.____padding_file/28
.____padding_file/29
.____padding_file/3
.____padding_file/4
.____padding_file/5
.____padding_file/6
.____padding_file/7
.____padding_file/8
.____padding_file/9
FujitsuFmTowns.jpg
FujitsuFmTowns_thumb.jpg
NeoKobe-FujitsuFmTowns2016-02-25.z01
NeoKobe-FujitsuFmTowns2016-02-25.z02
NeoKobe-FujitsuFmTowns2016-02-25.z03
NeoKobe-FujitsuFmTowns2016-02-25.z04
NeoKobe-FujitsuFmTowns2016-02-25.z05
NeoKobe-FujitsuFmTowns2016-02-25.z06
NeoKobe-FujitsuFmTowns2016-02-25.z07
NeoKobe-FujitsuFmTowns2016-02-25.z08
NeoKobe-FujitsuFmTowns2016-02-25.z09
NeoKobe-FujitsuFmTowns2016-02-25.z10
NeoKobe-FujitsuFmTowns2016-02-25.z11
NeoKobe-FujitsuFmTowns2016-02-25.z12
NeoKobe-FujitsuFmTowns2016-02-25.z13
NeoKobe-FujitsuFmTowns2016-02-25.z14
NeoKobe-FujitsuFmTowns2016-02-25.z15
NeoKobe-FujitsuFmTowns2016-02-25.z16
NeoKobe-FujitsuFmTowns2016-02-25.z17
NeoKobe-FujitsuFmTowns2016-02-25.z18
NeoKobe-FujitsuFmTowns2016-02-25.z19
NeoKobe-FujitsuFmTowns2016-02-25.z20
NeoKobe-FujitsuFmTowns2016-02-25.z21
NeoKobe-FujitsuFmTowns2016-02-25.z22
Neo_Kobe_Fujitsu_FM_Towns_2016-02-25_meta.xml
__ia_thumb.jpg
nkpresents.gif

Utopia bootdisk est un programme de démarrage sorti le 22 juin 2000 et créé par le groupe warez Utopia, conçu pour jouer à des jeux piratés Sega Dreamcast sur des disques CD-R standard. Le disque de démarrage permet également la lecture de GD-ROM Dreamcast officiels importés , en contournant le verrouillage de région de Dreamcast . Le disque de démarrage Utopia n'annule pas la sécurité utilisée sur les disques GD-ROM d'origine ; à la place, il utilise une méthode de démarrage alternative dans le BIOS Dreamcast , qui était à l'origine destinée à être utilisée avec des CD MIL . Lorsqu'il est chargé dans un Dreamcast standard, l'écran affiche un rendu 3D rotatif d'un rennes à côté d'un message pour insérer un disque. Une fois qu'un nouveau disque est inséré et que le couvercle Dreamcast est fermé, le disque démarre. Finalement, le disque de démarrage a été rendu obsolète par des versions pirates "auto-amorçantes" - des jeux sortis au format MIL-CD qui pouvaient démarrer sans avoir besoin du disque de démarrage Utopia. Le disque de démarrage a été développé à l'aide d'une version piratée du SDK Sega Katana , avec du code pour rendre le renne tiré d'une première démo de la théière Dreamcast .

MEmu := "Xenia"
MEmuV := "v1.0.0"
MURL := ["http://xenia.jp/"]
MAuthor := ["drik333","Dime333"]
MVersion := "1.0.4"
MCRC := ""
iCRC := ""
MID := ""
MSystem := ["Microsoft Xbox 360","Microsoft Xbox Live Arcade"]
;----------------------------------------------------------------------------
; Notes:
; Set Skip Checks to Rom Extension.
; You need to use the emulator in portable mode. You can do this by creating a file called "portable.txt" and placing it in the emu folder.
; The module is able to launch iso files and extracted games.
; For extracted games, you have to name the folders of the games like your database. To see these games in RLUI, create blank txt files named like
; your database and edit iso|txt|xex as Rom Extensions in RLUI. Or you can make zip files of each game and set the compression to "uncompressed" for
; fast load times.
;----------------------------------------------------------------------------
StartModule()
BezelGUI()
FadeInStart()
primaryExe := new Emulator(emuPath . "\" . executable) ; instantiate emulator executable object
emuPrimaryWindow := new Window(new WindowTitle("Xenia","XeniaWindowClass")) ; instantiate primary emulator window object
Fullscreen := moduleIni.Read(romName . "|Settings", "Fullscreen","true",,1)
gpu := moduleIni.Read(romName . "|Settings", "GPU","D3D12",,,1)
draw_resolution_scale := moduleIni.Read(romName . "|Settings", "Draw_resolution_scale","1280x720",,,1)
d3d12_readback_resolve := moduleIni.Read(romName . "|Settings", "D3D12_readback_resolve","false",,1)
auto_clear_runtime_caches := moduleIni.Read(romName . "|Settings", "Auto_clear_runtime_caches","true",,1)
max_queued_frames := moduleIni.Read(romName . "|Settings", "Max_queued_frames","4",,,1)
break_on_unimplemented_instructions := moduleIni.Read(romName . "|Settings", "Break_on_unimplemented_instr.","true",,1)
protect_zero := moduleIni.Read(romName . "|Settings", "Protect_zero","true",,1)
scribble_heap := moduleIni.Read(romName . "|Settings", "Scribble_heap","false",,1)
If StringUtils.InStr(executable,"canary")
{
config := new IniFile(emuPath . "\xenia-canary.config.toml")
}
Else
{
config := new IniFile(emuPath . "\xenia.config.toml")
}
hideEmuObj := Object(emuPrimaryWindow,1)
7z(romPath, romName, romExtension, sevenZExtractPath)
BezelStart()
HideAppStart(hideEmuObj,hideEmu)
ExtractedGamePath := "\" . romName . "\default.xex"
ExtractedGameFile := new File(romPath . ExtractedGamePath)
If (gpu = "D3D12")
{
config.Write(" ""d3d12""", "GPU", "gpu ")
}
Else
{
config.Write(" ""vulkan""", "GPU", "gpu ")
}
If (draw_resolution_scale = "1280x720")
{
config.Write(" 1", "GPU", "draw_resolution_scale_x ")
config.Write(" 1", "GPU", "draw_resolution_scale_y ")
}
If (draw_resolution_scale = "2560x1440")
{
config.Write(" 2", "GPU", "draw_resolution_scale_x ")
config.Write(" 2", "GPU", "draw_resolution_scale_y ")
}
If (draw_resolution_scale = "3840x2160")
{
config.Write(" 3", "GPU", "draw_resolution_scale_x ")
config.Write(" 3", "GPU", "draw_resolution_scale_y ")
}
If (d3d12_readback_resolve = "false")
{
config.Write(" false", "D3D12", "d3d12_readback_resolve ")
}
Else
{
config.Write(" true", "D3D12", "d3d12_readback_resolve ")
}
If (max_queued_frames = "1")
{
config.Write(" 1", "APU", "max_queued_frames ")
}
If (max_queued_frames = "4")
{
config.Write(" 4", "APU", "max_queued_frames ")
}
If (max_queued_frames = "8")
{
config.Write(" 8", "APU", "max_queued_frames ")
}
If (max_queued_frames = "16")
{
config.Write(" 16", "APU", "max_queued_frames ")
}
If (max_queued_frames = "32")
{
config.Write(" 32", "APU", "max_queued_frames ")
}
If (max_queued_frames = "64")
{
config.Write(" 64", "APU", "max_queued_frames ")
}
If (break_on_unimplemented_instructions = "true")
{
config.Write(" true", "CPU", "break_on_unimplemented_instructions ")
}
Else
{
config.Write(" false", "CPU", "break_on_unimplemented_instructions ")
}
If (protect_zero = "true")
{
config.Write(" true", "Memory", "protect_zero ")
}
Else
{
config.Write(" false", "Memory", "protect_zero ")
}
If (scribble_heap = "false")
{
config.Write(" false", "Memory", "scribble_heap ")
}
Else
{
config.Write(" true", "Memory", "scribble_heap ")
}
If (Fullscreen = "true")
{
If (ExtractedGameFile.Exist()) {
primaryExe.Run(" --fullscreen """ . romPath . "\" . romName . "\default.xex" """")
} Else If (ExtractedGameFile !="") {
primaryExe.Run(" --fullscreen """ . romPath . "\" . romName . romExtension . """")
}
}
Else
{
If (ExtractedGameFile.Exist()) {
primaryExe.Run("""" . romPath . "\" . romName . "\default.xex" """")
} Else If (ExtractedGameFile !="") {
primaryExe.Run("""" . romPath . "\" . romName . romExtension . """")
}
}
emuPrimaryWindow.Wait()
emuPrimaryWindow.WaitActive()
BezelDraw()
HideAppEnd(hideEmuObj,hideEmu)
FadeInExit()
If (auto_clear_runtime_caches = "true")
{
Loop
{
Sleep 1000
Send {f5}
Process, Exist, xenia.exe
IF !errorlevel=1
Process, Exist, xenia_canary.exe
IF !errorlevel=1
Goto, Continue
else
Sleep 1
}
}
else
Sleep 1
Continue:
primaryExe.Process("WaitClose")
7zCleanUp()
BezelExit()
FadeOutExit()
ExitModule()
CloseProcess:
FadeOutStart()
emuPrimaryWindow.Close()
Return
...
Modeler est un émulateur arcade Sega : System 32, System 32 Multi & Model 1.

Citra (emulator)
2014–2024
Icon
Citra was discontinued on March 4, 2024, following a lawsuit by Nintendo.
MEmu := "Citra"
MEmuV := "2015-08-01"
MURL := ["http://citra-emu.org/"]
MAuthor := ["djvj"]
MVersion := "1.0"
MCRC := ""
iCRC := ""
MID := ""
MSystem := ["Nintendo 3DS"]
;----------------------------------------------------------------------------
; Notes:
; Roms must be decrypted to run in the emu
; See here for a guide on decrypting games you own: https://gbatemp.net/threads/tutorial-how-to-decrypt-extract-rebuild-3ds-roms-run-xy-oras-without-update.383055/
;----------------------------------------------------------------------------
StartModule()
BezelGUI()
FadeInStart()
; settingsFile := modulePath . "\" . moduleName . ".ini"
; Fullscreen := IniReadCheck(settingsFile, "Settings", "Fullscreen","true",,1)
BezelStart()
hideEmuObj := Object("Select ahk_class ConsoleWindowClass",0,"Citra ahk_class Qt5QWindowIcon",1) ; Hide_Emu will hide these windows. 0 = will never unhide, 1 = will unhide later
7z(romPath, romName, romExtension, 7zExtractPath)
HideEmuStart()
Run(executable . " """ . romPath . "\" . romName . romExtension . " """, emuPath)
WinWait("Citra ahk_class Qt5QWindowIcon")
SetTitleMatchMode, 2
WinWaitActive("Citra ahk_class Qt5QWindowIcon")
Send {f11}
BezelDraw()
HideEmuEnd()
FadeInExit()
Process("WaitClose", executable)
7zCleanUp()
BezelExit()
FadeOutExit()
ExitModule()
CloseProcess:
FadeOutStart()
WinClose("Citra ahk_class Qt5QWindowIcon")
Return

MEmu := "Sega Model 2 Emulator"
MEmuV := "v1.0"
MURL := ["http://nebula.emulatronia.com/"]
MAuthor := ["djvj","ghutch92"]
MVersion := "2.0.9"
MCRC := "14EECBD4"
iCRC := "3732EFE4"
MID := "635175648125374429"
MSystem := ["Sega Model 2"]
;----------------------------------------------------------------------------
; Notes:
; Manually launch the Sega Model 2 Emulator.
; Under Video enable "auto switch to fullscreen".
; model2.zip must exist in your rom path which contains the needed bios files for the system.
; Module settings overwrite what you have set in the emulator itself.
;
; For Multiplayer Support:
; To enable the linked games support, set Link_Enabled to true in the module settings in RocketLauncherUI
; The module has an internal list of games that it will only enable it for. Not all of the games work in this emu. See below for more info.
;
; 1.) Multiplayer does not work when the emulator is launched using the same executable in the same path.
; 2.) Multiplayer only works if player 1 is set to be in master mode and players 2-4 are set to be in slave mode. (this info is stored in the emupath\NVDATA folder, press F2 to set in game)
; 3.) Singleplayer only works if player 1 is set to be in single mode. (this info is stored in the emupath\NVDATA folder, press F2 to set in game)
; 4.) Only the active window accepts keyboard input.
;
; Fixed Issue 1 by having folders in the emupath named Player 2, Player 3, and Player 4 and within each of these folsers there are separate installs of sega model 2 emulator.
; Fixed Issue 2 and 3 for Player 1 by having a folder named "Multi" in the NVDATA folder for multiplayer dat files and a folder name "Single" in the NVDATA folder for single player dat files.
; Fixed Issue 4 by activating the first player window so first player always has the keyboard and players 2-4 have to use a joystick(gamepad).
;
;Games that have a working link:
; daytona,daytonagtx,daytonam,daytonas,daytonat,indy500,indy500d,manxtt,motoraid,skisuprg,srallyc,srallycb,srallyp,stcc,stcce,von,vonj,waverunr
;
; overrev and sgt24h both look like they can support link but I couldn't get it working, because I think m2emulator uses a linking hack to get these games to work in stand alone mode.
; Still need to see if waverunr, stcc, stcce, von, and vonj can link, I couldn't get these working, I think my processor is the issue here. Saw video of stcc & waverunr link working though.
; von and vonj can only do a 2 player link
;----------------------------------------------------------------------------
StartModule()
BezelGUI()
settingsFile := modulePath . "\" . moduleName . ".ini"
linkEnabled := IniReadCheck(settingsFile, "Settings|" . romName, "Link_Enabled", "false",,1)
demulShooterEnabled := IniReadCheck(settingsFile, "Settings|" . romName, "DemulShooterEnabled", "false",,1)
SplitScreen2PlayersMode := IniReadCheck(settingsFile, "Settings", "SplitScreen_2_Players","Vertical",,1) ;horizontal or vertical
SplitScreen3PlayersMode := IniReadCheck(settingsFile, "Settings", "SplitScreen_3_Players","P1top",,1) ; For Player1 screen to be on left: P1left. For Player1 screen to be on top: P1top. For Player1 screen to be on bottom: P1bottom. For Player1 screen to be on right: P1right.
If romName in daytona,daytonagtx,daytonam,daytonas,daytonat,indy500,indy500d,manxtt,motoraid,skisuprg,srallyc,srallycb,srallyp,stcc,stcce,von,vonj,waverunr
If (linkEnabled = "true") {
Log("Module - Link mode enabled")
linkEnabledGame := 1
}
If linkEnabledGame
If (romName = "von") or (romName = "vonj")
SelectedNumberofPlayers := NumberOfPlayersSelectionMenu(2)
Else
SelectedNumberofPlayers := NumberOfPlayersSelectionMenu(4)
FadeInStart()
fullscreen := IniReadCheck(settingsFile, "Settings", "Fullscreen","true",,1)
fullScreenWidth := IniReadCheck(settingsFile, "Settings", "FullScreenWidth",A_ScreenWidth,,1)
fullScreenHeight := IniReadCheck(settingsFile, "Settings", "FullScreenHeight",A_ScreenHeight,,1)
emupath2 := IniReadCheck(settingsFile, "Settings", "Player2_EmulatorPath",emupath . "\Player 2",,1) ;must be a unique path to same version of the emulator
emupath3 := IniReadCheck(settingsFile, "Settings", "Player3_EmulatorPath",emupath . "\Player 3",,1) ;must be a unique path to same version of the emulator
emupath4 := IniReadCheck(settingsFile, "Settings", "Player4_EmulatorPath",emupath . "\Player 4",,1) ;must be a unique path to same version of the emulator
CheckFile(romPath . "\model2.zip","Could not locate ""model2.zip"" which contains the bios files for this emulator. Please make sure it exists in the same folder as your roms.")
m2Ini := CheckFile(emuPath . "\EMULATOR.INI")
m2RomDir1 := IniReadCheck(m2Ini, "RomDirs", "Dir1",,,1)
If (m2RomDir1 != romPath)
IniWrite, %romPath%, %m2Ini%, RomDirs, Dir1 ; write the correct romPath to the emu's ini so the user does not need to define this
If SelectedNumberofPlayers > 1
BezelStart(SelectedNumberofPlayers)
Else
BezelStart()
hideEmuObj := Object("AHK_class MYWIN",1) ; Hide_Emu will hide these windows. 0 = will never unhide, 1 = will unhide later
7z(romPath, romName, romExtension, 7zExtractPath)
; Write settings to m2's ini file - this needs to change also
IniWrite, % (If fullscreen = "true" ? 1 : 0), %m2Ini%, Renderer, AutoFull
IniWrite, %fullScreenWidth%, %m2Ini%, Renderer, FullScreenWidth
IniWrite, %fullScreenHeight%, %m2Ini%, Renderer, FullScreenHeight
If (demulShooterEnabled = "true") { ; If demulshooter is enabled for this game, launch it with relevant options
demulShooterTarget := StringUtils.Contains(executable,"multicpu") ? "model2m" : "model2"
DemulShooterExe := New DemulShooter()
DemulShooterExe.Launch(demulShooterTarget,romName,"-noresize")
}
If (SelectedNumberofPlayers = 1 || !linkEnabledGame) {
; Changing Cabinent Settings for player 1 this is because we will need to switch between master controller mode and single mode
; this info is stored in the NVDATA folder
; store single player settings in the NVDATA\Single folder and the Multiplayer Settings in the NVDATA\Multi folder
If (FileExist(emupath . "\NVDATA\Single\" . romName . ".DAT") && linkEnabledGame) {
Log("Overwriting " . emupath . "\NVDATA\" . romName . ".DAT with " . emupath . "\NVDATA\Single\" . romName . ".DAT")
FileCopy,%emupath%\NVDATA\Single\%romName%.DAT,%emupath%\NVDATA,1
}
HideEmuStart() ; This fully ensures windows are completely hidden even faster than winwait
Run(executable . A_Space . romName, emuPath, "Hide") ; Hides the emulator on launch. When bezel is enabled, this helps not show the emu before the rom is loaded
WinWait("ahk_class MYWIN",,,"Model 2 Emulator")
;WinWaitActive("ahk_class MYWIN",,,"Model 2 Emulator") ;this line only works if fade in is enabled
Sleep, 1000 ; Increase if your Front End is getting a quick flash in before the game loads
} Else {
;screen positions
If (SelectedNumberofPlayers = 2)
If SplitScreen2PlayersMode = Vertical
X1 := 0 , Y1 := 0 , W1 := A_ScreenWidth//2 , H1 := A_ScreenHeight , X2 := A_ScreenWidth//2 , Y2 := 0 , W2 := A_ScreenWidth//2 , H2 := A_ScreenHeight
Else
X1 := 0 , Y1 := 0 , W1 := A_ScreenWidth , H1 := A_ScreenHeight//2 , X2 := 0 , Y2 := A_ScreenHeight//2 , W2 := A_ScreenWidth , H2 := A_ScreenHeight//2
Else If (SelectedNumberofPlayers = 3)
If SplitScreen3PlayersMode = P1left
X1 := 0 , Y1 := 0 , W1 := A_ScreenWidth//2 , H1 := A_ScreenHeight , X2 := A_ScreenWidth//2 , Y2 := 0 , W2 := A_ScreenWidth//2 , H2 := A_ScreenHeight//2 , X3 := A_ScreenWidth//2 , Y3 := A_ScreenHeight//2 , W3 := A_ScreenWidth//2 , H3 := A_ScreenHeight//2
Else If SplitScreen3PlayersMode = P1bottom
X1 := 0 , Y1 := A_ScreenHeight//2 , W1 := A_ScreenWidth , H1 := A_ScreenHeight//2 , X2 := 0 , Y2 := 0 , W2 := A_ScreenWidth//2 , H2 := A_ScreenHeight//2 , X3 := A_ScreenWidth//2 , Y3 := 0 , W3 := A_ScreenWidth//2 , H3 := A_ScreenHeight//2
Else If SplitScreen3PlayersMode = P1right
X1 := A_ScreenWidth//2 , Y1 := 0 , W1 := A_ScreenWidth//2 , H1 := A_ScreenHeight , X2 := 0 , Y2 := 0 , W2 := A_ScreenWidth//2 , H2 := A_ScreenHeight//2 , X3 := 0 , Y3 := A_ScreenHeight//2 , W3 := A_ScreenWidth//2 , H3 := A_ScreenHeight//2
Else ; top
X1 := 0 , Y1 := 0 , W1 := A_ScreenWidth , H1 := A_ScreenHeight//2, X2 := 0 , Y2 := A_ScreenHeight//2 , W2 := A_ScreenWidth//2 , H2 := A_ScreenHeight//2, X3 := A_ScreenWidth//2 , Y3 := A_ScreenHeight//2 , W3 := A_ScreenWidth//2 , H3 := A_ScreenHeight//2
Else
X1 := 0 , Y1 := 0 , W1 := A_ScreenWidth//2 , H1 := A_ScreenHeight//2 , X2 := A_ScreenWidth//2 , Y2 := 0 , W2 := A_ScreenWidth//2 , H2 := A_ScreenHeight//2 , X3 := 0 , Y3 := A_ScreenHeight//2 , W3 := A_ScreenWidth//2 , H3 := A_ScreenHeight//2 , X4 := A_ScreenWidth//2 , Y4 := A_ScreenHeight//2 , W4 := A_ScreenWidth//2 , H4 := A_ScreenHeight//2
HideEmuStart() ; This fully ensures windows are completely hidden even faster than winwait
;this loop is for error checking since this emulator needs multiple instances of the emulator starting from different locations to run
Loop, %SelectedNumberofPlayers%
{
LinkedEmuPath := (A_Index = 1) ? (emupath) : (emupath%A_Index%)
CheckFile(LinkedEmuPath . "\" . executable)
CheckFile(LinkedEmuPath . "\EMULATOR.INI")
}
; Changing Cabinent Settings for player 1 this is because we will need to switch between master controller mode and single mode
; this info is stored in the NVDATA folder
; store single player settings in the NVDATA\Single folder and the Multiplayer Settings in the NVDATA\Multi folder
If FileExist(emupath . "\NVDATA\Multi\" . romName . ".DAT") {
Log("Overwriting " . emupath . "\NVDATA\" . romName . ".DAT with " . emupath . "\NVDATA\Multi\" . romName . ".DAT")
FileCopy,%emupath%\NVDATA\Multi\%romName%.DAT,%emupath%\NVDATA,1
}
Loop, %SelectedNumberofPlayers%
{
LinkedEmuPath := (A_Index = 1) ? (emupath) : (emupath%A_Index%)
m2ini := LinkedEmuPath . "\EMULATOR.INI" ;no need to checkfile it here since it's already been done
m2RomDir1 := IniReadCheck(m2Ini, "RomDirs", "Dir1",,,1)
If (m2RomDir1 != romPath)
IniWrite, %romPath%, %m2Ini%, RomDirs, Dir1 ; write the correct romPath to the emu's ini so the user does not need to define this
; Removing Fullscreen
IniWrite, 0, %m2Ini%, Renderer, AutoFull
; Creating the link
IniWrite,127.0.0.1,%LinkedEmuPath%\m2network.ini,network,NextIp ;127.0.0.1 is local address
IniWrite,% (1978 + A_Index - 1),%LinkedEmuPath%\m2network.ini,network,RxPort ;Recieving port
;the last player sends information to the first player completing the circle
IniWrite,% (If (A_Index = SelectedNumberofPlayers) ? 1978 : (1978 + A_Index)),%LinkedEmuPath%\m2network.ini,network,NextPort ;Sending Port
Run(executable . A_Space . romName, LinkedEmuPath, "Hide",Screen%A_Index%PID)
WinWait("ahk_pid " . Screen%A_Index%PID)
WinGet, Screen%A_Index%ID, ID, % "ahk_pid " . Screen%A_Index%PID
If Fullscreen = true
{ WinSet, Style, -0xC00000, % "ahk_id " . Screen%A_Index%ID
ToggleMenu(Screen%A_Index%ID)
WinSet, Style, -0xC40000, % "ahk_id " . Screen%A_Index%ID
currentScreen := A_Index
Log("Moving window " . currentScreen . " to " . X%currentScreen% . "`," . Y%currentScreen% . " with W" . W%currentScreen% . " H" . H%currentScreen%)
WinMove, % "ahk_id " . Screen%currentScreen%ID, , % X%currentScreen%, % Y%currentScreen%, % W%currentScreen%, % H%currentScreen%
;check If window moved
timeout := A_TickCount
Loop
{ WinGetPos, X, Y, W, H, % "ahk_id " . Screen%currentScreen%ID
If (X=X%currentScreen%) and (Y=Y%currentScreen%) and (W=W%currentScreen%) and (H=H%currentScreen%)
break
If (timeout<A_TickCount-2000)
Break
Sleep, 50
WinMove, % "ahk_id " . Screen%currentScreen%ID, , % X%currentScreen%, % Y%currentScreen%, % W%currentScreen%, % H%currentScreen%
}
}
Sleep, 50
}
}
BezelDraw()
HideEmuEnd()
If (SelectedNumberofPlayers = 1 || !linkEnabledGame) {
WinShow, ahk_class MYWIN ; Show the emulator
} Else {
Loop %SelectedNumberofPlayers%
WinShow, % "ahk_id " . Screen%a_index%ID ; Show the emulator
WinActivate, ahk_id %Screen1ID% ; activate first player window so that first player can use keyboard instead of last player
}
;I find that the fade in exit looks better after the winshow lines
FadeInExit()
Process("WaitClose", executable)
BezelExit()
FadeOutExit()
ExitModule()
CloseProcess:
FadeOutStart()
If (demulShooterEnabled = "true") {
DemulShooterExe.Close()
}
If (SelectedNumberofPlayers>1) {
Loop, %SelectedNumberofPlayers%
{ WinClose("ahk_id " . Screen%A_Index%ID)
WinWaitClose("ahk_id " . Screen%A_Index%ID)
}
} Else
WinClose("AHK_class MYWIN")
Return

MEmu := "Cemu"
MEmuV := "v1.7.0"
MURL := ["http://cemu.info/"]
MAuthor := ["djvj"]
MVersion := "1.0.5"
MCRC := ""
iCRC := ""
MID := ""
MSystem := ["Nintendo Wii U"]
;----------------------------------------------------------------------------
; Notes:
; Make sure the keys.txt in the emu root folder contains a Wii U common key.
; Do not ask where to get this, it's your job to figure this out.
;----------------------------------------------------------------------------
StartModule()
BezelGUI()
FadeInStart()
primaryExe := new Emulator(emuPath . "\" . executable) ; instantiate emulator executable object
emuPrimaryWindow := new Window(new WindowTitle("Cemu","wxWindowNR")) ; instantiate primary emulator window object
Fullscreen := moduleIni.Read("Settings", "Fullscreen","true",,1)
hideEmuObj := Object(emuPrimaryWindow,1)
7z(romPath, romName, romExtension, sevenZExtractPath)
BezelStart("FixResMode")
HideAppStart(hideEmuObj,hideEmu)
If (Fullscreen = "true")
Params := " -f"
primaryExe.Run(Params . " -g """ . romPath . "\" . romName . romExtension . """")
emuPrimaryWindow.Wait()
emuPrimaryWindow.WaitActive()
;If (fullscreen = "true")
; emuPrimaryWindow.MenuSelectItem("Options","Fullscreen")
; Load image
; emuPrimaryWindow.WinMenuSelectItem("File","Load")
; OpenROM("Open file to launch", romPath . "\" . romName . romExtension)
; emuPrimaryWindow.WaitActive()
BezelDraw()
HideAppEnd(hideEmuObj,hideEmu)
FadeInExit()
primaryExe.Process("WaitClose")
7zCleanUp()
BezelExit()
FadeOutExit()
ExitModule()
CloseProcess:
FadeOutStart()
emuPrimaryWindow.Close()
ExitApp
Return

MEmu := "Dice"
MEmuV := "v0.9"
MURL := ["http://adamulation.blogspot.com/"]
MAuthor := ["djvj"]
MVersion := "2.0.2"
MCRC := "6738B80A"
iCRC := "1E716C97"
MID := "635038268883967308"
MSystem := ["DICE"]
;----------------------------------------------------------------------------
; Notes:
; Create 4 txt files in the emu dir, one each for Gotcha, Pong, Rebound and SpaceRace.
; romExtension should be txt
; Point both emu and rom dirs to the dir that contains Dice.exe
; Dice stores its config in your user dir: C:\Users\username\AppData\Roaming\dice
;----------------------------------------------------------------------------
StartModule()
BezelGui()
FadeInStart()
settingsFile := modulePath . "\" . moduleName . ".ini"
Fullscreen := IniReadCheck(settingsFile, "Settings", "Fullscreen","true",,1)
BezelStart()
hideEmuObj := Object("DICE ahk_class phoenix_window",1) ; Hide_Emu will hide these windows. 0 = will never unhide, 1 = will unhide later
7z(romPath, romName, romExtension, 7zExtractPath)
StringLower, romName, romName ; the rom's name must be passed lowercase to the emu otherwise it doesn't work
fullscreen := If fullscreen = "true" ? "" : " -window"
HideEmuStart()
Run(executable . " " . romName . fullscreen, emuPath, "Hide") ; need Hide here otherwise the app pops into view over our GUI
WinWait("DICE ahk_class phoenix_window")
Control, Hide, , msctls_statusbar321, DICE ahk_class phoenix_window ; Removes the StatusBar
WinActivate, DICE ahk_class phoenix_window ; dice 0.8 does not give focus properly, this ensures it gets focus
WinWaitActive("DICE ahk_class phoenix_window") ; dice 0.8 has a status bar at the bottom
Control, Hide, , msctls_statusbar321, DICE ahk_class phoenix_window ; Removes the StatusBar
BezelDraw()
Sleep, 1000 ; small sleep required ottherwise your Front End can flash back into view
HideEmuEnd()
FadeInExit()
Process("WaitClose", executable)
7zCleanUp()
BezelExit()
FadeOutExit()
ExitModule()
CloseProcess:
FadeOutStart()
WinClose("DICE ahk_class phoenix_window")
Return

MEmu := "AAE"
MEmuV := "vAlpha87u2 (12/13/08)"
MURL := ["http://pages.suddenlink.net/aae/"]
MAuthor := ["djvj"]
MVersion := "2.0.7"
MCRC := "581D521B"
iCRC := "78B83C3"
MID := "635038268873928953"
MSystem := ["AAE"]
;----------------------------------------------------------------------------
; Notes:
; To apply the updates, first extract the aae092808.zip to its own folder. Then extract aaeu1.zip (10/26/08 build) on top of it overwriting existing files. Do this again for aaeu2.zip (12/13/08 build)
; 12/13/08 release crashes on launch if you have joysticks plugged in or virtual joystick drivers like VJoy installed. If you cannot change this, use AAE from 10/26/08.
; Open your aae.log if it crashes and if it's filled with joystick control info, you need to unplug one joystick at a time until it stops happening.
; Even just having your 360 controller receiver in can crash the exe. Nothing you can do except use another emu or always know to unplug your controllers.
; In the aae.ini, If mame_rom_path has a # before it, remove it.
; You can start the emu and press TAB to set some options.
; If you want to change your exit key within AAE, launch the emu manually (w/o a game) and hit Tab. Then goto Keyboard Config -> Quit (at bottom).
;----------------------------------------------------------------------------
StartModule()
BezelGUI()
FadeInStart()
primaryExe := new Emulator(emuPath . "\" . executable) ; instantiate emulator executable object
emuPrimaryWindow := new Window(new WindowTitle(,"AllegroWindow")) ; instantiate primary emulator window object
emuRestoreWindow := new Window(new WindowTitle(,"#32770"),"Crap")
Fullscreen := moduleIni.Read("settings", "Fullscreen","true",,1) ; true (fake full screen), false (Windowed mode) and Fullscreen (normal fullscreen. Do not work with Pause.)
bezelMode := moduleIni.Read(romName . "|Settings", "BezelMode","Layout",,1) ; "Layout" or "FixResMode"
Artwork_Crop := moduleIni.Read(romName . "|Settings", "Artwork_Crop", "1",,1)
Use_Artwork := moduleIni.Read(romName . "|Settings", "Use_Artwork", "1",,1)
Use_Overlays := moduleIni.Read(romName . "|Settings", "Use_Overlays", "1",,1)
Exit_Mode := moduleIni.Read("Settings", "Exit_Mode", "WinClose",,1)
aaeINI := new IniFile(emuPath . "\aae.ini")
aaeINI.CheckFile()
; Enabling Bezel components
aaeINI.Write(Use_Artwork, "main", "artwork")
aaeINI.Write(Use_Overlays, "main", "overlay")
aaeINI.Write(Artwork_Crop, "main", "artcrop")
If (bezelEnabled = "true")
If (bezelMode = "FixResMode") ; RocketLauncher Bezels
{ BezelStart()
aaeWidth := Round(bezelScreenWidth)
aaeHeight := Round(bezelScreenHeight)
aaeINI.Write(aaeWidth, "main", "screenw")
aaeINI.Write(aaeHeight, "main", "screenh")
aaeINI.Write(0, %aaeINI%, "main", "bezel")
} Else ; AAE Built-In Bezels
aaeINI.Write(1, %aaeINI%, "main", "bezel")
Else ; No Bezels
aaeINI.Write(0, "main", "bezel")
; Creating fake fullscreen mode if fullscreen is true because Pause is not compatible with AAE fullscreen mode.
currentFullScreen := aaeINI.Read("main","windowed")
If (currentFullScreen = 0) && (Fullscreen != "Fullscreen") { ; Windowed mode
aaeINI.Write(1, "main", "windowed")
aaeINI.Write(A_ScreenWidth, "main", "screenw")
aaeINI.Write(A_ScreenHeight, "main", "screenh")
} Else If (currentFullScreen = 1) and (Fullscreen = "Fullscreen") ; Real fullscreen mode
aaeINI.Write(0, "main", "windowed")
If (Fullscreen = "true") { ; Fake fullscreen mode
aaeINI.Write(A_ScreenWidth, "main", "screenw")
aaeINI.Write(A_ScreenHeight, "main", "screenh")
}
hideEmuObj := Object(emuRestoreWindow,0,emuPrimaryWindow,1)
7z(romPath, romName, romExtension, sevenZExtractPath)
aaeINI.Write(romPath, "main", "mame_rom_path") ; Update AAE's rom path so it's always correct and also works with 7z
HideAppStart(hideEmuObj,hideEmu)
primaryExe.Run(" " . romName)
emuPrimaryWindow.Wait()
emuPrimaryWindow.WaitActive()
If (Fullscreen = "true"){
TimerUtils.Sleep(200)
emuPrimaryWindow.RemoveTitleBar()
}
BezelDraw()
HideAppEnd(hideEmuObj,hideEmu)
FadeInExit()
primaryExe.Process("WaitClose")
7zCleanUp()
BezelExit()
FadeOutExit()
ExitModule()
RestoreEmu:
timeout := A_TickCount
Loop {
errLvl := emuRestoreWindow.Close()
If (!errLvl || timeout < A_TickCount - 3000)
Break
TimerUtils.Sleep(50)
}
Return
CloseProcess:
FadeOutStart()
If (Exit_Mode = "ProcessClose")
primaryExe.Process("Close")
Else
emuPrimaryWindow.Close()
Return
https://9alaxie9ames.blogspot.com/2024/07/winuaeloader.html


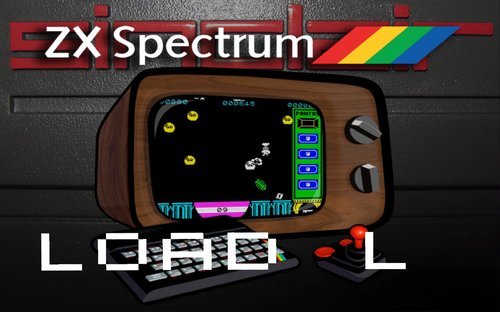 ROMs.sp|tap|tzx
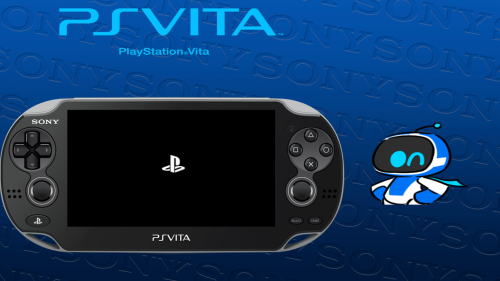 Run PSVITA on PC /PROCESS/ Download the emulator, then install the "firmware" in Vita3K. For the games in Vita3k install the VPK or ZIP games (MaiDump), if that does not work well, the other method consists in placing the games (MaiDump) decompress under Local Disk C, users, ***, AppData ( Hidden folder), Roaming, Vita3K, Vita3K, ux0, app Screenshots
 Un camion blindé rempli d'argent est abandonné dans un garage, et vous n'avez que quelques secondes pour remplir votre sac à dos avant que la police n'arrive. Quelques billets s'envolent derrière vous alors que vous courrez vers l'ascenseur. Lorsque vous arrivez sur le toit, un acolyte s’échappe par la tyrolienne, mais vous choisissez une route plus directe et faites le saut de l’ange depuis le bord de la toiture. Votre parachute s’ouvre. Les balles sillent alors qu’elles vous frôlent de beaucoup trop près. Dès que vos pieds touchent le sol, c’est un sprint endiablé vers la fourgonnette de fuite. Les sirènes hurlent. Les flics sont à vos trousses. C’est à ce moment que vous remarquez l’immense grue en chute libre vers le sol. Tout cela fait partie du quotidien d’un joueur de Battlefield Hardline.
 By GalaxieGames349
 "Apogee BK-01"
 ...
... Modeler est un émulateur arcade Sega : System 32, System 32 Multi & Model 1.
 By GalaxieGames19
 By GalaxieGames13
 By GalaxieGames42
 https://9alaxie9ames.blogspot.com/2024/07/winuaeloader.html