gigapig Posted December 21, 2013 Posted December 21, 2013 My order with Groovy Game Gear has just been dispatched. I ordered a Turbo Twist 2 and weighted token knob. No idea how the weight is going to help, but looking forward to finding out. As long as I can play Tempest how it should be played, for probably the first time in my life, I'm happy.
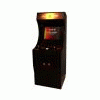
Fursphere Posted December 21, 2013 Posted December 21, 2013 To the OP - Looks great! Needs a coin door.
tattoopete84 Posted December 23, 2013 Posted December 23, 2013 Seeing how nice your cabinet looks makes me consider NOT wrapping mine with vinyl. I don't know, cuz it's $300 to do the sides only (quote I got locally). Is that a decent price? I may skip the wrap My Professional Tattoo Portfolio: https://www.facebook.com/media/set/?set=a.234510614736.131894.234499559736 My latest Free DJ mix download: https://soundcloud.com/insectorx/insector-x-invade-pensacola
Polemicist Posted December 23, 2013 Posted December 23, 2013 Seeing how nice your cabinet looks makes me consider NOT wrapping mine with vinyl. I don't know, cuz it's $300 to do the sides only (quote I got locally). Is that a decent price? I may skip the wrap Have a chat with the guys here. You will find a sticky on the cabinet forum about it. If that includes artwork creation then probably ok. Make sure you check what the material is they are using and what type of printing method etc. There is a lot to consider especially if you are going to be supplied with a print that cannot be wet applied. Blah blah blah enough of my guff.
jf866 Posted December 23, 2013 Author Posted December 23, 2013 My order with Groovy Game Gear has just been dispatched. I ordered a Turbo Twist 2 and weighted token knob. No idea how the weight is going to help, but looking forward to finding out. As long as I can play Tempest how it should be played, for probably the first time in my life, I'm happy. Do you have any idea what the proper MAME analog controls settings are for Tempest? I have a weighted spinner from Ultimarc and the thing will spin for a good 15-20 seconds..... an easy way to beat the game, it spins so fast you can just keep firing and never get killed.
rfancella Posted December 23, 2013 Posted December 23, 2013 I asked the same question about a month ago. Here was my answer with the help of another HyperSpinner: http://www.hyperspin-fe.com/forum/showthread.php?30023-Tempest-Controls&highlight=tempest Thanks, Ron Code Monkey and all around Command Line geek!If you like what someone has said or done for you, be sure and 'Thank' them. And if they changed your life, send them a Beer!
trailervert Posted December 24, 2013 Posted December 24, 2013 Awesome job! I love the CP nice and clean,
sucramjd Posted December 27, 2013 Posted December 27, 2013 Nice looking cab, but I doubt you'll ever be finished, I thought I was till I discovered hyper speech led blinky plus all the other systems [sIGPIC][/sIGPIC]
jf866 Posted May 13, 2014 Author Posted May 13, 2014 Member Furshere was right. My cabinet needed a coin door. I found the door on e-bay an could not resist. The orange $.25 buttons matched the overall color scheme of the cabinet. It feels so much more like an arcade machine now.
jf866 Posted May 13, 2014 Author Posted May 13, 2014 I created an .exe to read MAME controls.xml and display the information before the game launches. Here are some screen shots.
bleasby Posted May 13, 2014 Posted May 13, 2014 I created an .exe to read MAME controls.xml and display the information before the game launches. Here are some screen shots. It looks very nice. Really good work on that. It is like a clean looking cpwizard. Could you elaborate on the difference between your app and the cpwizard capability? Would you care to share the program and/or the code on it so I could take a look how you do it? Maybe sometime in the future I could use something like that, or try to integrate it to hyperpause or fade on hyperlaunch. Anyway, good work indeed. When asking for help for RocketLauncher, POST ON THE RLAUNCHER.NET FORUMS! Also, please post your RocketLauncher.log with logging level set to troubleshooting in pastebin (set the log level in RocketLauncherUI, global system > General Settings -> RocketLauncher). Ass. Bleasby - RocketLauncher Development Team.
rfancella Posted May 13, 2014 Posted May 13, 2014 I created an .exe to read MAME controls.xml and display the information before the game launches. Here are some screen shots.[ATTACH=CONFIG]41111[/ATTACH][ATTACH=CONFIG]41112[/ATTACH][ATTACH=CONFIG]41113[/ATTACH][ATTACH=CONFIG]41114[/ATTACH] It looks very nice. Really good work on that.It is like a clean looking cpwizard. Could you elaborate on the difference between your app and the cpwizard capability? Would you care to share the program and/or the code on it so I could take a look how you do it? Maybe sometime in the future I could use something like that, or try to integrate it to hyperpause or fade on hyperlaunch. Anyway, good work indeed. Agreed B! I also would love to test it out!! Thanks, Ron Code Monkey and all around Command Line geek!If you like what someone has said or done for you, be sure and 'Thank' them. And if they changed your life, send them a Beer!
jf866 Posted May 13, 2014 Author Posted May 13, 2014 It looks very nice. Really good work on that.It is like a clean looking cpwizard. Could you elaborate on the difference between your app and the cpwizard capability? Would you care to share the program and/or the code on it so I could take a look how you do it? Maybe sometime in the future I could use something like that, or try to integrate it to hyperpause or fade on hyperlaunch. Anyway, good work indeed. I am not sure what cpwizard is, I guess I just made my own. I created a Visual Basic application in VS2012. On the main form I added picture boxes for all of the controls on the arcade panel with visibility off. The wheel image is shown at the top. A key press event will close the application and continue to start MAME. The application looks for the launched game in controls.xml (not sure where I got this file, it is different than MAME's controls.xml) and determines if it is a gun, trackball, four way, what buttons,etc. and then sets visibility to the correct control image. Hyperlaunch modification for MAME: hideDesktop() Runwait, ..\GDAT\GDAT.exe %romName%, Hide UseErrorLevel Runwait, %executable% %romName% -nojoy, %EmuPath%, Hide UseErrorLevel Process, waitClose, %executable% exitapp I am happy to share the VS project, it is pretty simple code. Let me know how to get it to you.
bleasby Posted May 13, 2014 Posted May 13, 2014 cpwizard is an old program that does exactly what you did on your app. HyperLaunch has support for it since almost forever If you want to know more about it, just read about it here: http://headsoft.com.au/index.php?category=cpwizard Thanks for the info. I got what you did by your explanation. Sometimes I tough about doing the same, but I never did it, as I could get the same results from using cpwizard. Maybe in the future I could try to play with it again. If you care to share your resources just send me a private message with a link, if you don't mind. By the way, nice arcade. I always liked that kind of shape. When asking for help for RocketLauncher, POST ON THE RLAUNCHER.NET FORUMS! Also, please post your RocketLauncher.log with logging level set to troubleshooting in pastebin (set the log level in RocketLauncherUI, global system > General Settings -> RocketLauncher). Ass. Bleasby - RocketLauncher Development Team.
craiganderson Posted May 13, 2014 Posted May 13, 2014 nice job http://craigandersonthemes.weebly.com/
jf866 Posted June 10, 2014 Author Posted June 10, 2014 Does anyone know how many watts would be required for 20 LEDs. Each is 5V with a 200ohm resistor. The calculation would be 0.125 watts each (According to http://www.rapidtables.com/calc/electric/watt-volt-amp-calculator.htm), giving a total of 2.5 watts. Is this correct? The original motherboard overheated or something, totally dead. I found a used PC to replace it, but the max wattage of the PSU is 50 watts less than the old. I don't want to overload it and I don't want to use the old PSU, it's very loud. By any chance, would anyone know the pin out configuration for a Dell Optiplex 755 Mini Tower front panel? I can find no documentation on this. It's going to be tricky to wire the cabinet power switch, there is no motherboard connection, just a ribbon cable from the front panel. Thanks
Iggy Posted June 11, 2014 Posted June 11, 2014 Hey JF....im assuming for your LEDs you hooking them in series and not parallel, correct? If so the power calculation is not correct....you will need a couple of things from the LED manufacturer: Forwarding voltage (aka your voltage drop) and foward current rating Some series circuit facts: -E=Voltage, I = Current, R= Resistance, P=Power -You have to look at this in two ways.....the total circuit and what each component has -If you hook your LEDs in series, your total resistance increases hence RTotal = R(component 1) + R(component 2) + R(component 3)....so on .......so in your example it would be 20 * 200Ohm = 4K Ohm Total for the circuit -For voltage, since each LED will have a voltage drop....the sum of all voltage drops should give you how much voltage supply is needed. ESupplyNeeded = EDrop(component 1) + EDrop(component 2) + EDrop(component 3) and so on....in essence if you connect a lot of LEDs together in series, your supply voltage will not be sufficient to power your LEDs (LEDs will be dim) in which you will need to increase the voltage supply....but that has downside too, increasing supply voltage will increase total current...to counteract this....you need a current limiting resistor to protect your LEDs....this is detailed in a variation of ohms law: E = I * R...you increase total voltage, you also increase total current. By implementing a current limiting resistor then......R = E/I....you increase total resistance, you will decrease total current -Remember, current (I) will remain the same for each component -Calculation of Total Power = (Total E)2 / (Total R) will change....in essence, if total resistance increases, total power decreases....to put that in relation to voltage: P = I x E....so if total power decreases, so must total voltage In summary, lets see what your forward voltages and forward current rating is on your LEDs......by hooking up your 20 LEDs in series, the amount of watts decrease. Heres a nice little site to help you understand the LED calcs and the current limiting resistor calc: http://scriptasylum.com/rc_speed/led.html [sIGPIC][/sIGPIC]Sega Saturn Japanese Wheel Project: COMPLETE!! If you have FTP access, find my name and grab the set now!!!
Iggy Posted June 11, 2014 Posted June 11, 2014 Found this which might /might not help as its pulled from a GX260 however check it out and also check out the FCC ID i point out in the website provided below: 34-Pin function 16-Pin 1 GND 3, 7, 15, 16 2 ? 3 ? 4 ? 5 ? 6 ? 7 ? 8 ? 9 GND 10 ? 11 11 GND 12 ? 13 ? 14 GND 15 ? 16 GND 17 ? 18 ? 19 GND 20 Pwr Switch 2 21 “KEY” 22 HD LED 4 23 PWR LED - 5 24 ? 13 25 GND 26 ? 27 PWR LED + 9 28 ? 8 29 GND 30 GND 31 ? 32 GND 33 ? 34 ? Source: https://answers.yahoo.com/question/index?qid=20100128171857AA8opDi Note: Check out the reply on this thread for FCC ID on this particular circuit board for possible pinout [sIGPIC][/sIGPIC]Sega Saturn Japanese Wheel Project: COMPLETE!! If you have FTP access, find my name and grab the set now!!!
jf866 Posted June 11, 2014 Author Posted June 11, 2014 Hey JF....im assuming for your LEDs you hooking them in series and not parallel, correct? If so the power calculation is not correct....you will need a couple of things from the LED manufacturer: Forwarding voltage (aka your voltage drop) and foward current ratingSome series circuit facts: -E=Voltage, I = Current, R= Resistance, P=Power -You have to look at this in two ways.....the total circuit and what each component has -If you hook your LEDs in series, your total resistance increases hence RTotal = R(component 1) + R(component 2) + R(component 3)....so on .......so in your example it would be 20 * 200Ohm = 4K Ohm Total for the circuit -For voltage, since each LED will have a voltage drop....the sum of all voltage drops should give you how much voltage supply is needed. ESupplyNeeded = EDrop(component 1) + EDrop(component 2) + EDrop(component 3) and so on....in essence if you connect a lot of LEDs together in series, your supply voltage will not be sufficient to power your LEDs (LEDs will be dim) in which you will need to increase the voltage supply....but that has downside too, increasing supply voltage will increase total current...to counteract this....you need a current limiting resistor to protect your LEDs....this is detailed in a variation of ohms law: E = I * R...you increase total voltage, you also increase total current. By implementing a current limiting resistor then......R = E/I....you increase total resistance, you will decrease total current -Remember, current (I) will remain the same for each component -Calculation of Total Power = (Total E)2 / (Total R) will change....in essence, if total resistance increases, total power decreases....to put that in relation to voltage: P = I x E....so if total power decreases, so must total voltage In summary, lets see what your forward voltages and forward current rating is on your LEDs......by hooking up your 20 LEDs in series, the amount of watts decrease. Heres a nice little site to help you understand the LED calcs and the current limiting resistor calc: http://scriptasylum.com/rc_speed/led.html Thank you very much for the info. A bit to think about.
jf866 Posted June 11, 2014 Author Posted June 11, 2014 Found this which might /might not help as its pulled from a GX260 however check it out and also check out the FCC ID i point out in the website provided below: 34-Pin function 16-Pin 1 GND 3, 7, 15, 16 2 ? 3 ? 4 ? 5 ? 6 ? 7 ? 8 ? 9 GND 10 ? 11 11 GND 12 ? 13 ? 14 GND 15 ? 16 GND 17 ? 18 ? 19 GND 20 Pwr Switch 2 21 “KEY” 22 HD LED 4 23 PWR LED - 5 24 ? 13 25 GND 26 ? 27 PWR LED + 9 28 ? 8 29 GND 30 GND 31 ? 32 GND 33 ? 34 ? Source: https://answers.yahoo.com/question/index?qid=20100128171857AA8opDi Note: Check out the reply on this thread for FCC ID on this particular circuit board for possible pinout I think I saw this web page in my hunt for information. The Optiplex 755 pin out has 40 pins. From the little information I have found, Dell likes to change them up between models and nothing is published since the design is proprietary. I might try to solder the wires directly to the front panel board where the little power button connects.
Iggy Posted June 11, 2014 Posted June 11, 2014 NP let us know if you need any assistance and we will help out as best we can! [sIGPIC][/sIGPIC]Sega Saturn Japanese Wheel Project: COMPLETE!! If you have FTP access, find my name and grab the set now!!!
jf866 Posted May 7, 2015 Author Posted May 7, 2015 Okay, still not done. I added two Ultimarc servos, a new(used) mother board, and a solid state drive. There was not enough room to install one of the servos, so I modified it to be mounted on the narrower side of the joystick plate. It just involved drilling a couple of new holes to fit. I modified my control panel information application to send a key event, F4/F8, for automatic four and eight way switching. My only complaint is the motors are rather loud, you hear errrrrAaerrrR when they switch. The SSD/MOBO improved performace dramatically! Boot time (Win XP) went from 45 seconds to about 7.

Recommended Posts
Archived
This topic is now archived and is closed to further replies.