
Other
Everything else until we make a category for it.
35 files
-
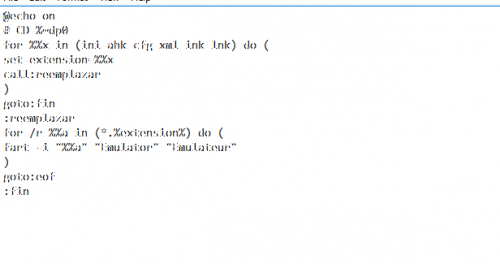 This will change any folder or text string that you want just edit at the end of the script what you want . So if your hyperspin contains a folder called Emulateur and you want that folder renamed add Emulator in the second example ..
@echo on
# CD %~dp0
for %%x in (ini ahk cfg xml ink lnk) do (
set extension=%%x
call:reemplazar
)
goto:fin
:reemplazar
for /r %%a in (*.%extension%) do (
fart -i "%%a" "Emulator" "Emulateur"
)
goto:eof
:fin
By streetmedic157 5 -
 --[ Purpose ]-------------------------------------------------
Controls the order the controllers appear in the "Game Controllers" list in Windows.
--[ Reason ]--------------------------------------------------
The order they appear in are used in some emulators and games to define the order they should be used.
For example, the top one in the list is Joy1. Second one Joy2 etc.
Problem here is threefold.
1: The list is not always the same after a restart so you have to remap all your controllers in the emulators
that use this setup.
2: If you plug in another controller, it will (most of the time) not go to the end of the list but in the
middle somewhere, messing up the order of the other controllers.
3: Even if everything is as you think it should be, your first joystick might be called Joy3 in the
games/emulators and it just looks ugly =)
--[ Usage ]---------------------------------------------------
Connect all the controllers that you want to have a permanent location in the list.
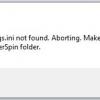
Run "Tur-Game_Controller_Order.exe" as administrator and it will list all the controllers and ask
you, one by one which location it should have in the list (basically, where you want it to appear. 1 = top)
That will create a Settings.ini file. If that file exists the next time you run it, it will simply
go through the controllers and reorder them, silently. Remove or rename Settings.ini to get it to run
again.
You can also create more then one Settings.ini file if you have different setups. Simply specify which
.ini file it should work with when running it, for example "Tur-Game_Controller_Order.exe Settings2.ini"
By default, when you run it with a Settings.ini present, it will just run once and exit, but you can have
it running all the time, checking the order every few seconds or so. This is good if you have some controllers
plugged in some of the time but want to be able to plug in others without them appearing in the middle of the
list. Edit Settings.ini and change DaemonMode=False to True.
DaemonModeDelay= is how many seconds to wait between each check. 5-10 seconds is a good value IMO.
--[ Notes for BlissBox users ]--------------------------------
If you own a BlissBox you must update the firmware first so the ports get unique HIDs and names.
See here: http://atarigalore.wix.com/4play
They should appear as 4-Play_port1 to port4 (at least at the time of writing. As long as they are unique
its OK.)
--[ Limitations ]---------------------------------------------
One big limitation is this. Say you have 3 controllers connected that are Joy1, Joy2 and Joy3 in the
emulators/games. If you unplug the first controller in the list (Joy1), the others will shift up and Joy2
will become Joy1 etc. There is no way around that at the moment, except for creating a dummy Joy1 controller
to put at the top of the list. I have yet to figure that one out easely.
Always keep your permanetly connected controllers at the top of the list to overcome this.
--[ Other hints ]---------------------------------------------
You must set UAC to "Never Notify" if you want this program to run on startup automatically as its
running as a local administrator. You also can not just make a shortcut to your Startup folder for it
as windows will not allow it. In the "Extras" folder you'll find a small VBS script that just runs it
from the same location as the exe, so copy the VBS to where you have Tur-Game_Controller_Order.exe
and make a shortcut to the VBS file to your Startup folder in Windows.
Any controllers connected that are NOT in the Settings.ini file when you run it will automatically go
to the end of the list.
I include a program called "List_Controllers.exe" as well. This only lists all the connected controllers
and the HID for it. You can use this if you want to add a controller to an already existing Settings.ini
file. Just copy the HID shown into Settings.ini.
When manually editing Settings.ini, make sure the ports start with Port1, Port2 and there are no gaps in the
numbering.
By Turranius1,397 5 -
 This file contains a few .bat files to extract the "Classics" from MAME Merged Romset. There are files for the next Systems:
Atari Classics
Capcom Classics
Capcom Play System
Capcom Play System II
Capcom Play System III
Data East Classics
Irem Classics
Konami Classics
Midway Classics
Namco Classics
Nintendo Classics
Sega Classics
SNK Classics
Taito Classics
Williams Classics
How to use it?
Just place the .bat files into your MAME Merged Romset and execute each file. It will create a folder for each System.
By ci2own65 3 -
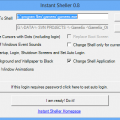 A one click utility to change the windows shell to any application or front end and completely hide the windows environment.
Use at your own risk, if you have problems post on the forum, but make sure you understand what you are doing here.
What's New in Version 0.8 (See full changelog)
•13th November 2012 - Version 0.8
•◾A step forward with Windows 7. This version hides the Welcome.. and Shutting Down text
The article below was taken from the MAMEworld forums, in case it ever becomes lost.
In addition to the guide below I have developed a small application that automates all the process called InstantSheller. It allows you to one click shell GameEx or any other front end. It does “everything” in the guide below automatically. Its for Windows XP Service pack 2 and above, Vista and Windows 7 although for full functionality XP is required. It also requires the .net framework 2 service pack 1 or above. It now also features a one click ‘Undo’.
Use at your own risk, if you have problems post on the forum, but make sure you understand what you are doing here.
How to completely hide windows, and SHELL directly into a Front-End
Okay, I finally succeeded in hiding windows completely this morning. I’ll give you a quick heads-up!
The first thing that you need to do is get a CmdLine MAME up and running with a good FrontEnd. I use The Dragon King by Howard Castro (mainly coz’ it looks feckin’ awsome and it’s easy to skin! Also, it supports automated shutdown of Windows, YOU REALLY WANT THIS TO HIDE WINDOWS COMPLETELY!)
http://www.oscarcontrols.com/lazarus/
I run this setup under WinXP Pro, simply because the USB support is second to none, you’ll find out what I mean if you stick an I-pac into it! NOTE: this quick guide assumes you are using XP Pro, if not I don’t really know how accurate it will be!
Right, now you’ve got your actual emulator up and running, lets hide that OS!
***PLEASE NOTE*** THE FOLLOWING GUIDE COULD REALLY MESS UP YOUR SYSTEM! MAKE SURE THAT ALL OF YOUR ROMS AND ANYTHING ELSE THAT YOU WANNA’ KEEP HOLD OF IS SAFELY BACKED UP FIRST, I CAN’T BE HELD RESONSIBLE, SO DON’T COME CRYING TO ME!
Right, now that’s outta’ the way, on with the show!
Google for a cursor editing package (shareware will do, you’ll only be using it once!). Install and leave it for the time being. I used this one:
There’s two ways to get ride of that bootscreen. Use a package designed for it, or make your own.
1. The safest way is to get a program and screen from the net. If you’re not a fan of trial and serious error, this is the way to go, although if you create a custom skin for your FE, you may want them to match! Download BootSkin from Stardock:
http://www.stardock....ducts/bootskin/
And get a decent skin. Either google, or try this one:
After you install BootSkin, simply double click the downloaded skinfile and apply it. Simple!
2. The second method. Caution, SCREW THIS UP AND YOU MAY BE LOOKING AT A REFORMAT! REMEMBER TO BACK UP YOUR NTOSKRNL FIRST! Now download and install BootEditor. This will give you your custom boot screen. Be aware that you will certain runtime files for this! One of them that I can remember off the top of my head is CMDCTL32.OCX I think. Run the program in compatablily mode for Win2K and any errors will be reported on screen, then just google for the files you need.
http://www33.brinkst.../booteditor.zip
**UPDATE** I Just DL’d Ultimard I-Pac utility, and it seems like all the runtime files you need come with it! Just download and install! **Update**
http://www.andywarne...k/ipd_setup.zip
To create your bootscreen you will need a decent art package. Believe it or not I use Ulead PhotoImpact. Okay, it’s cheap, but it does for most of the basic stuff! The instructions included with BootEditor (you’ll find a readme in the extracted folder, FOR GOD’S SAKE, PRINT, READ, AND READ AGAIN! This can really screw your system up if you cock up!)
Once you’ve created an NTOSKRNL that you’re happy with (by the time you’ve got this far, you should know what I mean!), the only thing you have left to do is actually hide windows itself. Start by going into control panel\sounds and make sure that your default scheme is set to NOSOUND (silent). Open your cursor editor and create a cursor 1pixel in size, and in a dark colour (remember that you may need to be able too see it, a shade of gray will do). Export the cursor you’ve made with a name you can remeber, and place it in the \windows\cursors\ folder, we’ll be coming back to that later!
Now we’re going to disable the startup\shutdown screens.
Change from the default windows XP welcome screen to the older style by going to Control Panels>User Accounts>Change the way users logon or off. Deselect the “Use Welcome Screen” checkbox.
To get rid of the startup and shutdown messages, enter regedit (Start>Run>Type “regedit” without the quotes.). Using the tree on the left, browse through to the following entry:
HKEY_LOCAL_MACHINE >Software>Microsoft >Windows>CurrentVersion> Policies>System
If there’s a DisableStatusMessages dword there, change it to 1, otherwise add it (right click, add dword) and change it to 1.
Now you’ll have to change the background colour of the login screen. Even though you’ve disabled the login, the screen will still load up in blue as it laoding the personal settings. Again, this is a registry hack like before. Browse to the following entry:
HKEY_USERS>.DEFAULT>Control Panel>Colors>Background
The default value of this is an RGB value. For the sake of ease, if you change this to 0 0 0, you will get a black screen.
While you’re in regedit, here’s the final hack:
HKEY_CURRENT_USER \Software\Microsoft\Windows NT\CurrentVersion\Winlogon
Look for a string entry called ‘Shell’. If it is not there, create a string entry and name it ‘Shell’. Set the value of this entry to the name and location of your Front-end. For Dragon King, the shell entry may be “C:\MAME\The Dragon King.exe” or wherever your Frontends executable is located. To repair this if anything happs, bbot via safe mode, go into regedit, and change this value to “explorer.exe”. When you reboot, you will find that you enter windows, and not your frontend! Simple!
Right, now for the cursor! If this isn’t changed at the logon level, you’ll see the mouse cursor for around five seconds while windows loads your personal settings. This really spoils the effect! Download TweakUI:
http://www.systemsme...s/TweakUIXP.exe
NOTE: I got a newer version of this from MS and it was missing the option that I needed!
Once this is installed, go to Control Panel>Mouse>Pointers and change all of your cursors to the one that you created earlier. Save this scheme as “MAME Single Point Cursor Set” or something. Don’t apply this yet, it’ll make things bloody hard to do!
Right, the last thing to do is finish off making the cursor invisible. Go back to the cursor screen in control panel, load your scheme and hit apply. It’ll be hard to see your cursor, which is why I left this till last! Squint your way into your start menu and open TweakUI. Go to the LOGON option, and somewhere there is the option to copy your wall paper etc. across to the Logon Screen. Hit apply and you’re done!
Restart your machine, and you should no longer notice windows at all! The only thing that really gives it away is the status bar scrolling on the boot screen, but you can get rid of this using BootEditor, but I think it’s handy to have a guide as to whether or not the systems crashed! While you’re in the front end, if you need to revert back to windows, press CtrlAltDelete, enter the task manager (you will have you mouse back at this point, if you can see it, or simply use the keyboard), end your Frontends, click on New Task, and type in explorer.exe. Taa Daa! Windows! Simply navigate to control panel with your invisible cursor (once you hit the start
button things get easier!), and change your scheme back to the windows deault! Do your maintenance, and restart the machine. Back into your FE! Y ou like!?!
Well, that’s how I did it. I think that using TweakUI would be able to sort the screens out the same way as it did the mouse, but I haven’t tried it. If anybody has the time, creating something in VB to make this a ‘Tick The Box’ process should be quite easy I would have thought?
Whilst most of this was put into my own words,I can’t take credit for most of this guide, I found it whilst trying to do the same thing myself! The links were all active at the time of writing this. The original guide can be found here, as well as a full WIP report for a scratch-built cab. It’s indispensible! Check it out, sign the guestbook, and tell ‘im Ritchie sent ya!
http://www.upup.us/o..._09_01_old.html
If anyone has any corrections for this, PM me and I’ll edit the post, and give credit of course!
By HyperSpin551 2 -
 dir /a /b /-p /o:gen >C:\WINDOWS\Temp\file_list.txt
start notepad C:\WINDOWS\Temp\file_list.txt
By streetmedic201 2 -
 This package contains two files to be placed with HyperSpin.exe
You can select to start them instead of HyperSpin.exe.
HyperSpinFullScreen.exe = Starts HyperSpin in fullscreen mode.
HyperSpinNotFullScreen.exe = Starts HyperSpin in windowed mode.
I do not expect a lot of people to use this, but I have my HyperSpin setup on the network for multiple machines.
On my work computer, where I set everything up, I do not want to start HS in fullscreen.
On my arcade machines, I do want to start it fullscreen.
I always forgot to change manually so it always opens the "wrong" way.
Running HyperSpinNotFullScreen.exe on my work computer and HyperSpinFullScreen.exe on my arcade machines makes sure they always start HS in the correct way.
All it really does it change the FullScreen value in Settings.ini to either true or false before launching "HyperSpin.exe".
Sources are included...
By Turranius480 2 -
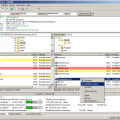
 Here you find version 10.2 of Daemon Tools Lite. Currently version 10.3 does not work with RocketLauncher.
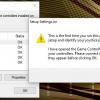
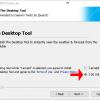
Care must be taken when installing this product as the "Free" version as it will install other software onto your PC.
Please see the screen shots for the best way to install.
Remember to set your DT Lite path in RocketLauncher UI to "C:\Program Files\DAEMON Tools Lite\DTAgent.exe" or wherever you installed it.
By gigapig2,171 2 -
 The new RetroArch Module in the recent Rocket Launcher Updates is a devastating step backward for anyone adding RA systems from the uploads section here.
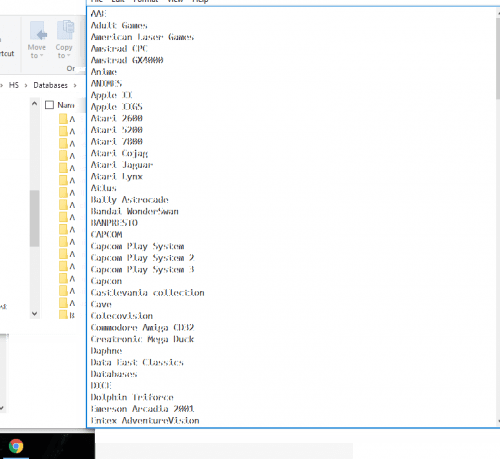
I have added these 100 systems into the module:
Aamber Pegasus
Acetronic MPU-1000
APF MP-1000
Apple I
Apple III
AMCOE
Arduboy
Atari 800
Bandai Let's! TV Play
Bandai RX-78 Gundam
Bandai Super NoteClub
Camerica Aladdin Deck Enhancer
Chailove
Commodore 128
Commodore 64
Commodore Amiga CD32
Commodore Amiga CDTV
Commodore VIC-20
DEC PDP-1
dreamGEAR My Arcade
dreamGEAR Plug 'N' Play
Elektronika Handheld
Exelvision EXL 100
Fisher-Price I Can Play Piano
Fujitsu FM7
Fujitsu FM77AV
Fujitsu FM Towns Marty
Fujitsu FM Towns UX
Gamate
Hasbro TV Board Games
Hitachi Basic Master Level 3
IBM PCjr
Jakks Pacific PNP
JAKKS Pacific Game Key
Koei PasoGo
Konami Handheld
LowRes NX
Lutro
M&D Monon Color
Manchester Baby
Memotech MTX
Microsoft MSX2+
Microsoft MSX Turbo-R
Mindset Corporation Mindset
NEC PC-6001
Nichibutsu My Vision
Nintendo 3DS
Nintendo Family BASIC
Nintendo GameCube
Nintendo Wii
Nintendo WiiWare
Palson CX 3000 Tele Computer
PEL Varazdin Orao
PDP VG Pocket
PICO-8 Fantasy Console
Radica Arcade Legends
Radica Play TV
Retro Game Bootleg Systems
Retro Game Licensed Systems
Retro Game Systems
Retro Game Systems Ports
Rowtron Television Computer System
Salter Fitness Pro Cardioline
Sammy Atomiswave
Sanyo MBC-550
Sega Naomi
Sega Naomi 2
Sega SG-1000 II
Sega Super Control Station SF-7000
Senario Multi-Player System
Senario Vs Maxx
Shaanxi Province CEC-I
Sharp MZ-700
Sharp MZ-2500
Sony SMC-777
Sony PlayStation 2
Soundic Victory
Takara DDR Family Mat
Takara e-pitch
Takara Popira
Takara Taiko De Popira
Tandy Memorex Video Information System
Tangerine Microtan 65
TIC-80 Tiny Computer
Timetop Gameking
Tesla Ondra ViLi
Tiger Handheld Electronics
Toshiba Pasopia PA7010
Toshiba Visicom
Ultimate Products Zone
Unisonic Champion 2711
Uzebox
VaporSpec
VideoJet Pocket Dream Console
Videoton TVC
Voltmace Database
VTech Socrates
VTech V.Smile Motion
VTech Laser 500
WASM-4
I have also fixed many existing systems in the module that were not launching properly.
I fully acknowledge the systems that can be added to RetroArch are endless and there is no way for anyone working on RL or myself to have a comprehensive module with everything.
I have done my best to represent every system that has been uploaded to the Hyperspin Forums.
Anyone has any suggested updates please comment Here and I can maintain an updated module.
By floatingyeti293 1 -
 Original thread
http://www.hyperspin-fe.com/topic/7830-demul-full-xbox-360-controls-for-naomi-and-atomiswave-enjoy/?hl=%2Bdemul+%2Bcontrol
Demul - Sega Naomi & Sammy Atomiswave control configs for Xbox 360 Controller
By urbangangsta101
Demu 0.582
Sammy Atomiswave XML v1.1
Sega Naomi XML v1.2
Installation: (Essential)
- Put the nvram folder into your Demul emulator folder (Overwrite any existing files)
- Put the Demul (v0.5.8).ini into your Hyperlaunch Demul module folder (Overwrite any existing file)
Extra Steps: (Not essential)
- Enable Keyboard in Port C of the Demul plugins menu (Config->Maple Device Manager->Port C = Keyboard) - For 'Keyboard' style games
- Add 'Mahjong' controls to your padDemul.ini (see demul-naomi-non-standard-controls.pdf)
- Map controls for the 4 'Trackball' style games using Xpadder (see demul-naomi-non-standard-controls.pdf)
- Map controls for the 11 'Lightgun' style games using Xpadder (see demul-naomi-non-standard-controls.pdf & demu-atomiswave.pdf) You should really use an Aimtrak Lightgun
- Map controls for 1 'Touch Screen' style game using Xpadder (see demul-naomi-non-standard-controls.pdf)
Enjoy!
By gigapig742 0 -
 uenas a todos: A raíz de ver en Face que muchos tenían dudas de como automatizar la carga de nuestro sistema a la hora de hacer una maquina Arcade. Voy a mostrarle como hacerlo muy fácilmente. Considero que el RetrOS (SO optimizado para ser usado en Arcades) es uno de los mejores que he probado basado en Windows XP o Windows 7 64bits (esencial para usar mas de 3gb de ram). Como estos sistemas vienen optimizados y dedicados al tema arcade, también traen preinstalados programas referidos al tema, uno de ellos y muy importante, es el Turbo Sheller.
Una vez que configuramos nuestro Frontend, casi en su totalidad, empezaremos la utilización de este simple pero eficiente programa.
Empecemos con el menú Arranque. Acá tenemos 3 opciones:
TurboSheller Activo: Esta opción es la fundamental para el correcto funcionamiento de la aplicación, puesto que una vez que la seleccionemos el programa se activara en el inicio del SO, en cada arranque, ejecutando las funciones que le configuremos.
Elegir logo de arranque...: En esta opción podremos modificar, el logo de inicio de Windows. Si usamos XP la imagen tendrá que ser un .BMP de muy baja resolución, en cambio si usamos Windows 7, nos da posibilidades de imágenes de mas alta resolución, inclusive el uso de imágenes con movimiento tipo .GIF.
Salir: Bueno esto hace exactamente eso, cierra el programa.
Ocultar/Mostrar Puntero: Este botón lo que hace es ocultar el puntero del Mouse, haciendo que no se superponga en la pantalla a la hora de jugar, mejorando la experiencia de ocultar el SO del usuario.
Elegir/Guardar: En esta segunda linea vemos un cuadro de texto que funcionan en conjunto con los botones "Elegir" y "Guardar". Con el botón "Elegir" debemos encontrar el ejecutable del Frontend que previamente configuramos, para que se realice el inicio automático sin ingresar al escritorio de la PC. Con el botón "Guardar" confirmamos esta selección, para que se grabe la direccion del Frontend en un archivo de configuración.
"Salir al Sistema Operativo": Bien en este apartado tenemos las opciones que nos dejan reingresar al Explorador gráfico de Windows:
Iniciar Explorer: Clickando en este botón se ejecutara nuevamente "explorer.exe", mostrándonos el escritorio de windows para que podamos modificar normalmente nuestro Sistema.
Poner como Shell por defecto: Esta opción posibilita el inicio automático del "explorer.exe" en el arranque de windows, llevándonos directamente al explorador en caso de que necesitemos reiniciar varias veces la PC, por temas de modificación o reparación del Sistema Arcade.
Terminar Frontend: Con esta opción activada no iniciara el Frontend en cada reinicio. Al igual que la opción anterior, sirve mas que nada para reparación o terminar de configurar el Frontend.
Funciones Rápidas: Como vemos, Turbo Sheller, esta pensado como nuestro acceso directo a los apartados más necesarios, luego de completar el grueso más tedioso de toda la configuración de la maquina. Así encontramos accesos directos a: Volumen, Joysticks, Administrador de Tareas, el Regedit, Resolución de pantalla y al Explorador de carpetas de windows.
Apagar Recreativa: Finalmente este apartado esta dedicado a las opciones de Apagado y Reinicio de la maquina.
Un ejemplo rápido de configuración:
Supongamos que instalamos RetrOS basado en Windows 7 (con lo que ello implica, cargar los drivers del mother, tener la resolución correcta en el monitor, en fin configurar el windows como una pc normal), y luego, logramos instalar y configurar nuestro Frontend favorito (MALA, Hiperspin, Maximus Arcade, etc), comprobamos que el Frontend funciona correctamente bajo windows, junto con todos los sistemas y roms que le hayamos colocado y nuestros joysticks.
Ahora nos debemos ocupar de que nuestra maquina inicie automáticamente sin dejar rastros de Windows. Buscamos entre los programas instalados el TurboSheller. Una vez abierto lo primero que hacemos es dirigirnos a "Arranque" y seleccionamos "TurboSheller Activo". Opcionalmente podríamos modificar la imagen de inicio de windows desde el menú "Arranque">"Elegir logo de arranque...", donde nos llevara a una ventana de configuración poco complicada. Seguimos la configuración del inicio automático seleccionando el ejecutable del Frontend con el botón "Elegir", una vez hecho esto comprobamos en el cuadro de texto, que la dirección del ejecutable es la correcta y damos al botón "Guardar". Por ultimo damos al botón "Ocultar Puntero" (Si no sabes manejarte entre botones con la tecla TAB, podes darte cuenta que cuando oculta el puntero lo que hace es transformarlo en un pixel, así que el mouse sigue estando ahí) Nos dirigimos al apartado "Apagar recreativa" y seleccionamos la opción "Apagar" o "Reiniciar" y al botón "Realizar acción". Cuando la PC vuelva a encender, si todo esta correcto, iniciara automáticamente el Frontend sin dejar rastros de windows.
IMPORTANTE: Para poder volver a Windows, para reparar, configurar y/o modificar el sistema normalmente, presionaremos la combinación de teclas "Ctrl + T" que nos abrirá el Turbosheller. Sin tocar nada y dando a la Barra espaciadora en el teclado activaremos el boton de "Mostrar Puntero". Luego seleccionaremos la opción "Iniciar Explorer" o consecuentemente si necesitamos, configurar y reiniciar varias veces la pc, podríamos combinar esto con las opciones "Poner como shell por defecto" y "Terminar Frontend".
Como ven es una herramienta muy sencilla y poderosa. Espero se haya entendido el tutorial de como automatizar nuestro sistema Arcade.
18 0 -
 What's New for Version 1.1.0:
ADDED 7 New Systems (80 TOTAL) + HS/RL/Default profiles. New systems include Sega Model 1, Sega System 16, Sega System 24, , Sega X Board, Sega Y Board, Pop-Cap, and Microsoft MS-DOS. Changed the ESC key functionality to buttons 7 + 8 (COIN+START). You must now press both to exit the game. Placed the ESC key location on Button 25 (a dummy location good for using combo buttons). Changed Button 5 to TAB. Changed Button 6 to P (PAUSE). Changed Button 9 to C. Changed Button 10 to V. Changed Button 11 to Z. Changed Button 12 to X. I'll see how this configuration works for me for the time being. If it's a pain or something is not quite right, I'll continue tweaking it until I find what's best.
***************** BACK UP YOUR OLD PROFILES IN CASE YOU DON'T LIKE THE CHANGES *****************
-------------------------------------------------------------------------------------------------------------------------------------------------------------------------------------------------------------------------------------------------
I created about 75 profiles for various systems, added them to a RAR archive, and attached to this post. All you have to do is unrar and place the folders within the archive into your ..\RocketLauncher\Profiles\JoyToKey directory. For example, mine is -- C:\Hyperspin\RocketLauncher\Profiles\JoyToKey.
You may need to edit the profiles so they are more to your liking or work correctly with your setup. I use the default MAME setup for everything. If you want to change one or all of them, all you have to do is edit only one CFG file, copy the CFG file to every other folder, and rename the CFG file and FOLDER to the name of the emulator you're using for the system.
For example -- I use Stella for the Atari 2600. My path is then C:\Hyperspin\RocketLauncher\Profiles\JoyToKey\Atari 2600\Stella\Stella.cfg
Maybe you don't use Stella for the Atari 2600 but use RetroArch. Here's how to change it:
You would simply rename C:\Hyperspin\RocketLauncher\Profiles\JoyToKey\Atari 2600\Stella\Stella.cfg to C:\Hyperspin\RocketLauncher\Profiles\JoyToKey\Atari 2600\RetroArch\RetroArch.cfg. It's the same path\folder\file but the innermost folder and cfg file have simply been renamed to match the emulator being used.
It's tedious to copy, paste, and rename but it doesn't take too long. I've copied these files to another machine that uses Launch Box, set up JoyToKey in Rocket Launcher via the tutorial link below, and found it working beautifully. MAME is a bit of a jerk, however. Sometimes it works straight away and sometimes you still have to map the game within the MAME TAB menu.
I ONLY HAVE CONTROLLER 1 MAPPED IN THESE FILES!
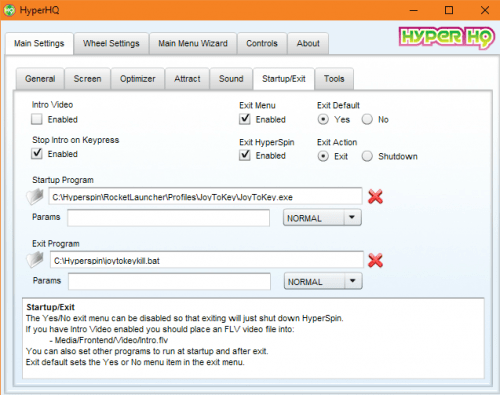
NOTE: There are NO games or programs within this archive. There are, however, 2 other files -- a BAT file for killing the JoyToKey process and a shortcut that gives that BAT file ADMIN privileges. Place the BAT and LNK files in your root Hyperspin directory and use the JoyToKey.exe as the startup program and JoyToKeyKill.lnk as a shutdown program in the HyperHQ UI. Using the LNK shortcut file allows for Administrator privileges with the CMD prompt window. You may need to create your own shortcut but I've included it for completeness. See the attached images.
All files were created manually by me so there's no copyright issue.
**** Here is a very good tutorial on how to set up JoyToKey with both Hyperspin and Rocket Launcher - READ IT CAREFULLY!:
http://bit.ly/2oA2CJ4
----------------------------------- ONLY FOR THOSE USING A MOGA PRO CONTROLLER-----------------------------------
In case you have a Moga Controller, download and install the Moga Serial program:
https://github.com/Zel-os/MogaSerial
NOTE: I can only get it to work in Mode A on the PRO Controller but it works great!
Your computer will also need BlueTooth enabled and successfully linked to the MOGA.
Here is where you can get the latest vJoy USB Controller Driver (you'll need this for the MOGA Controller):
http://vjoystick.sourceforge.net/site/
By malarrya1,924 0 -
 This beauty of a app allows me to set two buttons for volume up and down using standard joystick or joy2key input. Either way it can be programmed.
By warriorpoet303 0 -
 This is a simple batch file wrapped in a exe that starts Joy2Key and then HyperSpin. Replace your shell entry in registry to have a nice seamless launcher.
By warriorpoet444 0 -
 This is a simple wrapped batch file that uses NIRSOFT nircmd to play a MP3 named and located
C:\HyperSpin\Shutdown.mp3
Simply set this in HyperHQ to use when exiting hyperspin, it will play your MP3 then issue a shutdown on the computer. Disable power button to shutdown computer and use this to exit hyperspin and shutdown. Make nice seamless shutdown.
By warriorpoet123 0 -
 Hi Guys,
I just uploaded version 1.0.1 of HyperSpeech:
HyperSpeech 1.0.1.zip
Cheers!
Boogieman
By BoOgieman265 0 -
 All:
All:
First, I am not a programmer or professional script writer - so please be kind.
The purpose of this script is to edit the daphne-singe game config files that contain references to internally needed files so that they point to the right location.
example: . The script will change
sprCursor = spriteLoad("D:/Arcade/Games/American Laser Games/data/singe/crimepatrol/crosshaira.png")
to this:
sprCursor = spriteLoad("I:/Emulators/Hyperspin/Games/American Laser Games/data/singe/crimepatrol/crosshaira.png")
The script can be run from the base folder of the system name and it will search all subfolders. Also, it creates a backup of the target file before making any changes.
Use at own risk. I developed it because I got tired of having to manually edit the .singe files for each of the 'American Laser' and 'Wow Action Max' games. Hopefully, it will help others.
By Distalnak38 0 -
 This app will auto restart Hyperspin every X min/hours that you set in the configuration file! This is a workaround to the memory leak that hyperspin has after leaving it on for hours. Setting this to say 12 hours will ensure hyperspin doesn't give you the grey screen of death by auto restarting the program while you are away.
Setup:
Drop the exe and config file anywhere but I prefer the hyperspin root folder
Edit the configuration file and update the hyperspin path and milliseconds within the timeout line. By default its set to a 12 hour refresh
Open HyperRefresh.exe instead of hyperspin (note its just calling hyperspin.exe) No code changes or anything funny is happening here in HyperRefresh.
All credits go to Fr0stbyt3 (Hyperspin Dev), I just put in the request, made a video, and uploaded the file
By ninja2bceen844 0 -
 Building my own theme... I figured maybe someone else would find value in some free Python scripts Maybe I'll share the theme when I'm done.
Tired of batching with photoshop? This script will shrink any number of images within a file to constrain the width and/or height to beneath a specific size (default is under 200px wide and/or 100px tall. Then, it will attach it to a background image, which can be anything you want. The default tile included is is Chicuelo's theme. Super easy and FAST!
By Brawndo69 0 -
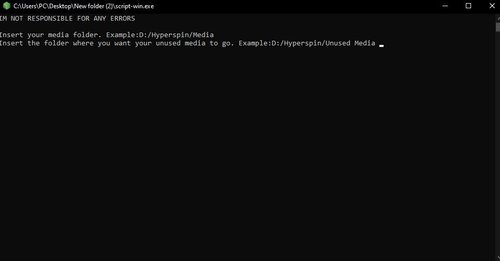 Filters media and roms(if they have the same name as the system) that aren't being used by hyperspin(the name doesnt appear in the database)
Usage:
1-Place the script.exe on the safe folder as Main Menu.xml(can be found on Database/Main Menu) or just create a folder with the script.exe and main menu
2-Run the script and insert the base folder and the folder where you want to sent unused media.
3-Done
4-Profit?
By iTweeno92 0 -
 FileZilla Client is a fast and reliable cross-platform FTP, FTPS and SFTP client with lots of useful features and an intuitive graphical user interface. Website: filezilla-project.org
Features:•Easy to use
•Supports FTP, FTP over SSL/TLS (FTPS) and SSH File Transfer Protocol (SFTP)
•Cross-platform. Runs on Windows, Linux, *BSD, Mac OS X and more
•IPv6 support
•Available in many languages
•Supports resume and transfer of large files >4GB
•Tabbed user interface
•Powerful Site Manager and transfer queue
•Bookmarks
•Drag & drop support
•Configurable transfer speed limits
•Filename filters
•Directory comparison
•Network configuration wizard
•Remote file editing
•Keep-alive
•HTTP/1.1, SOCKS5 and FTP-Proxy support
•Logging to file
•Synchronized directory browsing
•Remote file search
By HyperSpin244 0 -
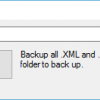 HyperBackup is a simple configuration backup and restore utility for HyperSpin.
Simply choose the path to your HyperSpin installation and hit Backup. It will then copy all INI and XML files to a directory called HyperSpin_configBackup. You can then Restore the files back if needed.
More HyperBackup information can be found at http://www.hyperspin-fe.com/topic/25083-hyperbackup
By DJQuad197 0 -
 This isn't anything special but I took the liberty of creating a bat file that will launch Killer Instinct and converted it to an exe which will work for the PC Launcher in RL. Or at least it should. I've tested the exe many times and it launches as expected. I REALLY hate metro/modern apps.
By Pyramid_Head308 0 -
 RocketBlinky is a 3rd-party tool that can, in a matter of minutes, auto-generate an LEDBlinkyControls.xml supporting over 160 HyperSpin systems. Translation: It takes 99% of the work out of setting up LEDBlinky.
Demo Video:
By newoski912 0 -
 New Version: Main Menu Changer 0.0.1.2 [bETA 3]
BETA 3 IMPORTANT CHANGE:
Now you can use the new MMCLauncher app to launch all your apps including HyperSpin, this fix various issues and is the recommended way to use MMC now.
1- Edit MMCLauncher.ini with your Hyperspin path.
2- Add more apps fallowing the same format if you need. This way the apps you need run once and not every time MMC relaunch HyperSpin.
3- Delete any app from HyperHQ startup app. (Yes, quit killExplorer as start app And let MMCExit as exit app)
4- Run MMCLauncher every time you need to run HyperSpin, so all needed operations like changing wallpaper or kill Explorer.exe, occur before Hyperspin launch.
This change is not present it Video Tutorials or other Documents, so the old setups are still possible for retro-compativility.
If you setup is working fine, don't touch it
Windows 10 aparently don't need Wallpaperchange enabled, just RestoreExplorer will kill windows explorer and hidde the wallpaper.
___________________________________________________________________________________________________
This app lets you change your main menu, filtering the entries stored in one XML file and allow you to create multiple level setups (HyperSpin allows a 2 leves setup normally).
Note: The setup and MMCHQ part of the program needs more testing, as the version says it's still BETA, please fallow the setup tutorials and report any problems in the support topic.
This app Works in 3 modes:
MODE 1 - Normal Mode:
A subwheel contains all the Filter Items, you can chose to Close Hyperspin Automatically or just configure the Main Menu with the selected filter and go back manually using normal FE controls.
MODE 2 - SubWheels Mode:
The filters are in the main menu Wheel and HS is closed and open again to load the results of the filtering process. You must scroll until you found a "BACK" item that will lead you to the previous main menu.
MODE 3 - SubWheels Mode with NO "BACK" entry:
The filters are in the main menu Wheel and HS is closed and open again to load the results of the filtering process. You can use the Frontend back key to go back, no special item need to be added to databases.
What's New
MainMenuChanger HQ: New app that let you edit xml files with diffrent apps and take care of save the modifications to the correct places.
MainMenuChanger "First Run" Wizard: If you are making a new install of MMC, the app will copy the necesary files and tell you what needs to be done to make MainMenuCHanger work.
Wallpaper Change: Change the wallpaper by a black one and back to a file of your choise on HS launch/close.
Ini version check: If you are updating from 2016-04-04 version, the new ini options will be added and, so you current ini should work with this 0.0.1 version.
Wheels and art included (Some wheels by spotUP)
Setup:
Download MainMenuChanger_0.0.1.1_BETA.7z For all setup modes. Set Antivirus exeptions. Set all exes included to run with administrator provileges (right click -> propieties -> compativility -> run as administrator) Set all exes as secure (in propieties) so Windows dont ask before execute any of them. [*]Mode 1 and 2 have diffrent video tutorials.
Mode 3 setup is almost identical to mode 2 with the fallowing diferences:
In settings you must select mode 3, not mode 2 ( ) In setings you must set RestoreExplorer to True (This kills and restore windows explorer to avoid the desktop to flash for a seccond when you go back a level of wheels) Optionally you can set the option WallpaperCHange to true to change you wallpaper to a black one on HS launch.
Tutorials
Mode 3 Tutorial (By maabus)
Here is a text based instructions on how to setup sub wheels in Mode 3 with no back button. I only went over one level of wheels and sub wheels, and one category. Just follow the steps again to add more. It looks like a lot of work, but it really isn't. It should only take about 5 minutes to setup at least on category. I tried to explain what everything does to my understanding so that also added to the length of the instructions. Try out the instructions and let me know if anything is not clear.
By knewlife2,416 0 -
 Hi!
Hi!
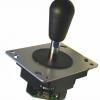
I share a script I made for Rocket Launcher that programs UGC files (e.g 4-way, 8-way, 2-way, analog, etc.. ) to Ultimarc's UltraStik 360 Joysticks before launching a Rom, without requiring LedBlinky. It uses the User Function feature of RL. (Updated to new script language as of RocketLauncher v1.2, Jan-2017)
(Note: RocketLauncher can now handle UltraStick directly from RLUI. However, it requires you to enter the profile for each system / game manually. The only advantage of this script is that it allows you the define the profile for each system / rom using a .ini file)
UltraStik 360 Programmer
You can define a different UGC file for each Rom or System. It also programs the Joysticks when you exit a Rom, allowing you to define a UGC file for the Front-end. UltraStik 360 Programmer can replace LedBlinky if you are using it only to program you U360s (as I was doing!).
UGC files (UltraStik Game Configuration) tells the UltraMap.exe program which maps to download to which joysticks (numbered 1 to 4). For example, 4-way.ugc tells UltraMap to program the 4-way Map (4-way.um, located in the Maps subfolder of the UltraMap program folder) to both joysticks 1 and 2. In this pack I include 6 UGC files: 2-way, 2-way-vertical, 4-way, 4-way-diagonal, 8-way, analog.
With the UltraStick 360 Programmer, you can specify a system (MAME, Nintendo Entertainment System, Atari 2600, etc..) to use a different UGC file per Rom (a "Per Rom System"), or to use the same UGC file for all roms. I include UGC files for most MAME games in the default ini file, with the default as 8-way.
Installation
Copy "Global.ahk" to the "Rocket Launcher\Lib\User Functions" folder. WARNING: If you have other User Functions already programmed in User Functions.ahk, do not overwrite your file. You should edit it and add the code provided here. Copy "UltraStik 360 Programmer.ini" to the "Rocket Launcher\Lib\User Functions" folder Edit "UltraStik 360 Programmer.ini" to specify the location of the UltraMap software (in the UltraMapExe key). If you don't have it installed, please download it from http://www.ultimarc.com/ultrastik_prog.html and install it. By default, it installs itself in C:\Program Files (x86)\UltraMap. Copy the provided UGC files to the UltraMap program folder (in the same folder where UltraMap.exe is in). Also copy the Maps that are in the Maps folder to your UltraMap/Maps folder. Feel free to modify these UGC files with the UltraMap software. That's it, enjoy! You can further edit the ini file to better suit your needs
Ini File
In the ini file (UltraStik 360 Programmer.ini, located in Rocket Launcher\Lib) you define a global default UGC (typically 8-way). This UGC is used when there is no specified UGC for either the System or the Rom.
In the [PerRomSystems] section of the ini file, enter "System Name"=true for systems that can have a different UGC files for each Rom. (e.g. MAME=true). If a system is a PerRomSystem, the script looks for a specific UGC for each Rom. If it does not find it, it looks for a default system UGC in the [systems] section. And if it does not find it either, it uses de global default UGC.
In the [systems] section, enter the ugc file for each system (without quotes and without the .ugc extension, e.g. Nintendo Entertainment System=8-way). If the current System is a Per Rom System, this UGC will be used as default when no rom UGC is specified. If the current system is not a Per Rom System, this UGC will be loaded for all roms of the system. If a system is not specified in this section, UltraStik 360 Programmer will use the global default.
The system "FrontEnd" is the system name assigned to the front end. This UGC is loaded each time you exit a rom.
The system "Pause" is the system name assigned Rocket Launcher's Pause. This UGC is loaded each time you enter Pause. When exiting Pause the programmer reloads the Rom's UGC.
In the [Roms] section, enter the UGC file for each rom, for all PerRomSystems (without quotes and without the .ugc extension, e.g. invaders=2-way). If a rom is not specified, the script will use the UGC given in Systems, or the global default.
Credits: I used rom UGC configs prepared by EMDB for HyperMap (http://forum.arcadecontrols.com/inde...,134128.0.html), and took the main idea of this Programmer from byancey (http://forum.arcadecontrols.com/inde...tml#msg1483682). Thanks to both!
Change History
v2.0 - Compatible with RocketLauncher v1.2 (new location and scripting language)
v1.01 - Works with RocketLauncher 1.01, takes advantage of the new Pause Features: StartPauseUserFeatures and StopPauseUserFeatures.
ReTango
By retango498 0