ericleroi Posted June 4, 2014 Author Posted June 4, 2014 looking through the photos again... makes me realise I " hate " you where did you get the batman AC prints They came with the hardback game guide That was the main reason I bought it!
ericleroi Posted June 5, 2014 Author Posted June 5, 2014 Cheers Pro_Pop Right side seat panel is now attached to the base:
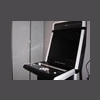
ericleroi Posted June 5, 2014 Author Posted June 5, 2014 Compressable high density foam has been used to secure the monitor hood. This sits between the monitor posts and the inside of the hood. It provides a great deal of resistance to avoid the hood being accidentally knocked off. There's no chance that will happen now. Hood in place:
rfancella Posted June 5, 2014 Posted June 5, 2014 Wow... That is just sexy! Can't wait to see it finished. Thanks, Ron Code Monkey and all around Command Line geek!If you like what someone has said or done for you, be sure and 'Thank' them. And if they changed your life, send them a Beer!
connorsdad Posted June 5, 2014 Posted June 5, 2014 That is amazing, I just showed my wife and her comment was "he's built that from scratch?, you're not building one of them!" Sent from my SM-N9005 using Tapatalk
ericleroi Posted June 8, 2014 Author Posted June 8, 2014 I've been waiting for some 2mm plastic card to come and it's arrived. I've used this to create a blanking plate for the front of the wheel stem: Cut to shape: Covered (air bubble has since been removed): Attached:
maxxsinner Posted June 9, 2014 Posted June 9, 2014 Fantastic attention to detail. You must be getting down to the final parts.... although for me, the last 5% seems to take the longest. Electropin - Enough lights to land a jet on an aircraft carrierHigh Voltage Pinball - Cause one build just wasn't enough Voltek Arcade - Funglo pedestal style mame cabinet Pinball Electrical Tutorial - Wire All Your Bling With Confidence and Fewer House Fires
ericleroi Posted June 9, 2014 Author Posted June 9, 2014 Thanks maxxsinner. Hopefully there aren't too many pieces to complete now as I've been trying to finish every part entirely as I've been going along. I do know what you mean though, I still have a few things to sort out on the Vewlix cabinet!
ericleroi Posted June 14, 2014 Author Posted June 14, 2014 Good progress on the wall rack: Just need to tidy the top and bottom up, trim the hangers at the back and glue in place
ericleroi Posted June 19, 2014 Author Posted June 19, 2014 Button box arrived: It will be a shame to take this apart but it needs to be done ...
ericleroi Posted July 16, 2014 Author Posted July 16, 2014 I've been contemplating the dashboard panel layout and other aspects that need to be completed. I've decided on a design and literally just finished ordering the necessary components. It turns out the DSD button box will be quite a lot of work to take apart and refit but I'm not going to let that deter me. I figured I would include a missile switch cover: Up to 4 Neutrik connectors should I want to add any devices or headphones etc: Some small self tapping hex screws (difficult to locate these) to mount the dash panels: I have the lights and fan (located on a unit to the side of the pod and plugged into an RF activated socked) remotes to wire up with momentary contact push buttons. I will be making a small panel to sit just in front of the shifter on the side pod. This and the dash panels will be covered with real carbon fibre sheet: So a lot of purchases to allow me to get this finished! At a later date, I will add three screens, a larger Buttkicker (for large bump and collision effects) and another amp. Still lots of expense required to finally complete this Edit: Oh, and I've been hammering the heck out it!
ericleroi Posted July 19, 2014 Author Posted July 19, 2014 Now that all the parts and materials have arrived, I've got myself together to make some more progress on the panels. The left panel will have 4 toggle switches, 4 rotary switches and 2 Neutrik USB ports. The right panel will have an 2 toggle switches (one with a missile switch cover), an engine start button, 4 momentary contact push buttons and 2 Neutric USB ports. Left panel covered with carbon fibre (USB ports need to be screwed in): Progress on the toggle / rotary switches:
ericleroi Posted July 19, 2014 Author Posted July 19, 2014 Almost done with the wiring, only a couple of toggles left to do. Left panel: Right panel:
HazzardActual Posted July 20, 2014 Posted July 20, 2014 looks real clean man, cant wait to see it installed
richie_jones Posted July 20, 2014 Posted July 20, 2014 Looks great are you going to have some sort of text above the buttons....
ericleroi Posted July 20, 2014 Author Posted July 20, 2014 Thanks Hazzard and richie. Yes, I'll be printing some labels to place next to the buttons. I've left the bottom angled part of the panels free for a logo. The wiring is complete. In the process of fitting and tidying. The cables are a mess but everything is secure (hot glue all over the place ) and working. I've also done a little more work in the wheel stem - the blanking plate at the front will be re-fitted. Full frontal: Right panel: Left Panel: Close-up (glad I held out for the hex screws):
ericleroi Posted July 20, 2014 Author Posted July 20, 2014 Really pleased with how this has turned out. Just need to wait for some retainers to allow me to fit the last screw in each of the panels and epoxy the blanking plate on.
zomboided Posted July 20, 2014 Posted July 20, 2014 Beautiful...is there anything left to do (short of buying 2 more screens and the big ass buttkicker)? [sIGPIC][/sIGPIC]
mikekim Posted July 20, 2014 Posted July 20, 2014 how about removing the BMW logo from the fanatic wheel and producing a custom R-Pod one?
richie_jones Posted July 20, 2014 Posted July 20, 2014 Agreed, need to loose the BMW logo... Amazing build..
ericleroi Posted July 20, 2014 Author Posted July 20, 2014 Thanks for the feedback It was a shame the wheel came fitted with the BMW logo, some prefer that type of thing but I'd rather it had come with a Fanatec one. I have been looking for a replacement badge to fit the recess which will be left if it's removed. An R-Pod one would be a good idea. In terms of other R-Pod related things, I have a few ideas. I have 2 remotes, both RF so line of sight isn't an issue. One currently operates a plug socket which the fan is plugged into, The other activates the LED lighting. I have bought some additional push buttons and intend to wire these up to the remotes. I'll be making a small, carbon fibre panel to sit in front of the shifter to operate these. The remotes will be hidden inside the shifter pod. I will also be making an iPhone holder - there are apps which output additional race information in real time. That was one of the reasons for using the Neutrik USB ports; I'll connect the iPhone with a coiled lightning cable: Also planned is a small keyboard/mouse unit which will also hold a couple of quick release wheel rims - thinking about one of the 7 Fanatec have release to add to the collection at some point. The surface will have a recess for a glass / cup / can. I already have the mouse mat (well 2 actually, the first shipment was delayed so they sent me another):

Recommended Posts
Archived
This topic is now archived and is closed to further replies.